- Enter username (Which Provided)
- Enter password (Which Provided)
- Click on Login Button
- If login success, you'll redirect to dashboard
System Login
1. Open any web browser
Type sisfs.com.au/admin, and Enter
This will redirect to admin login panel sisfs.com.au/admin
2. Enter login credentials

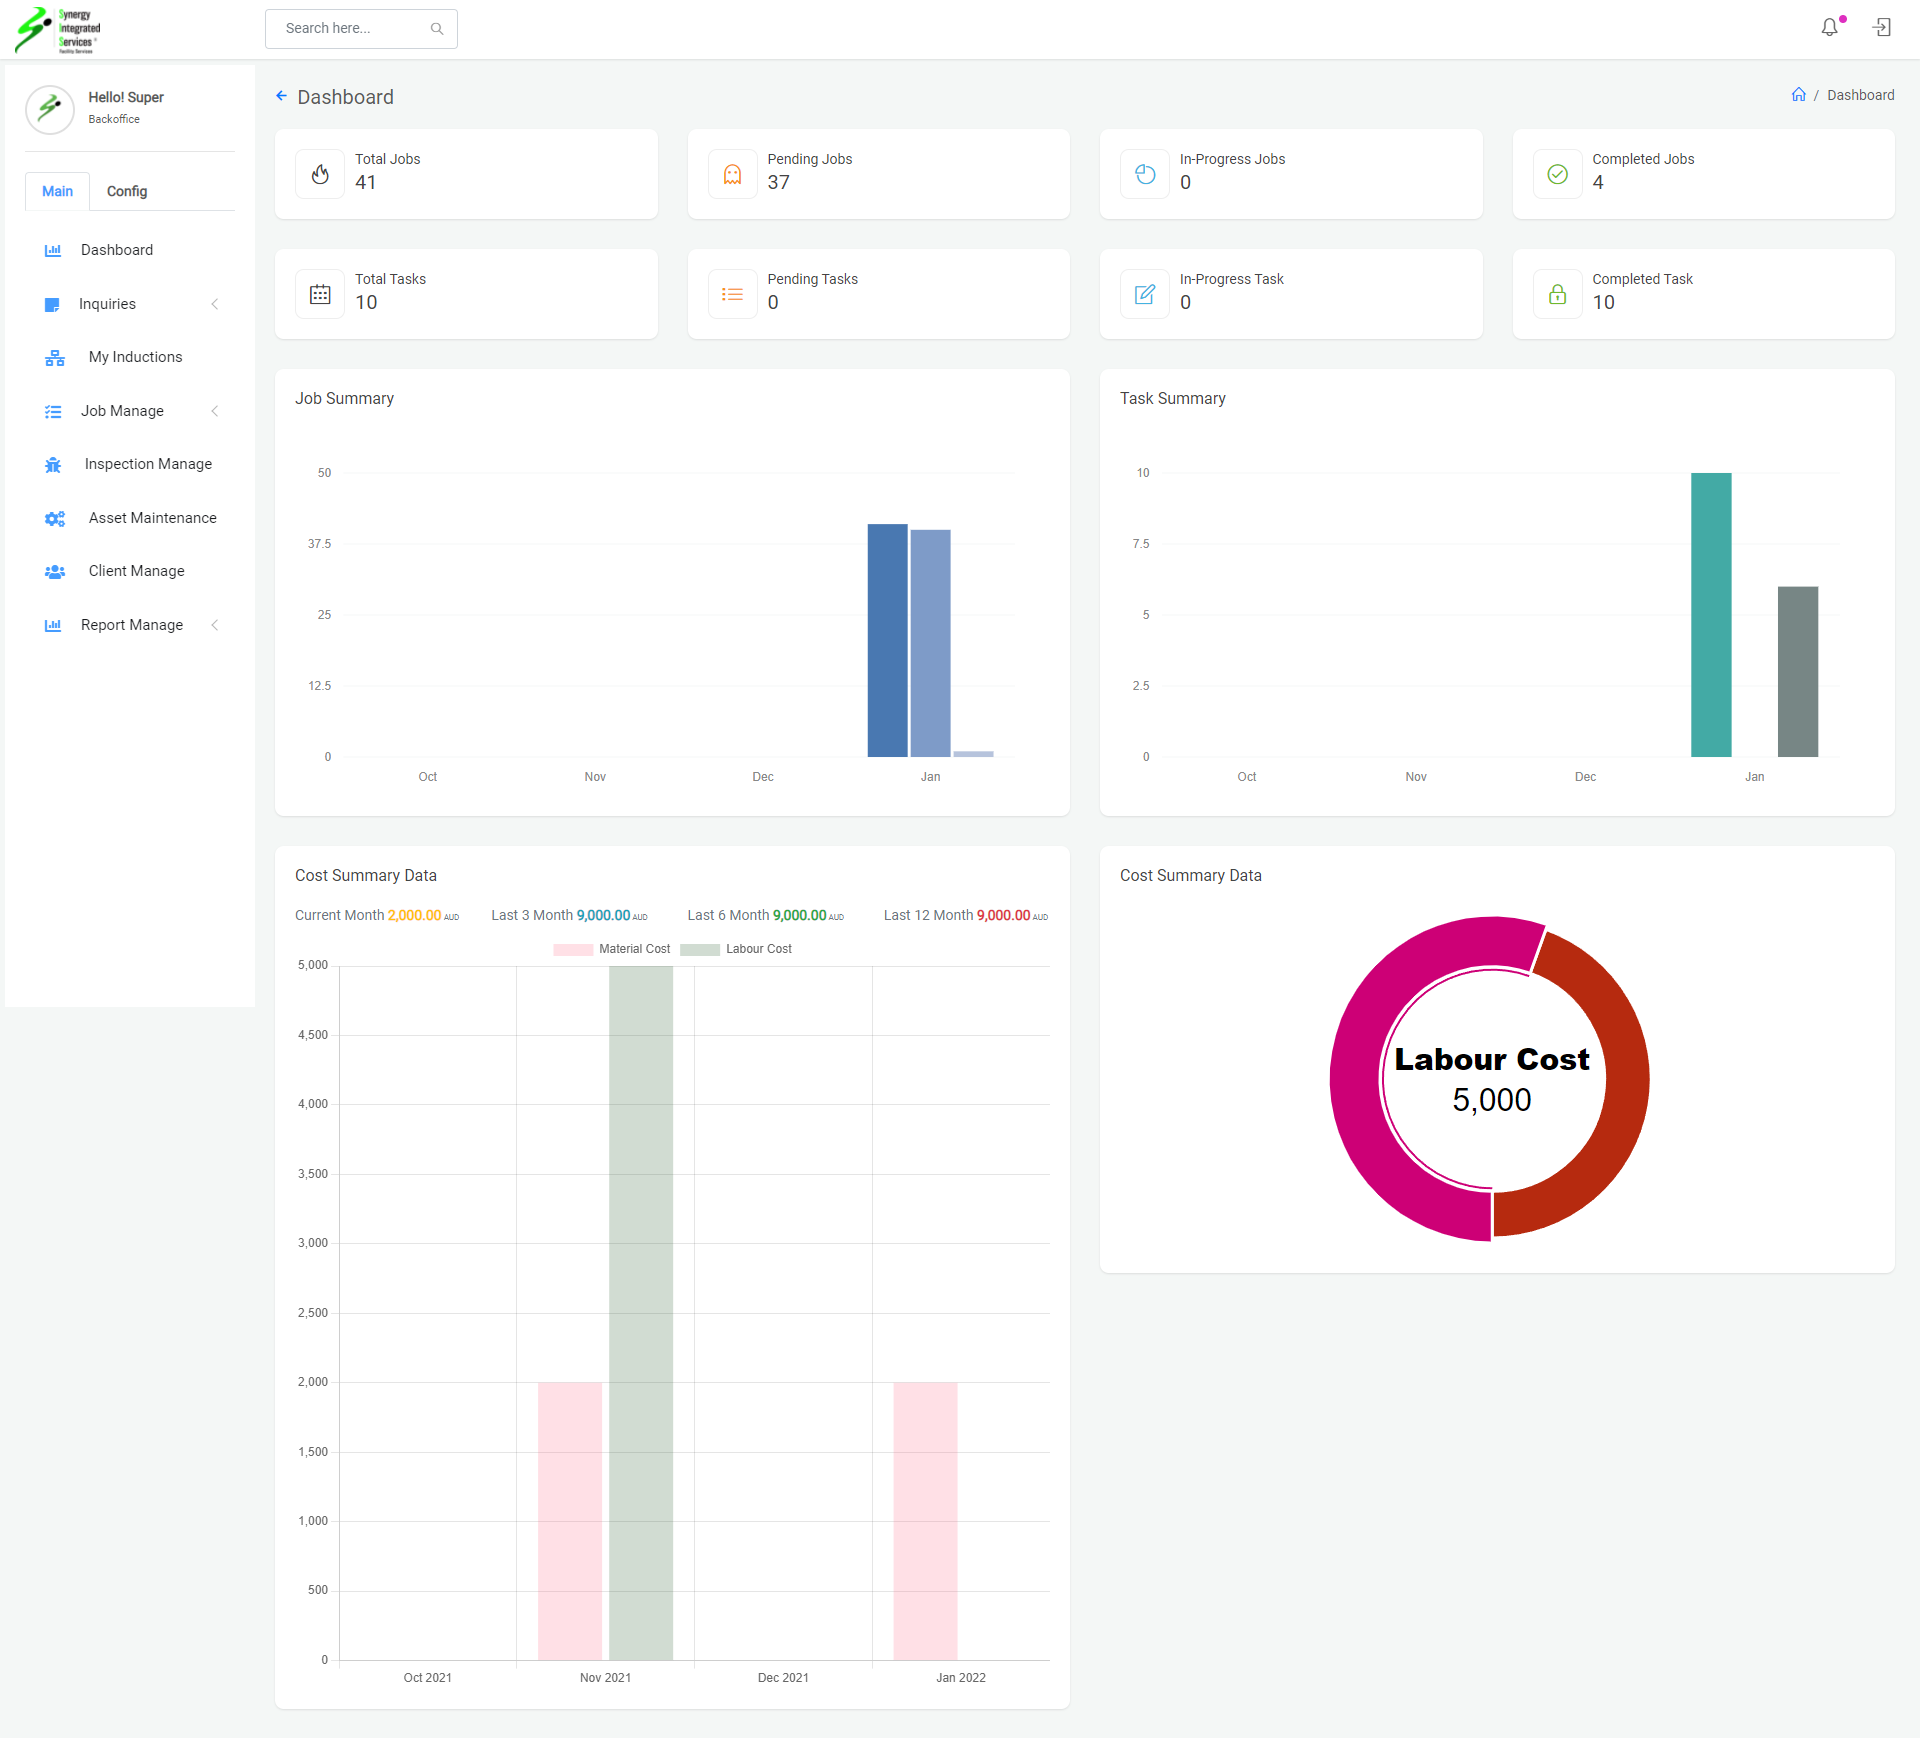
Admin Dashboard
1. Open any web browser
Go to sisfs.com.au/admin
2. Log into the System
3. Successfull login automatically redirect to Dashboard
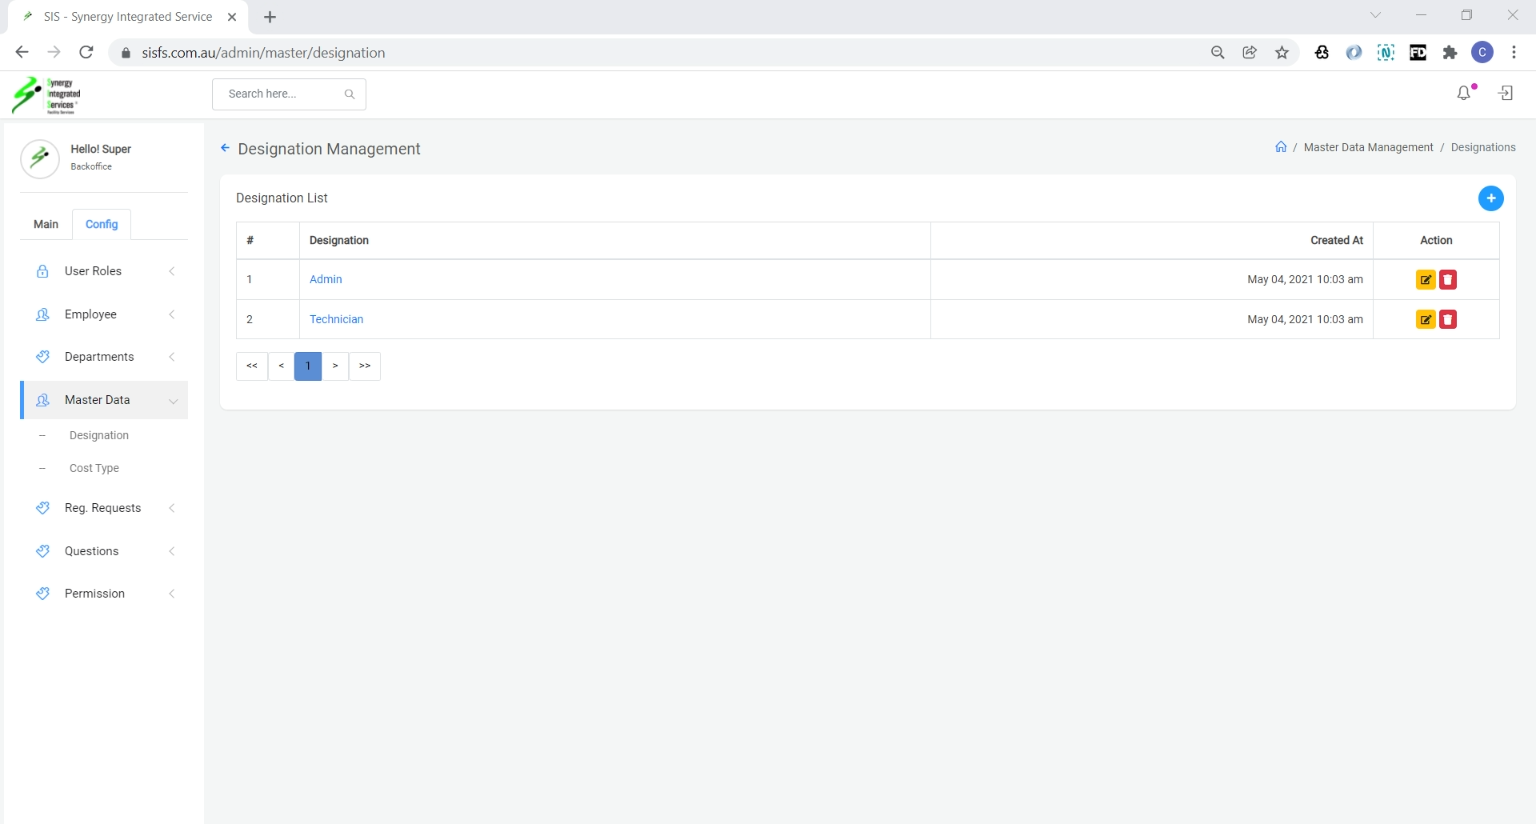
Designation List
1. Open any web browser
Go to sisfs.com.au/admin
2. Log into the System
3. Navigate to Config > Master Data > Designation
Create & Update Designation
1. Open any web browser
Go to sisfs.com.au/admin
2. Log into the System
3. Navigate to Config > Master Data > Designation
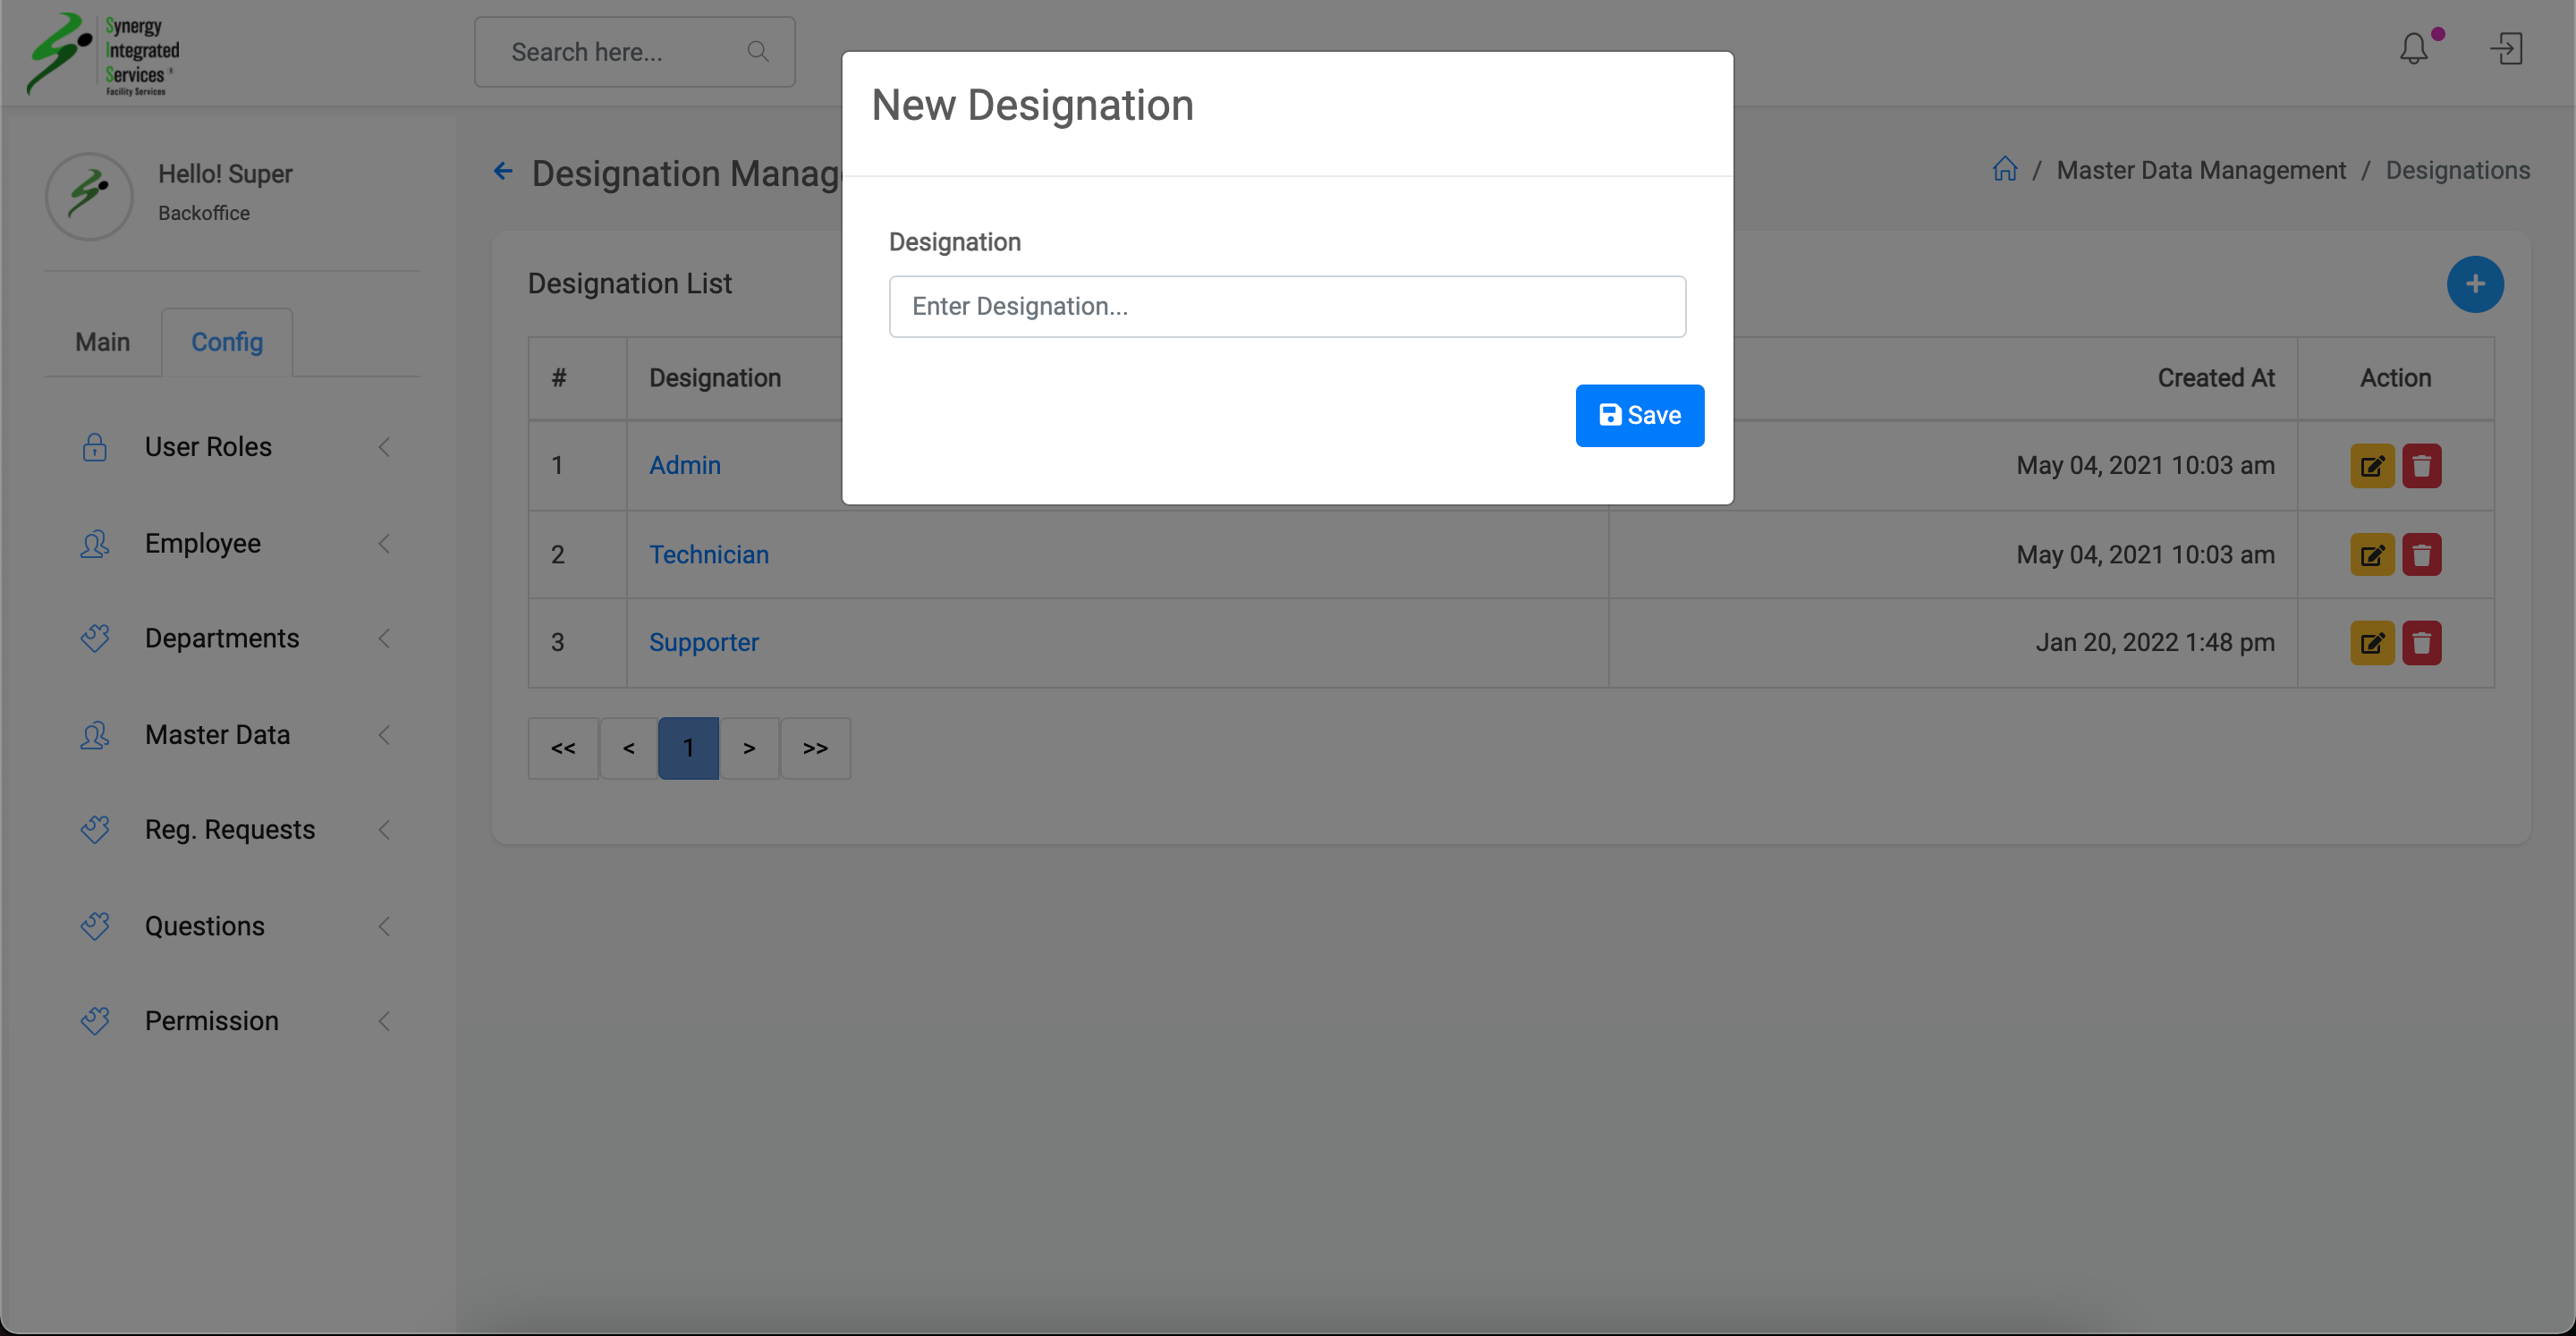
Click on Blue color circle plus button
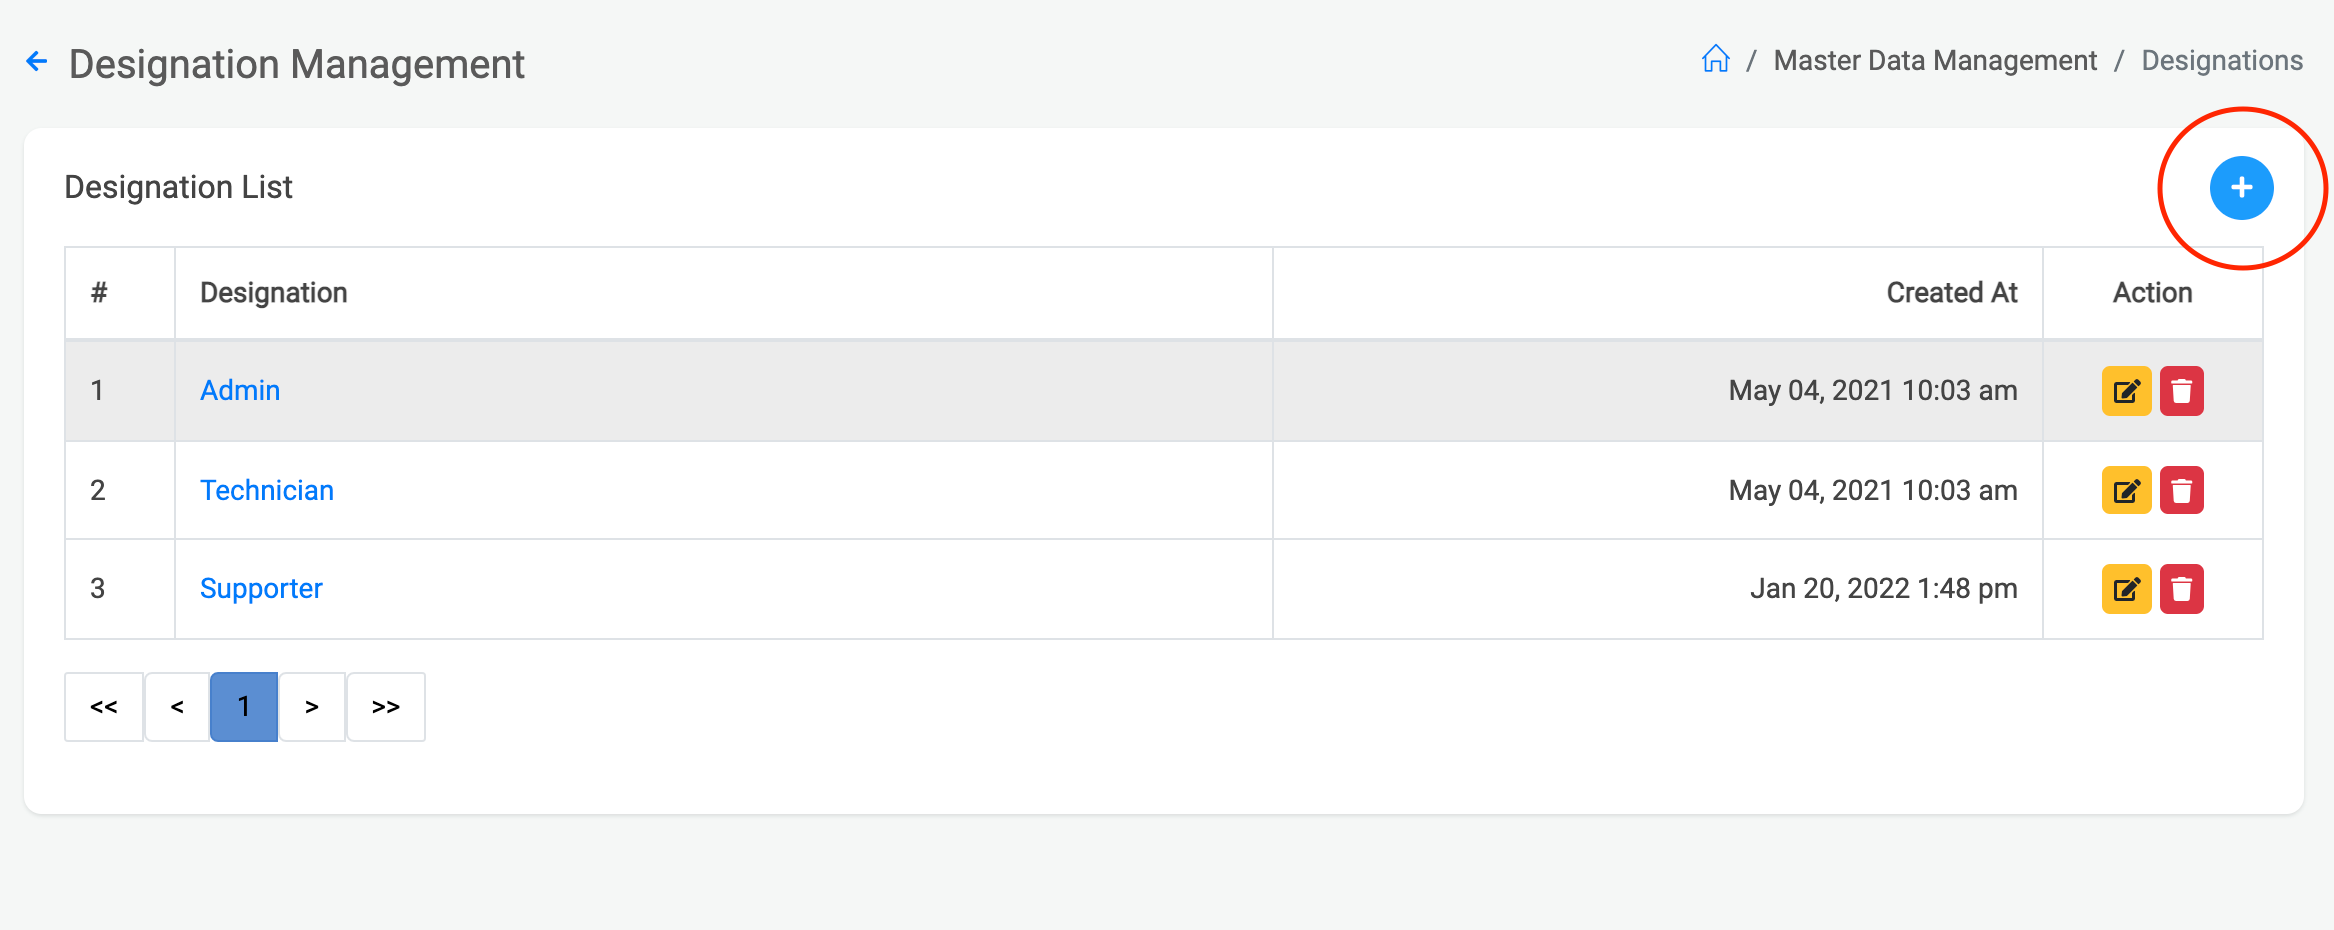
Enter designation name and click on save button
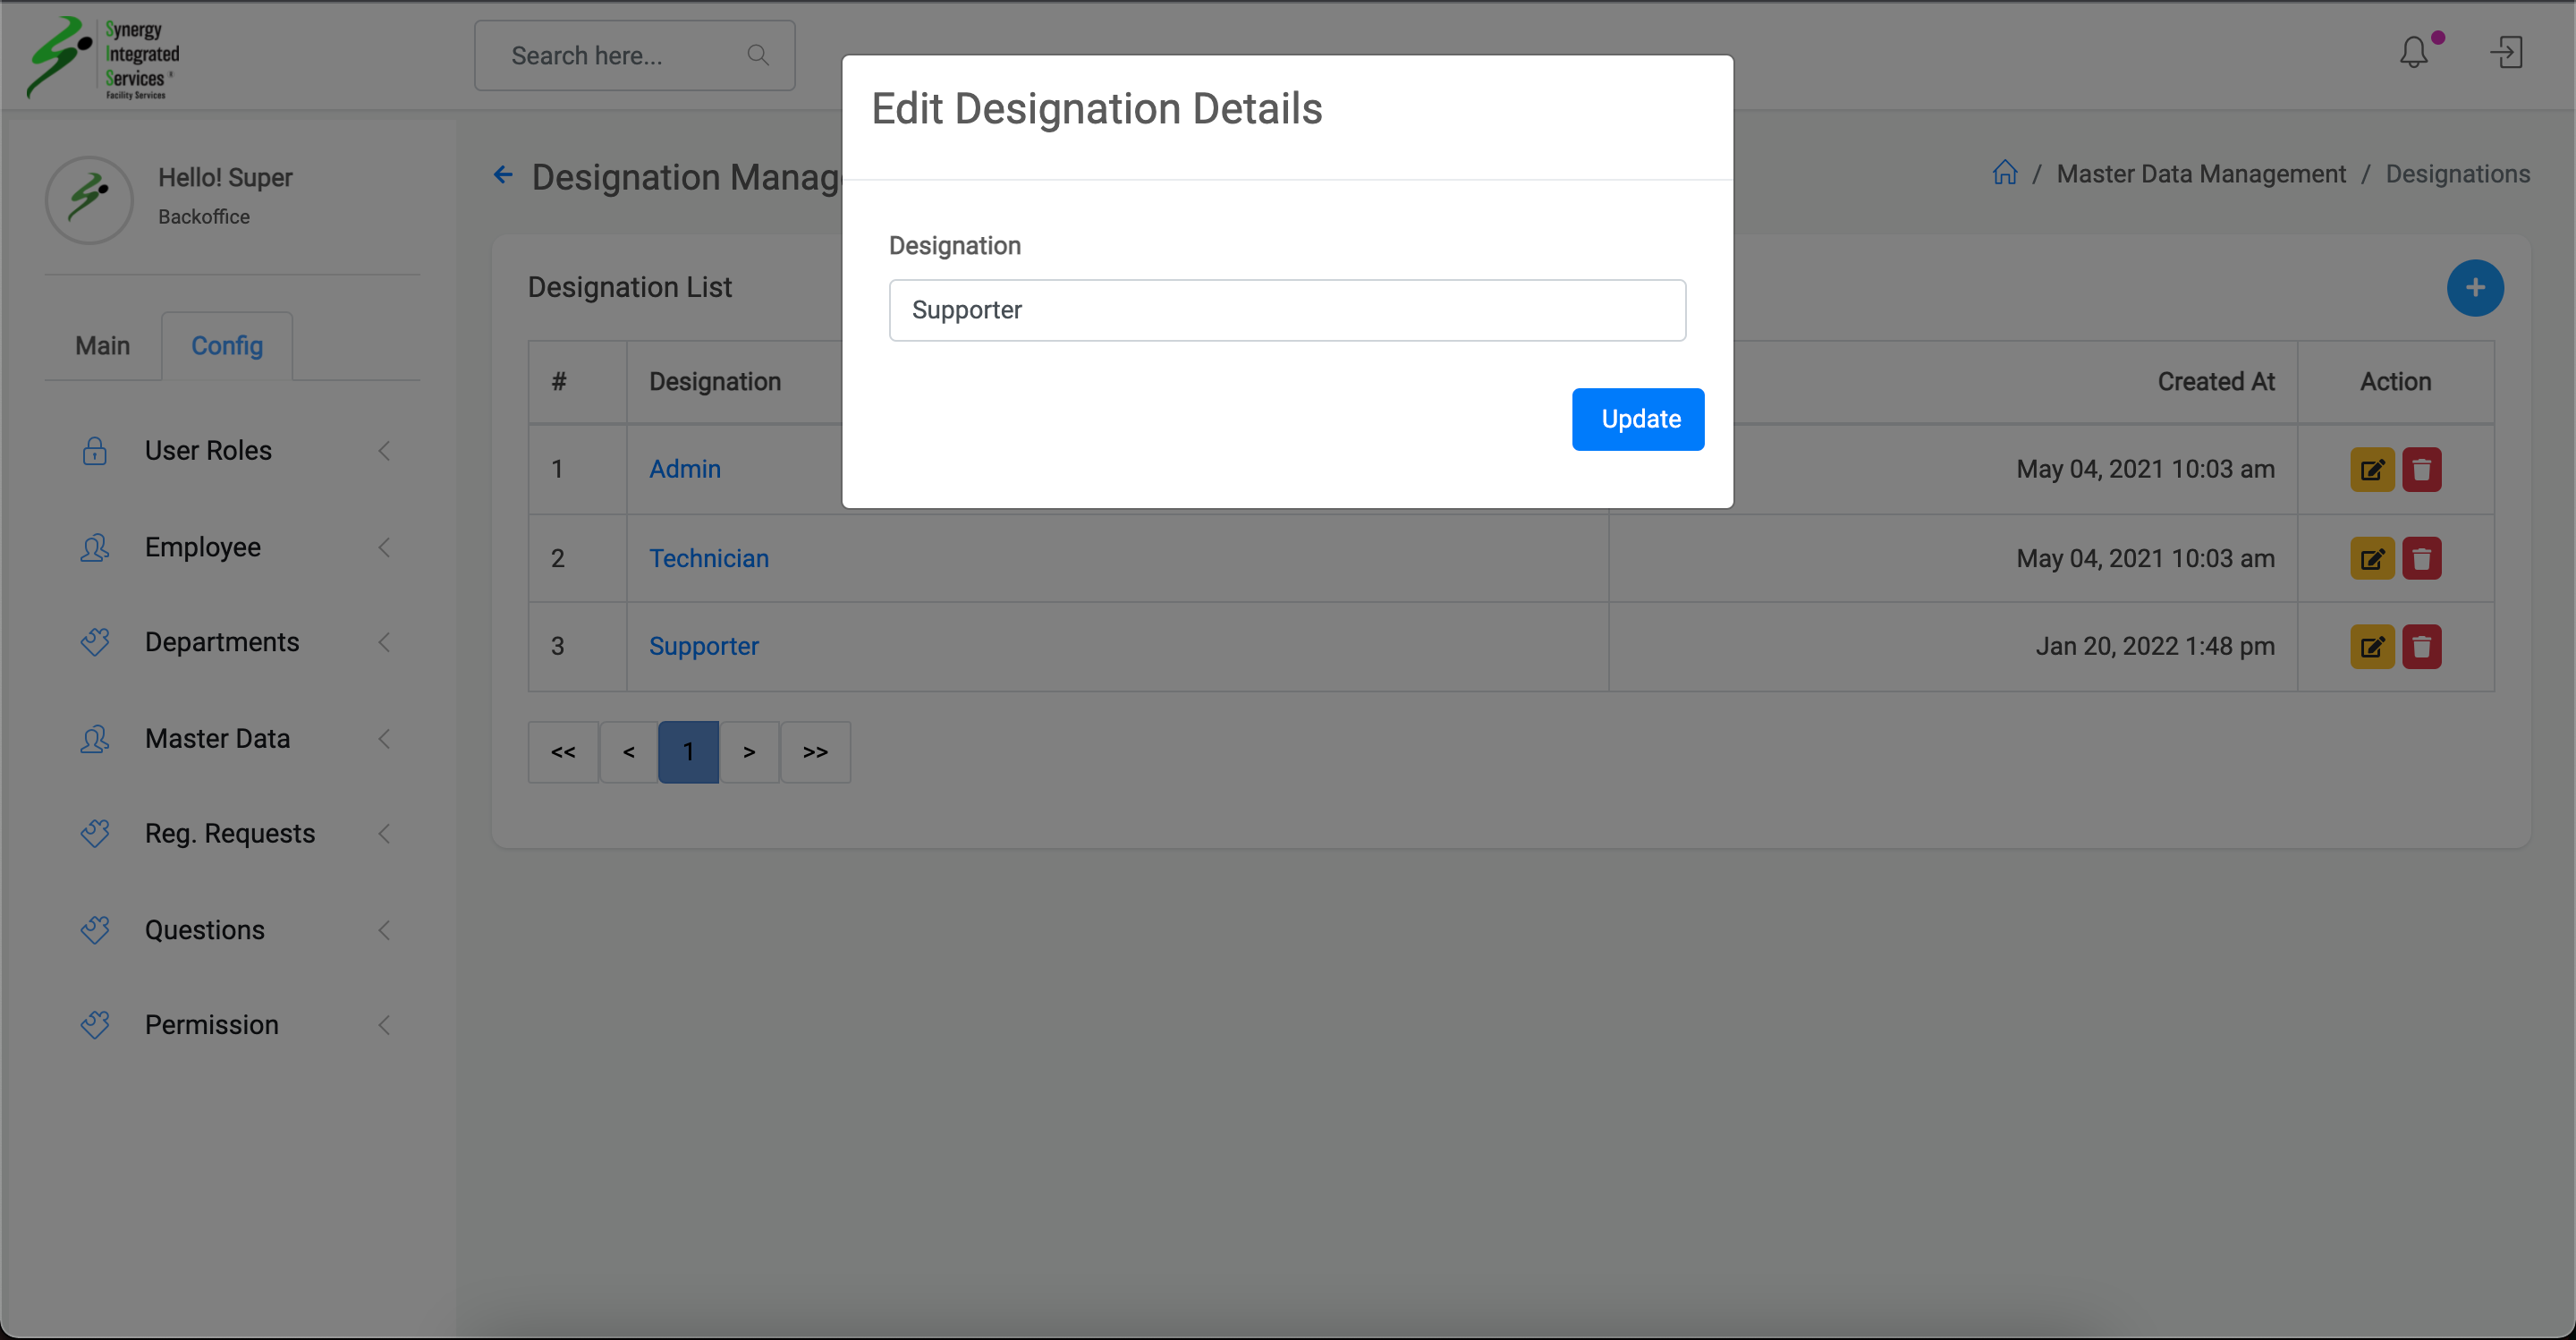
Click on the edit icon corresponding to the designation you want to change
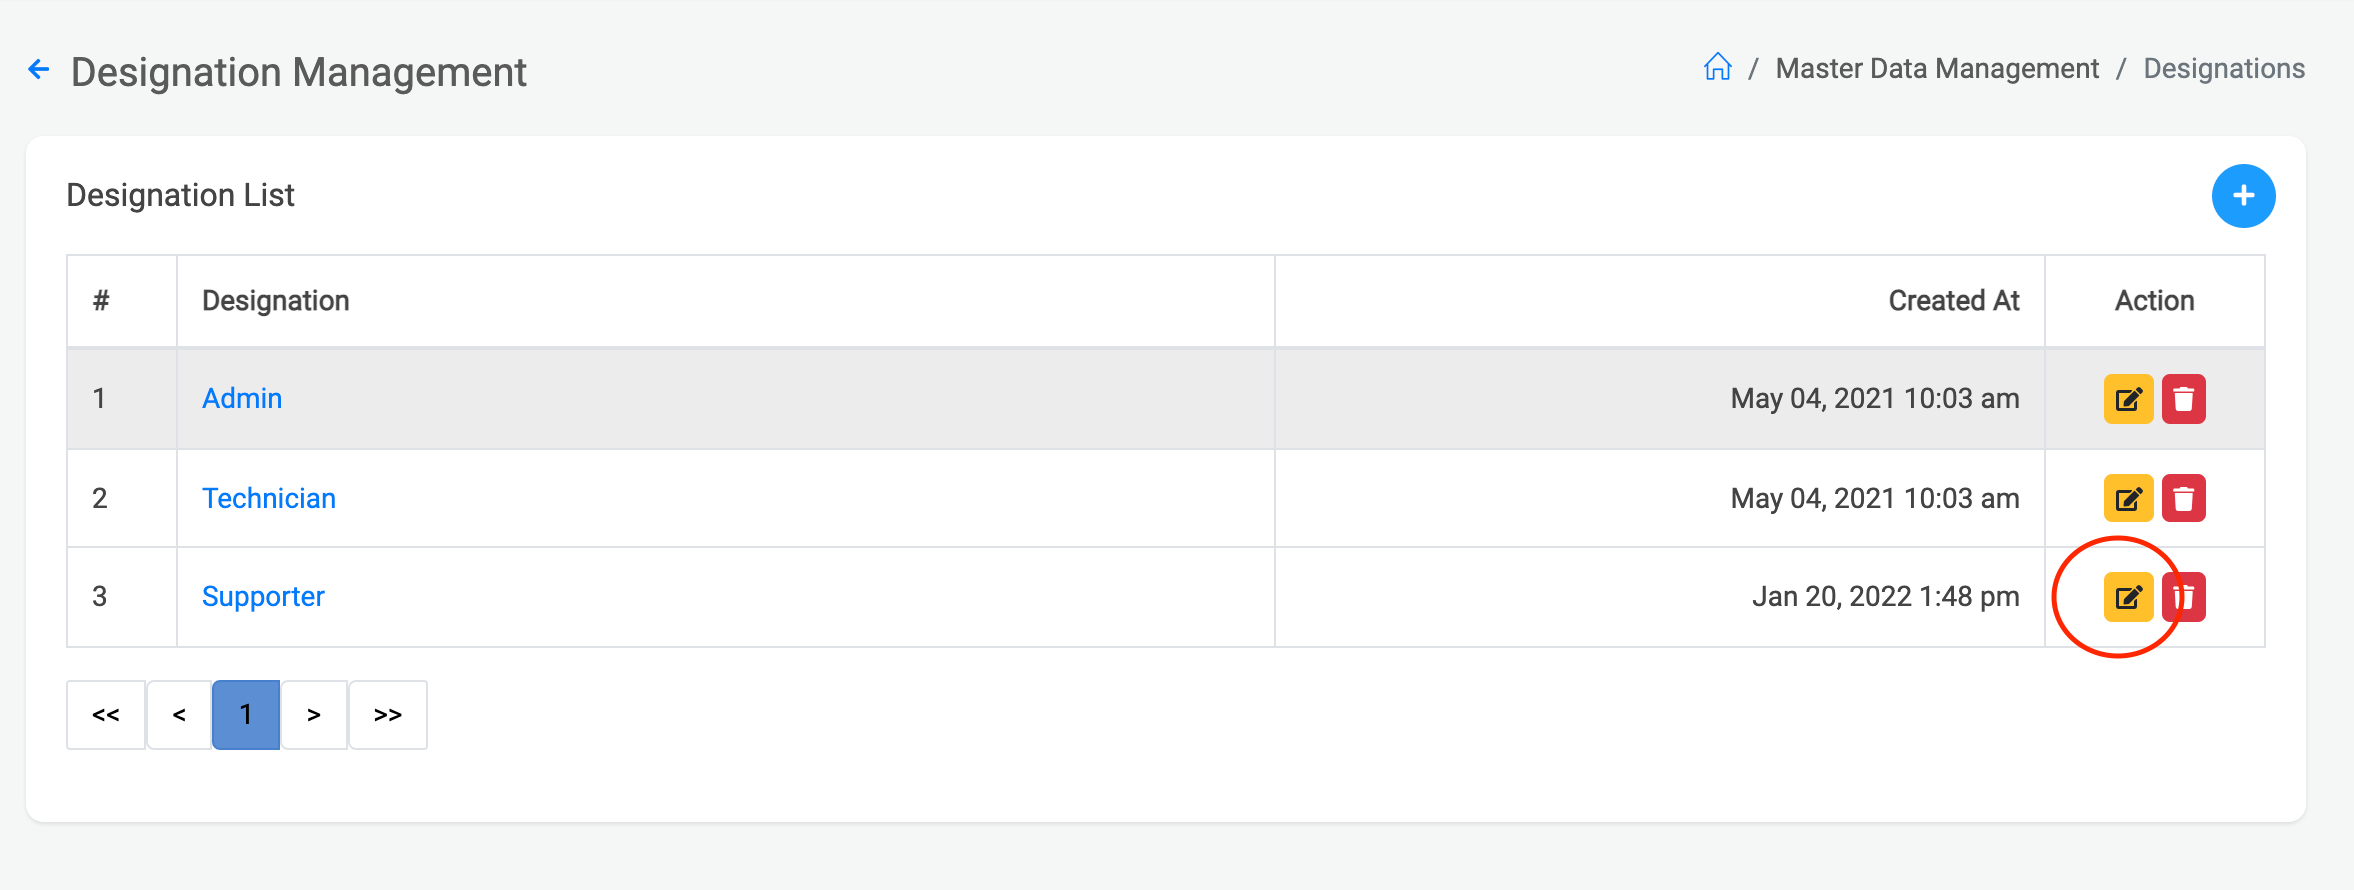
Change the designation name and click on update button
Cost Type List
1. Open any web browser
Go to sisfs.com.au/admin
2. Log into the System
3. Navigate to Config > Master Data > Cost Type
Create & edit Cost Type
1. Open any web browser
Go to sisfs.com.au/admin
2. Log into the System
3. Navigate to Config > Master Data > Cost Type
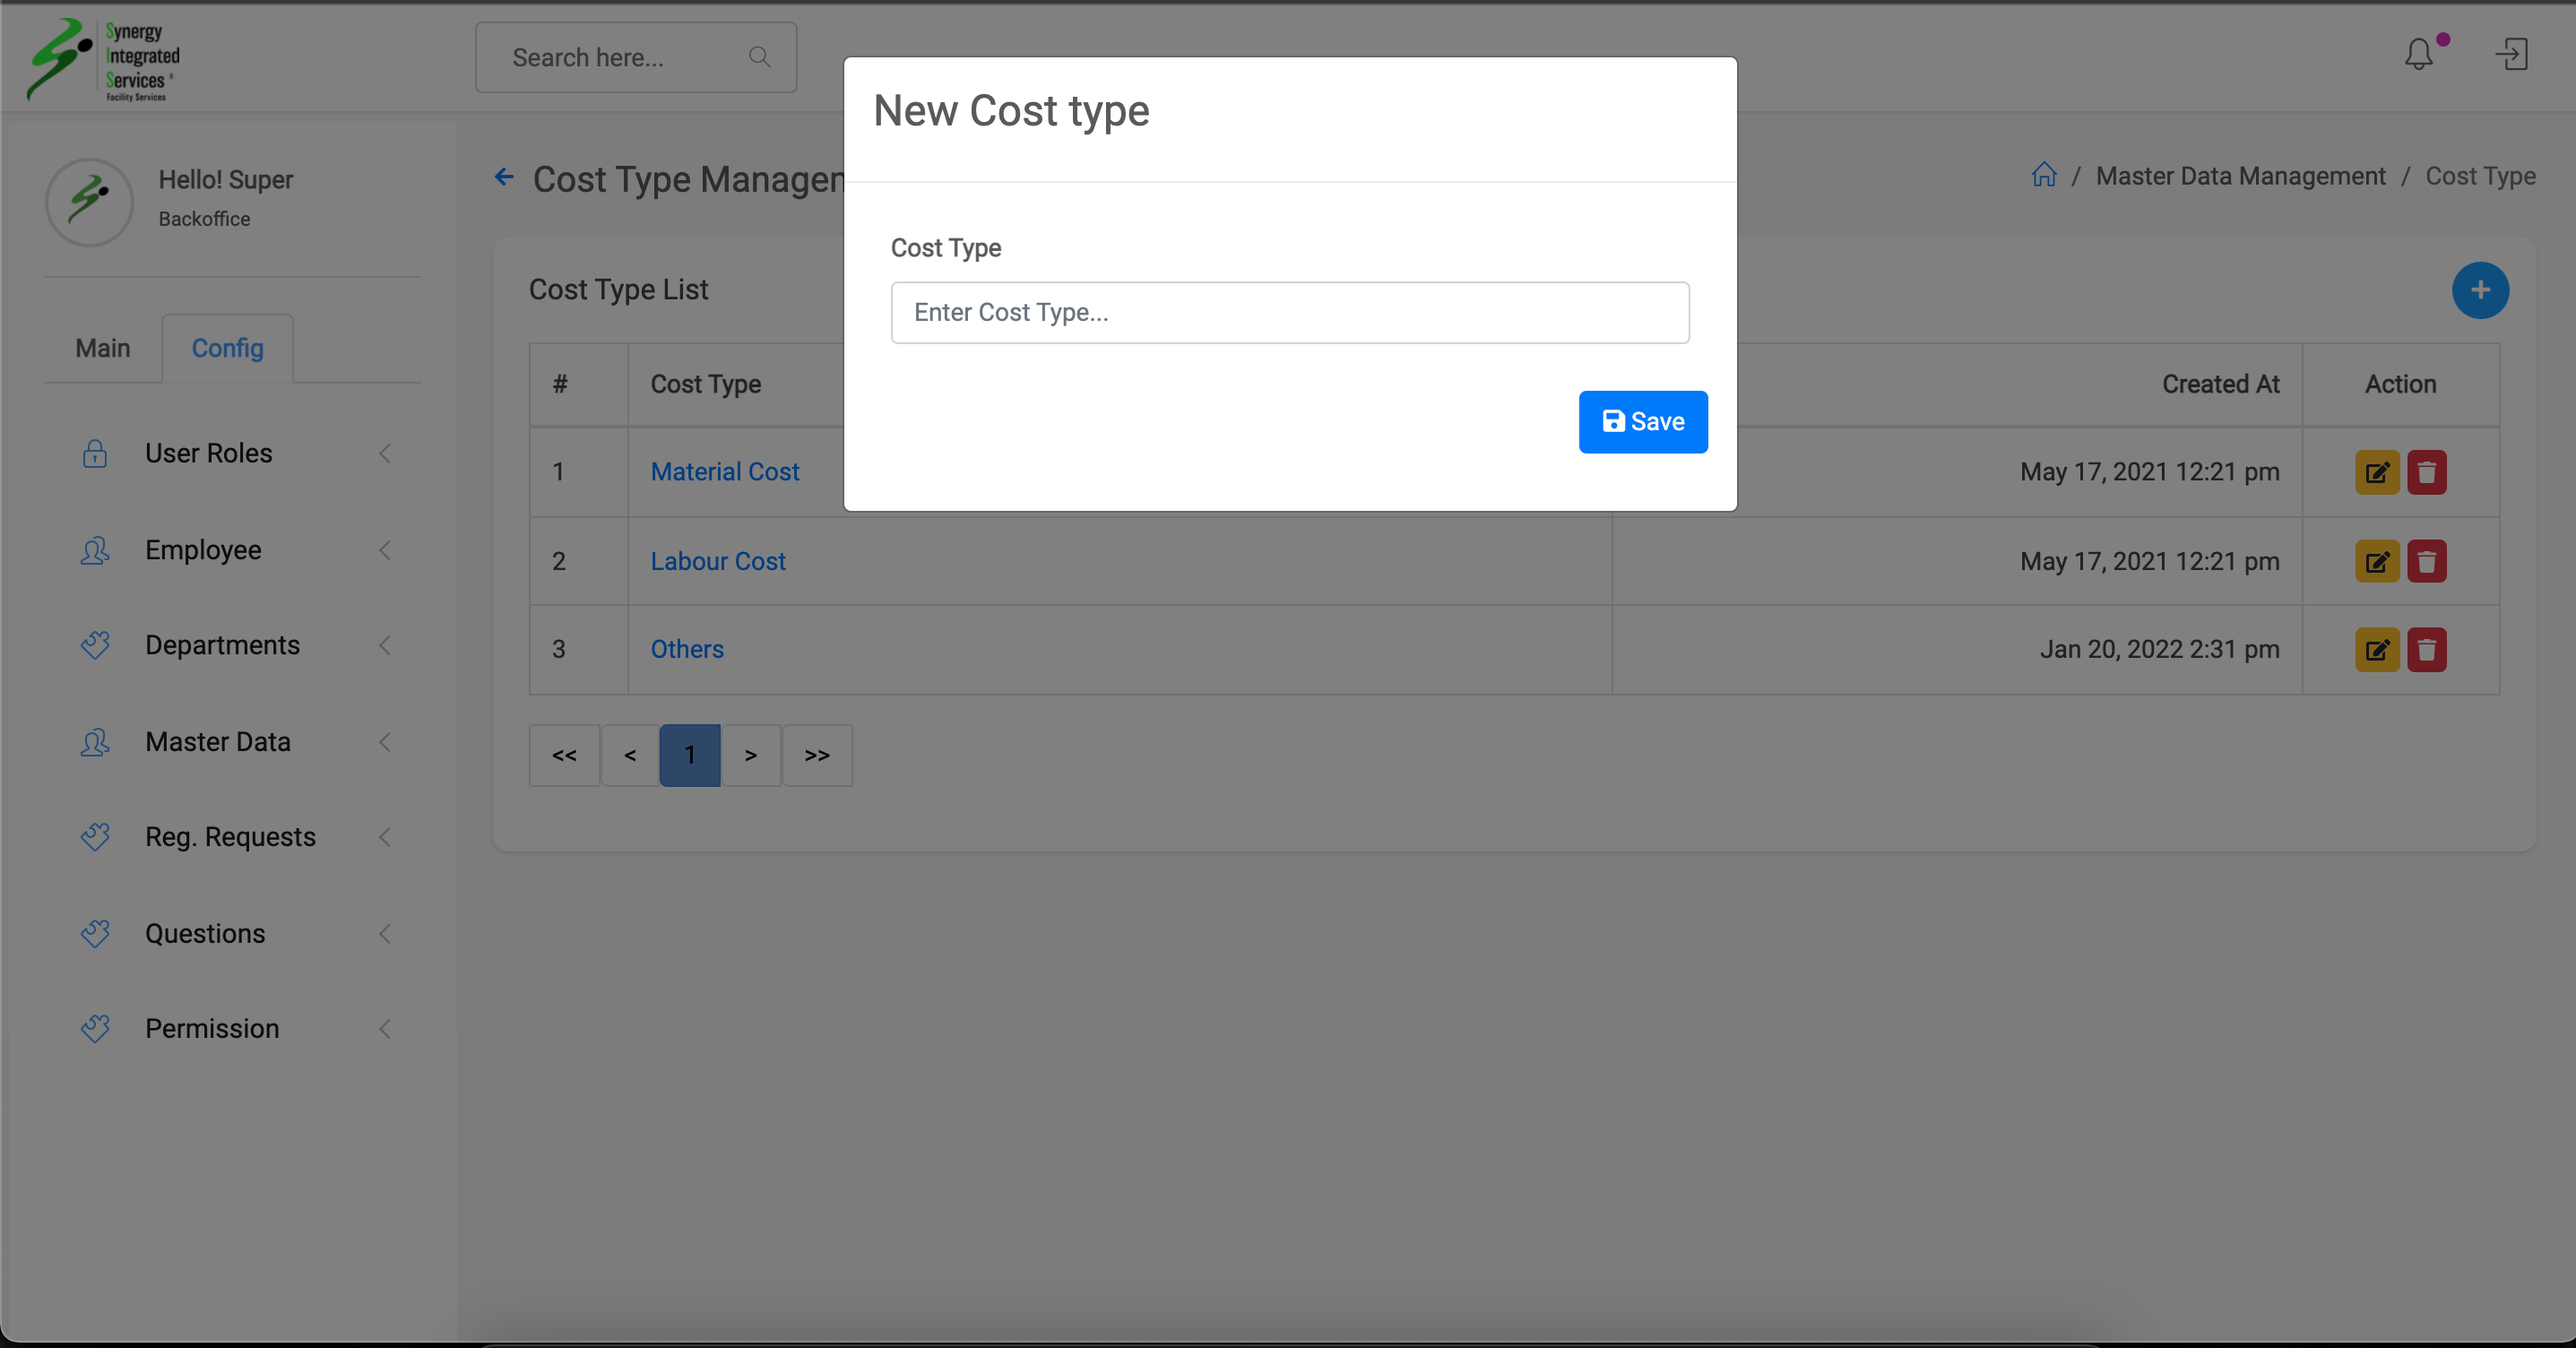
Click on Blue color circle plus button
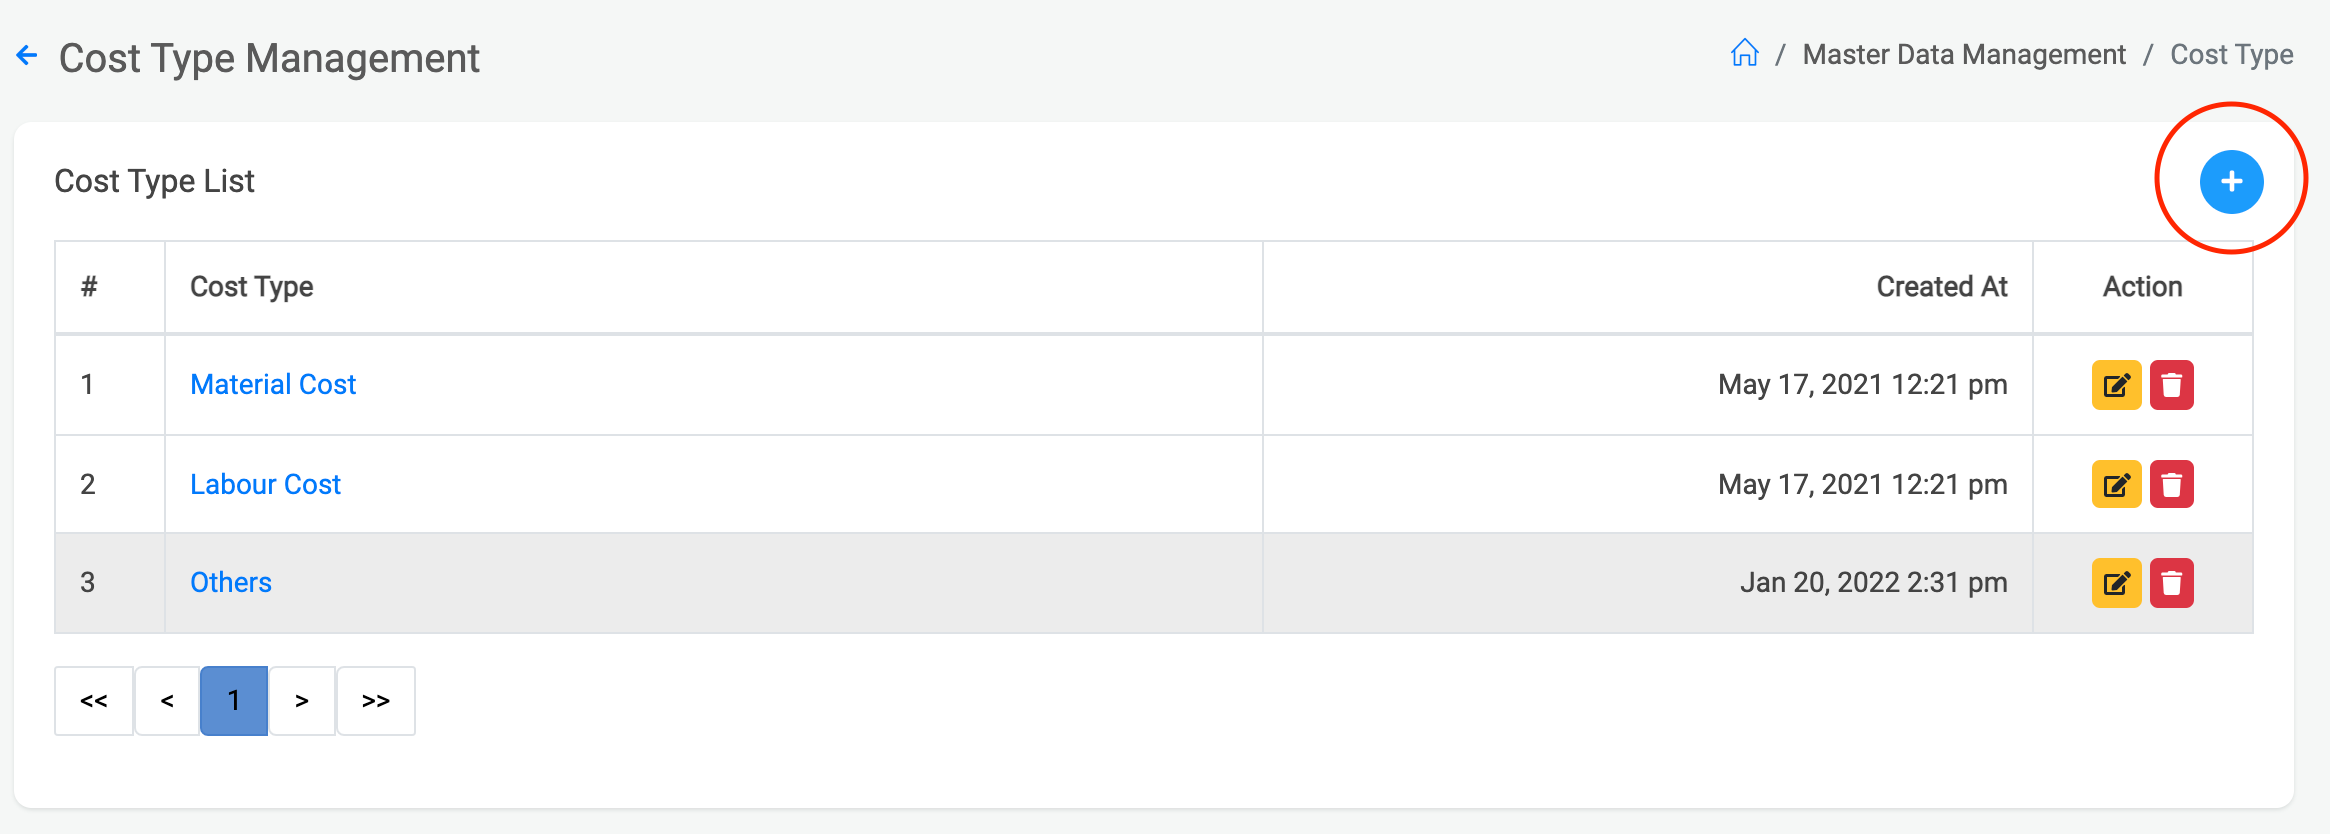
Enter cost type name and click on save button
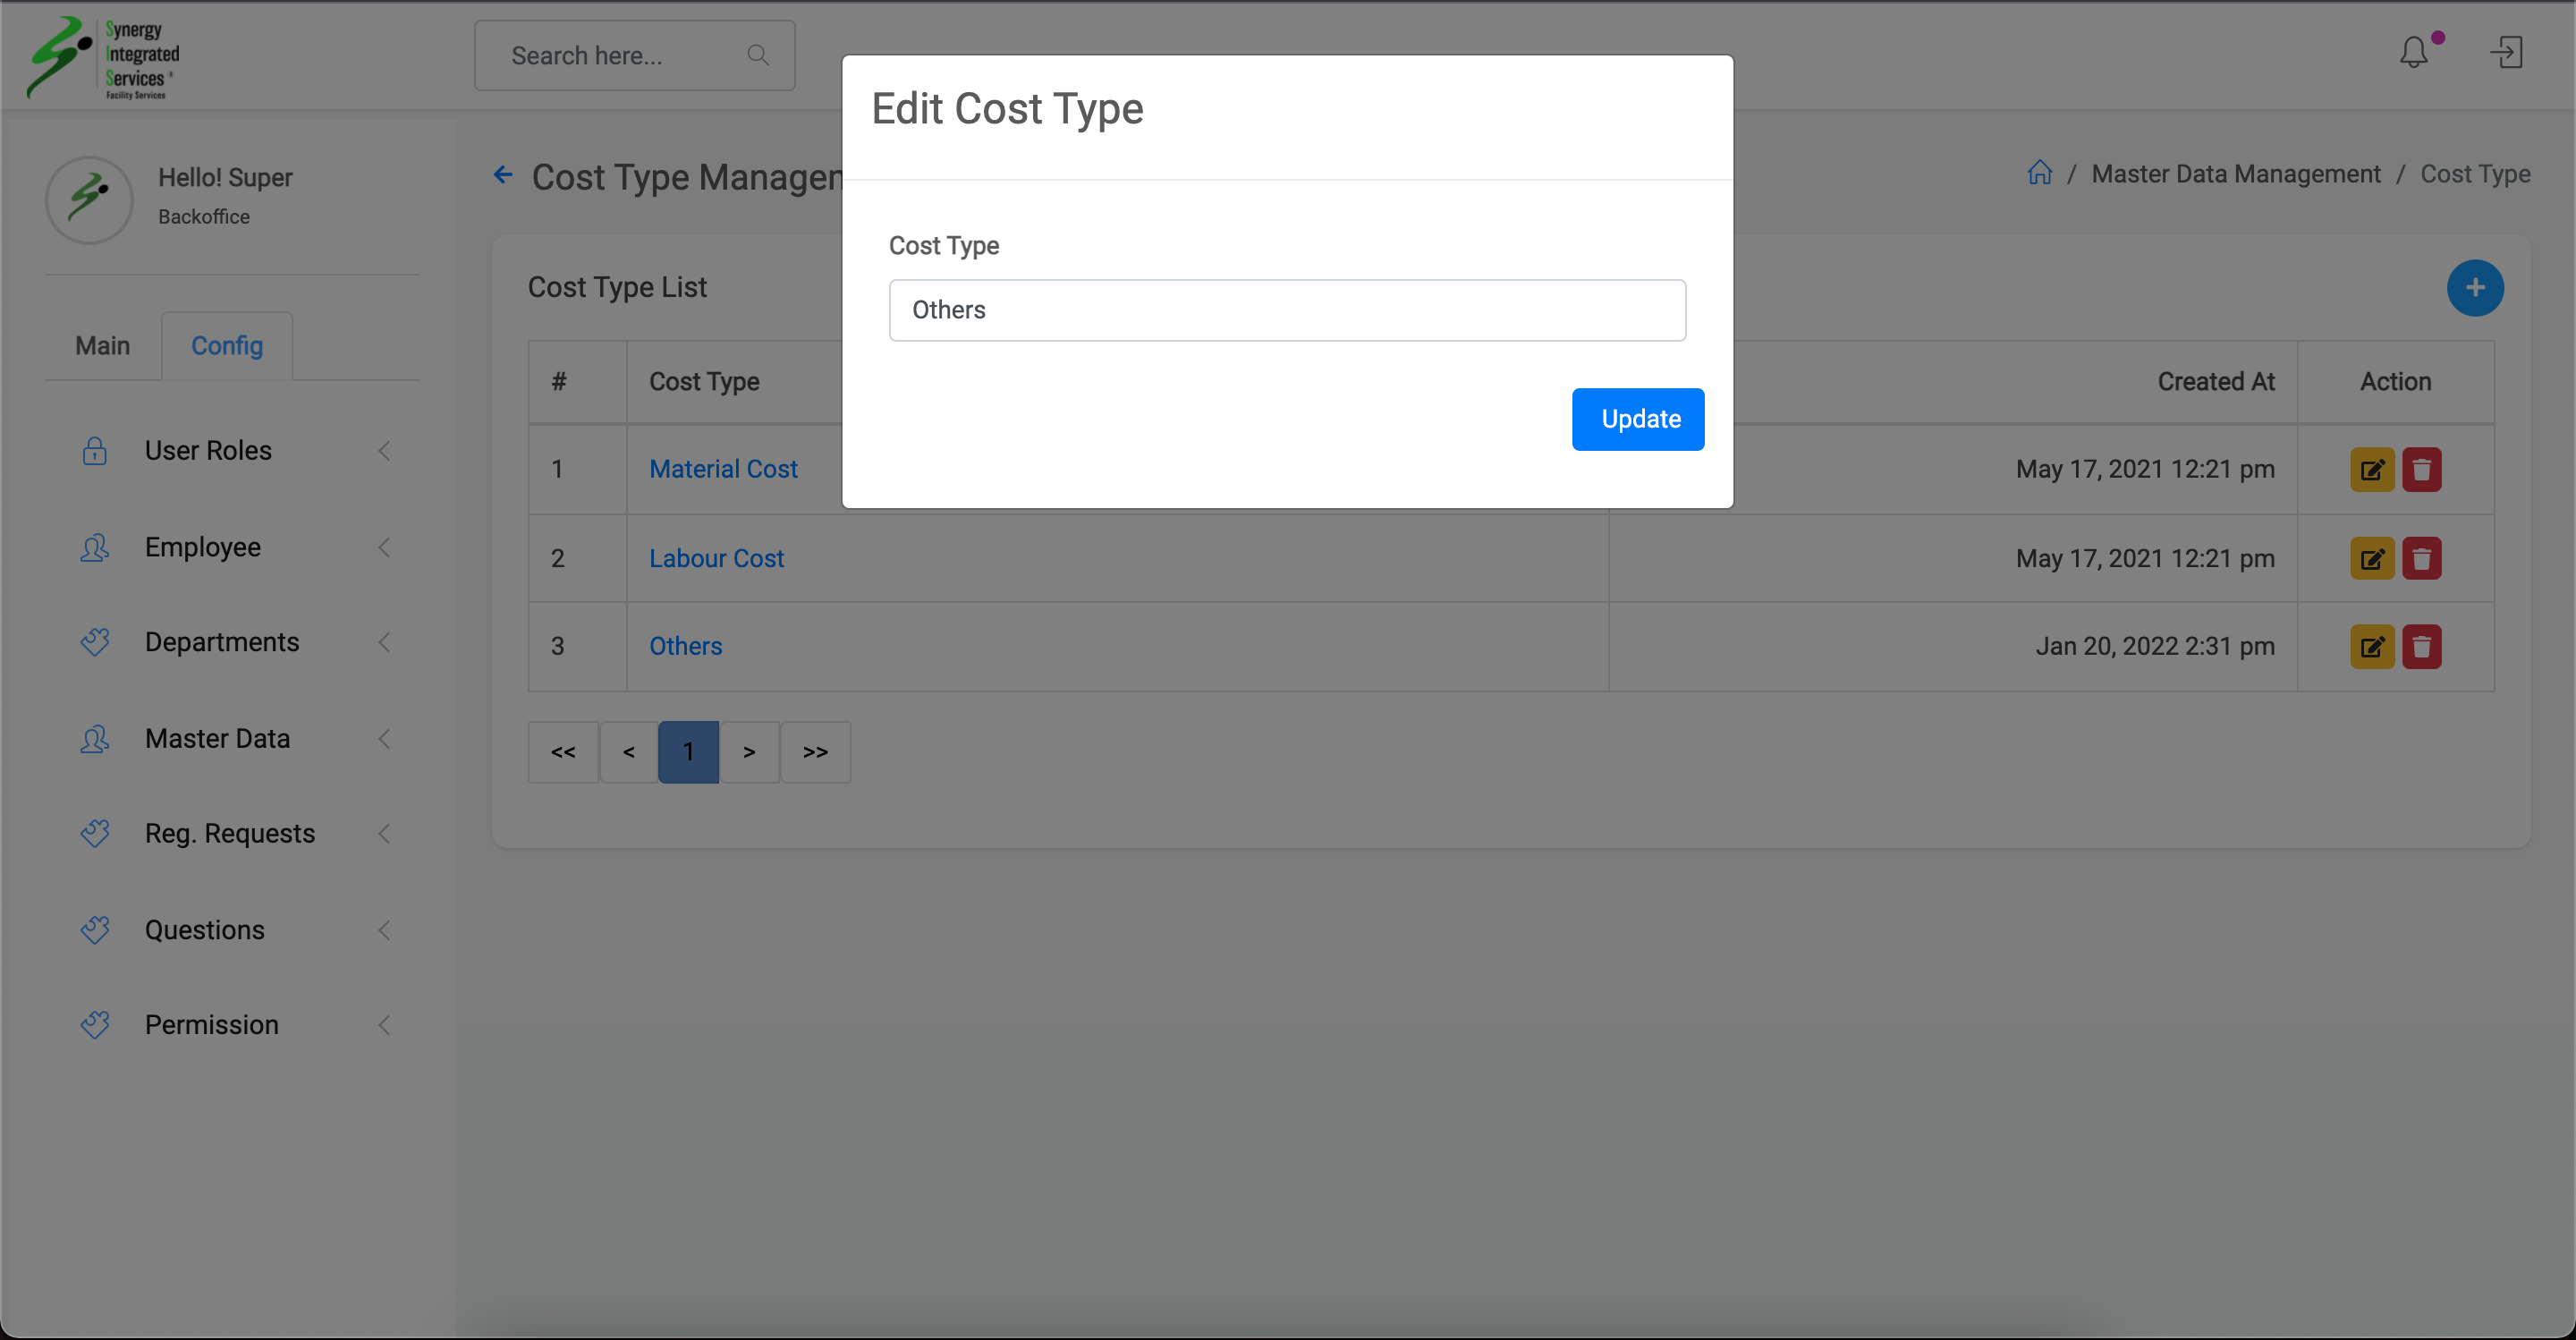
Click on the edit icon corresponding to the cost type you want to change
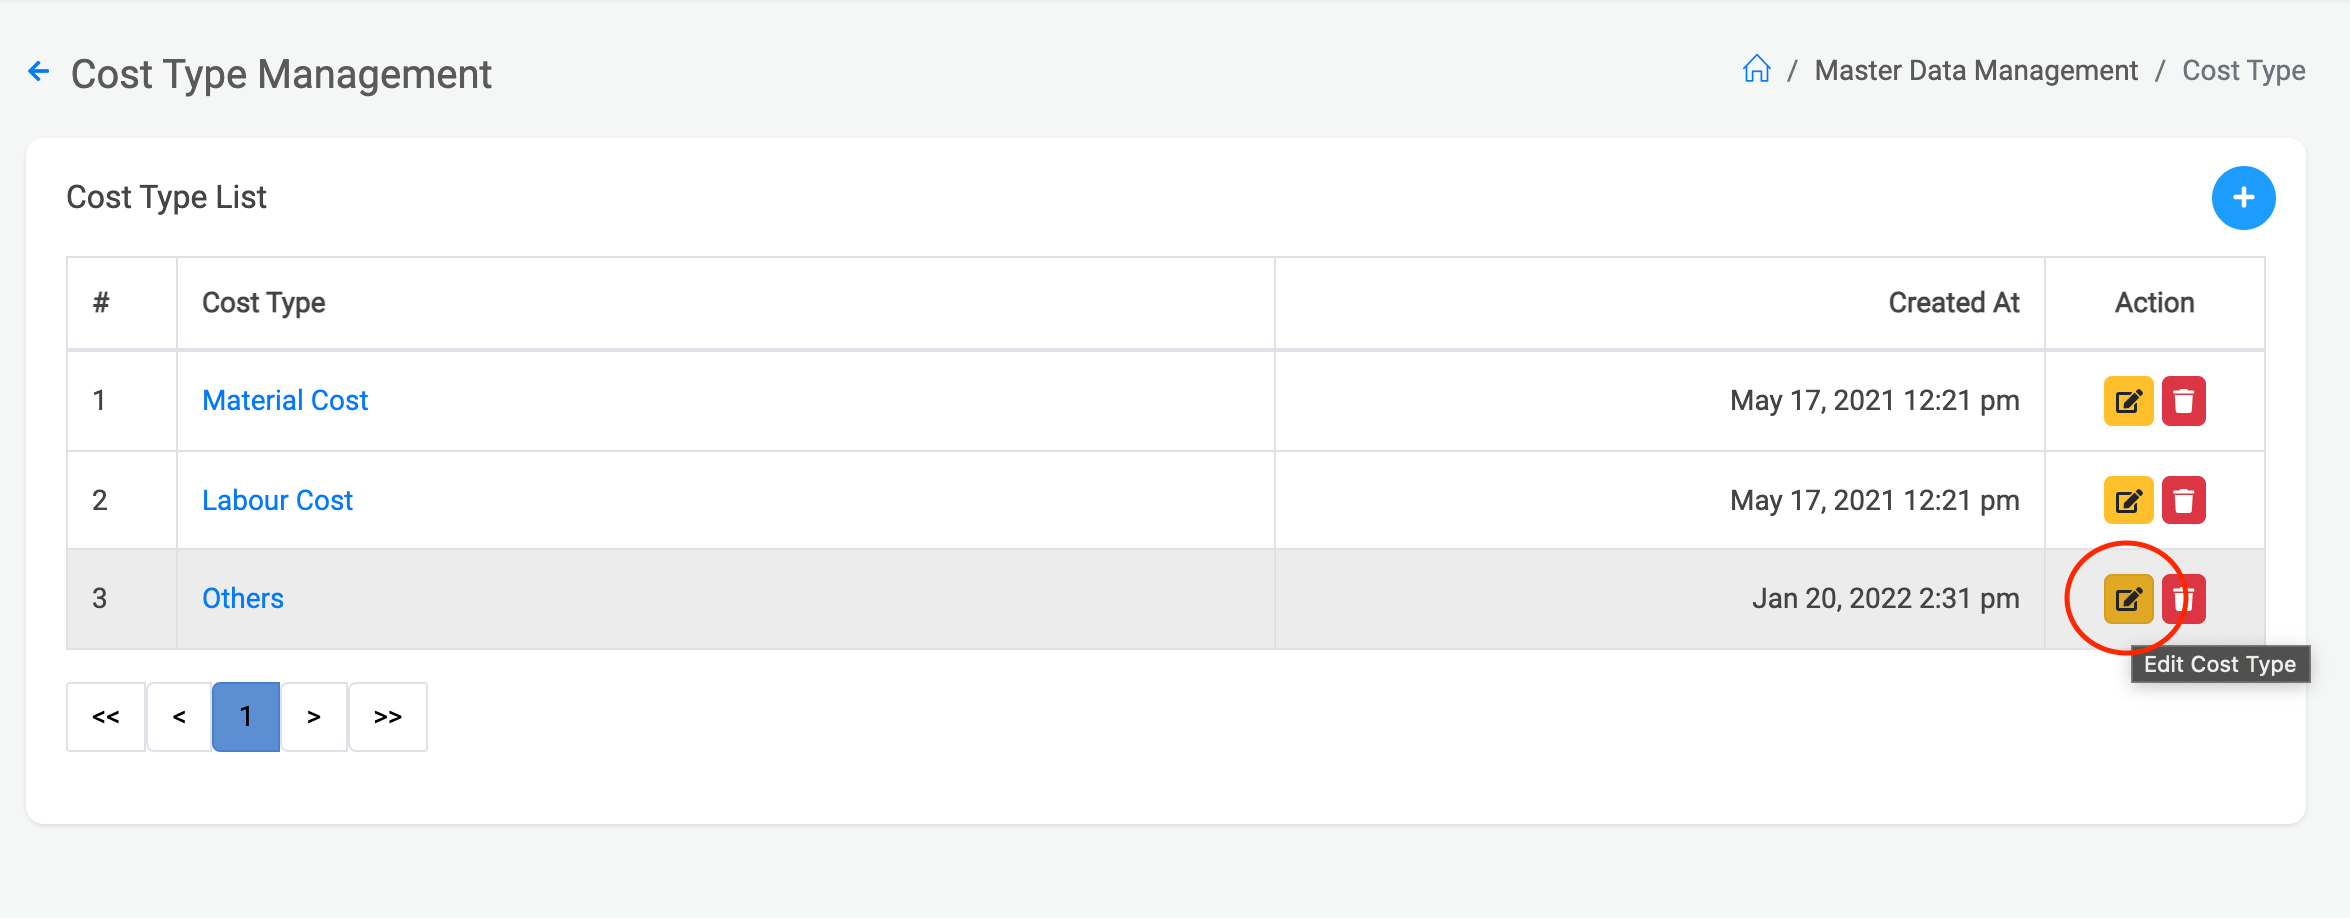
Change the cost type name and click on update button
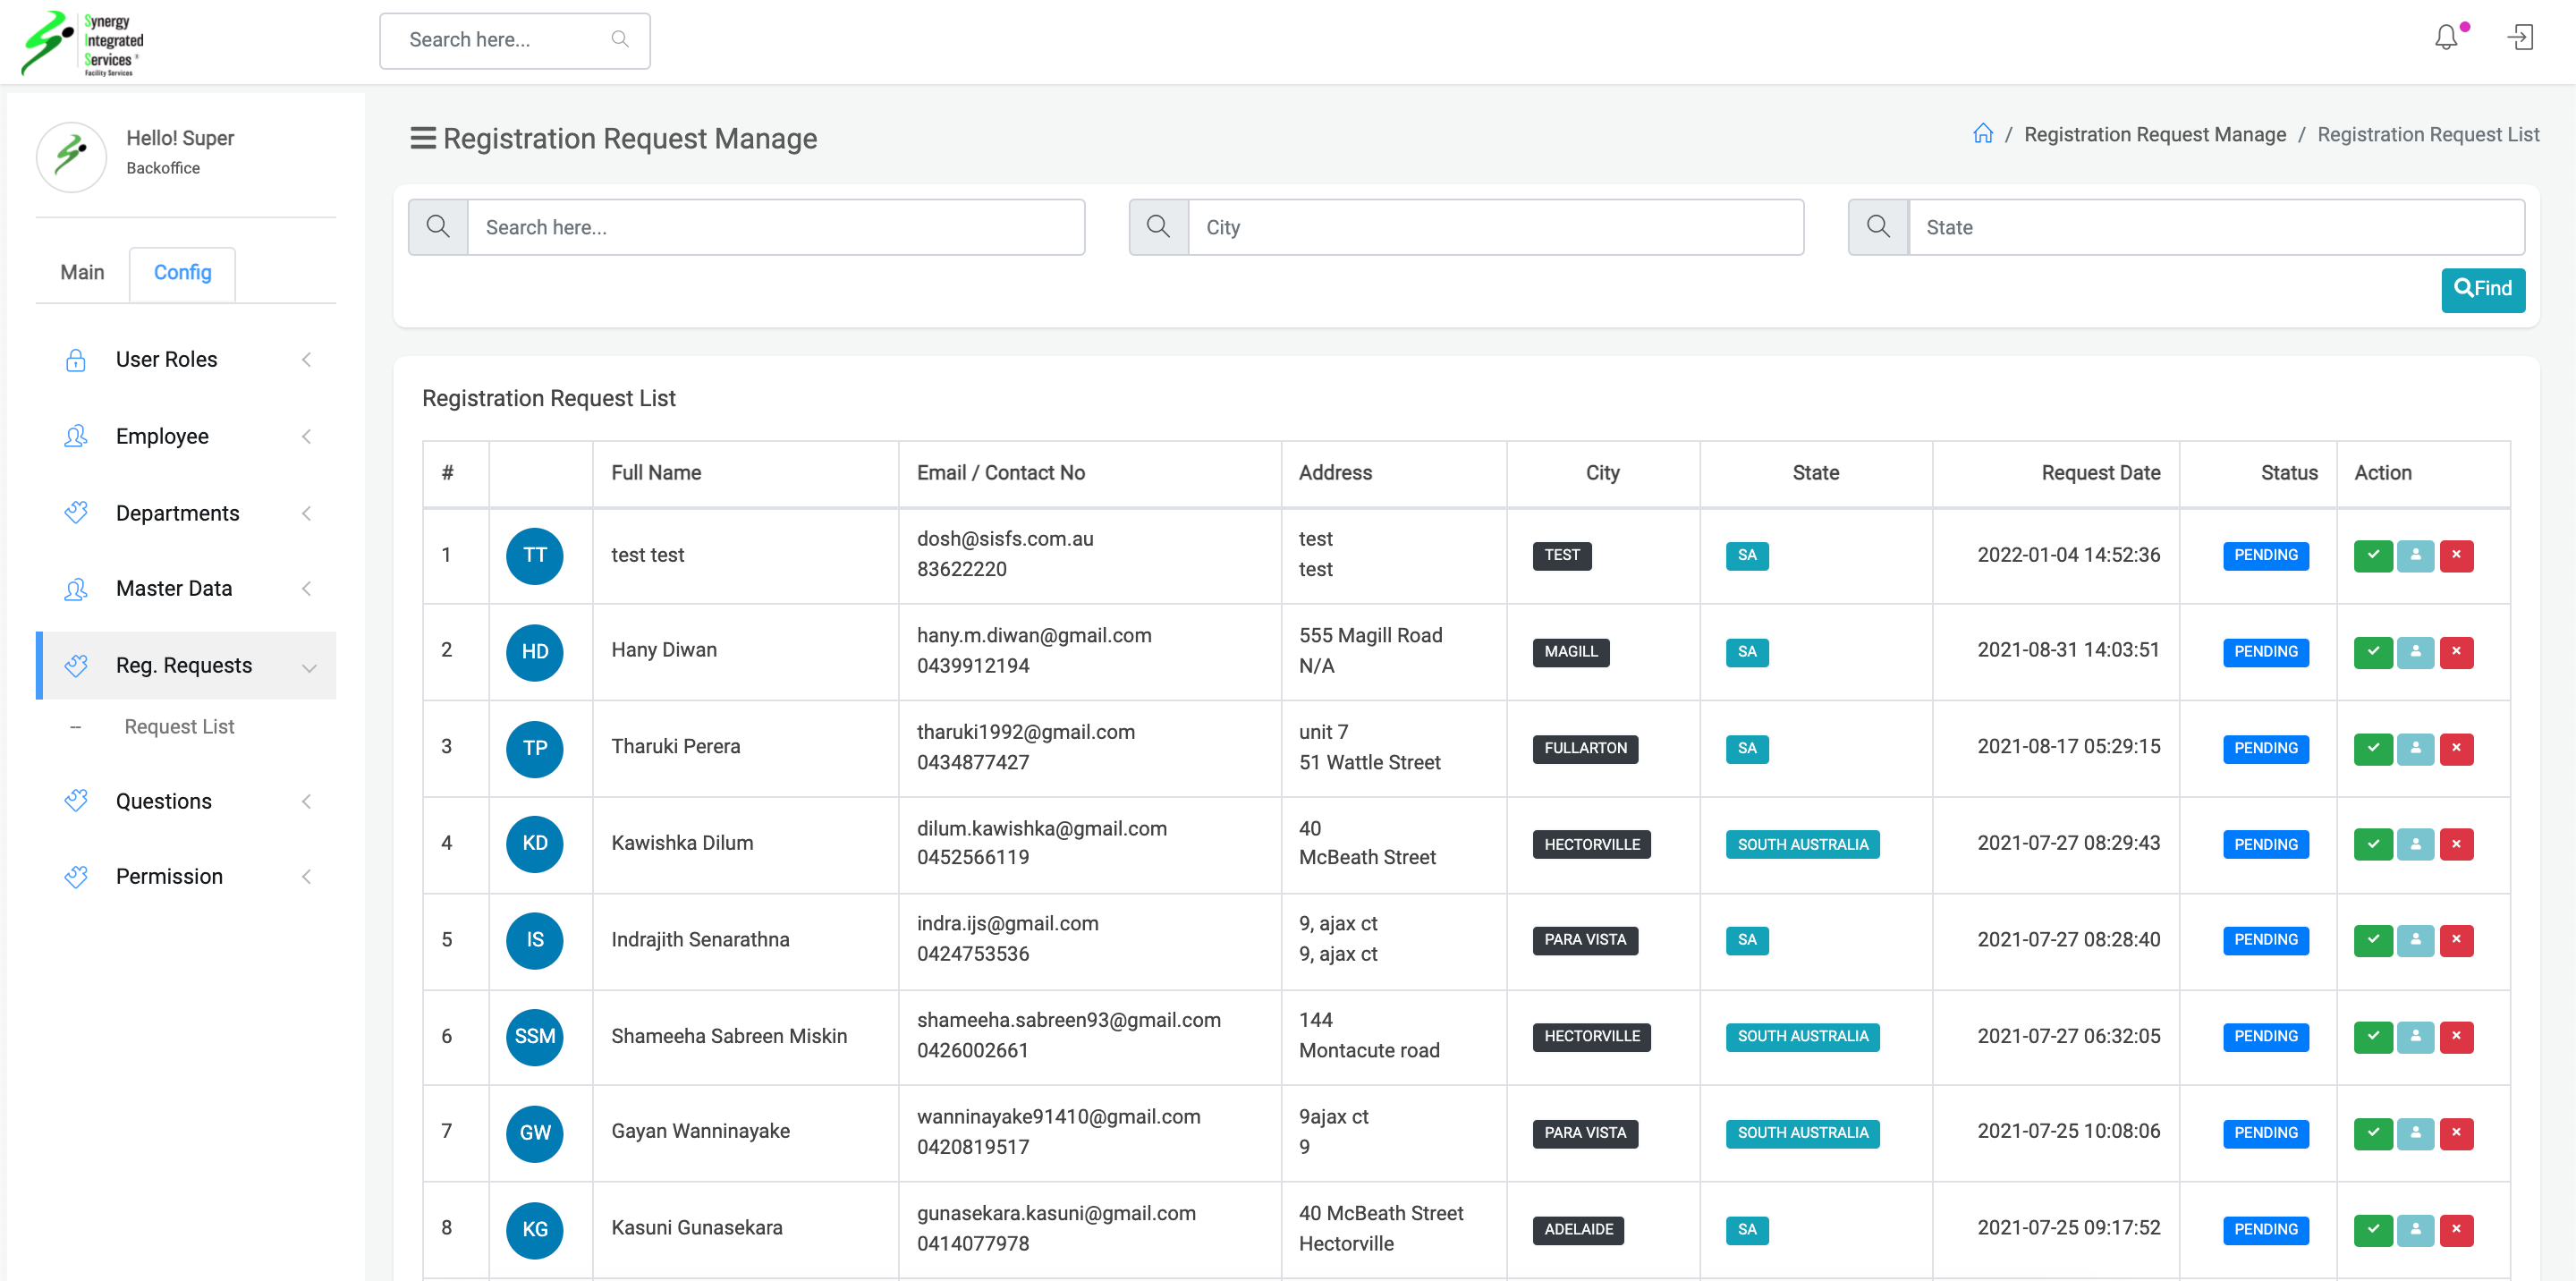
Registration Request List
1. Open any web browser
Go to sisfs.com.au/admin
2. Log into the System
3. Navigate to Config > Registration Request
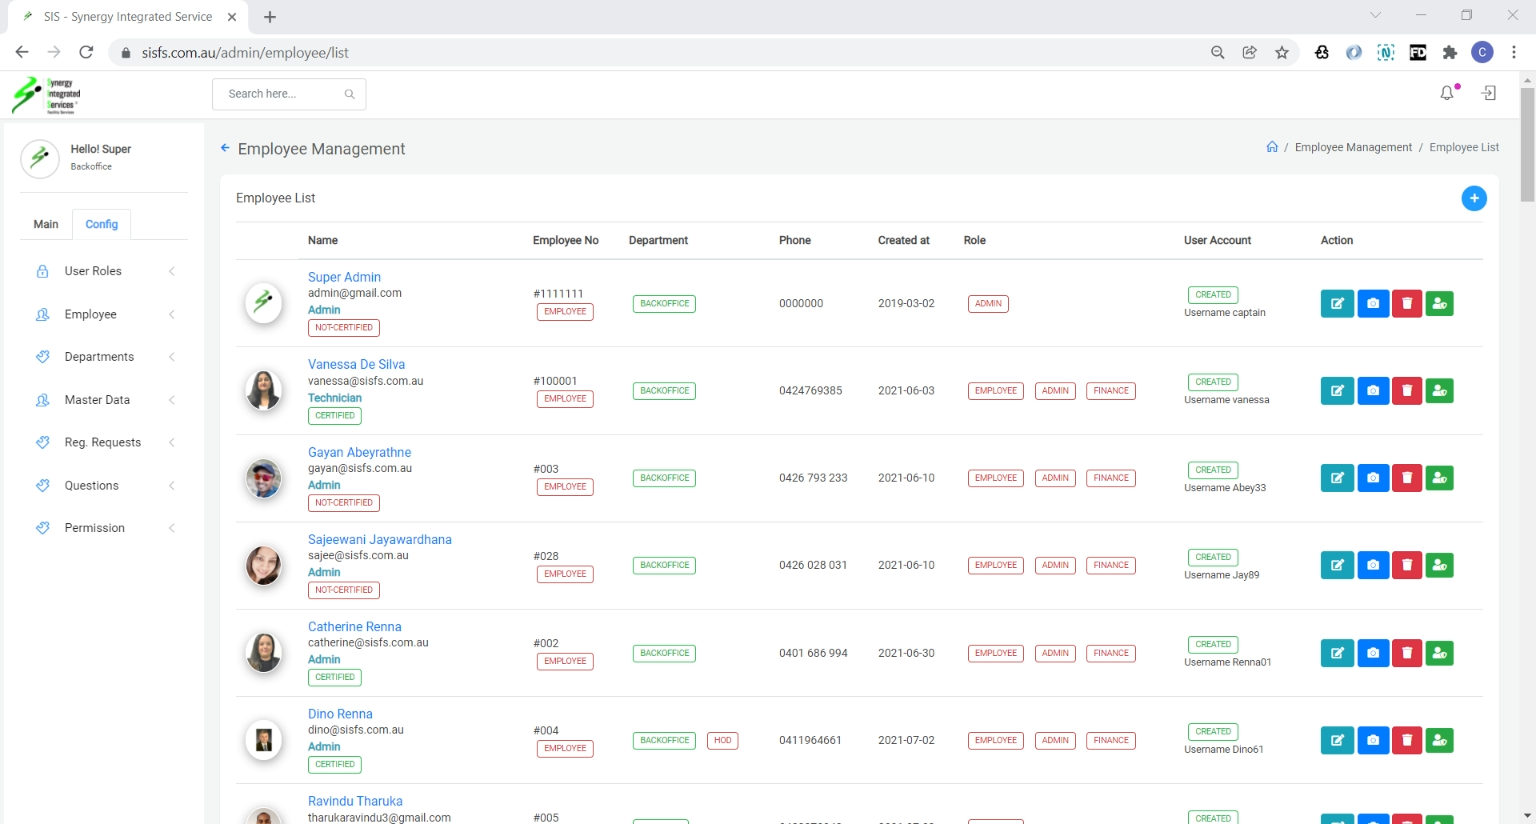
Employee List
1. Open any web browser
Go to sisfs.com.au/admin
2. Log into the System
3. Navigate to Config > Employee > Employee List
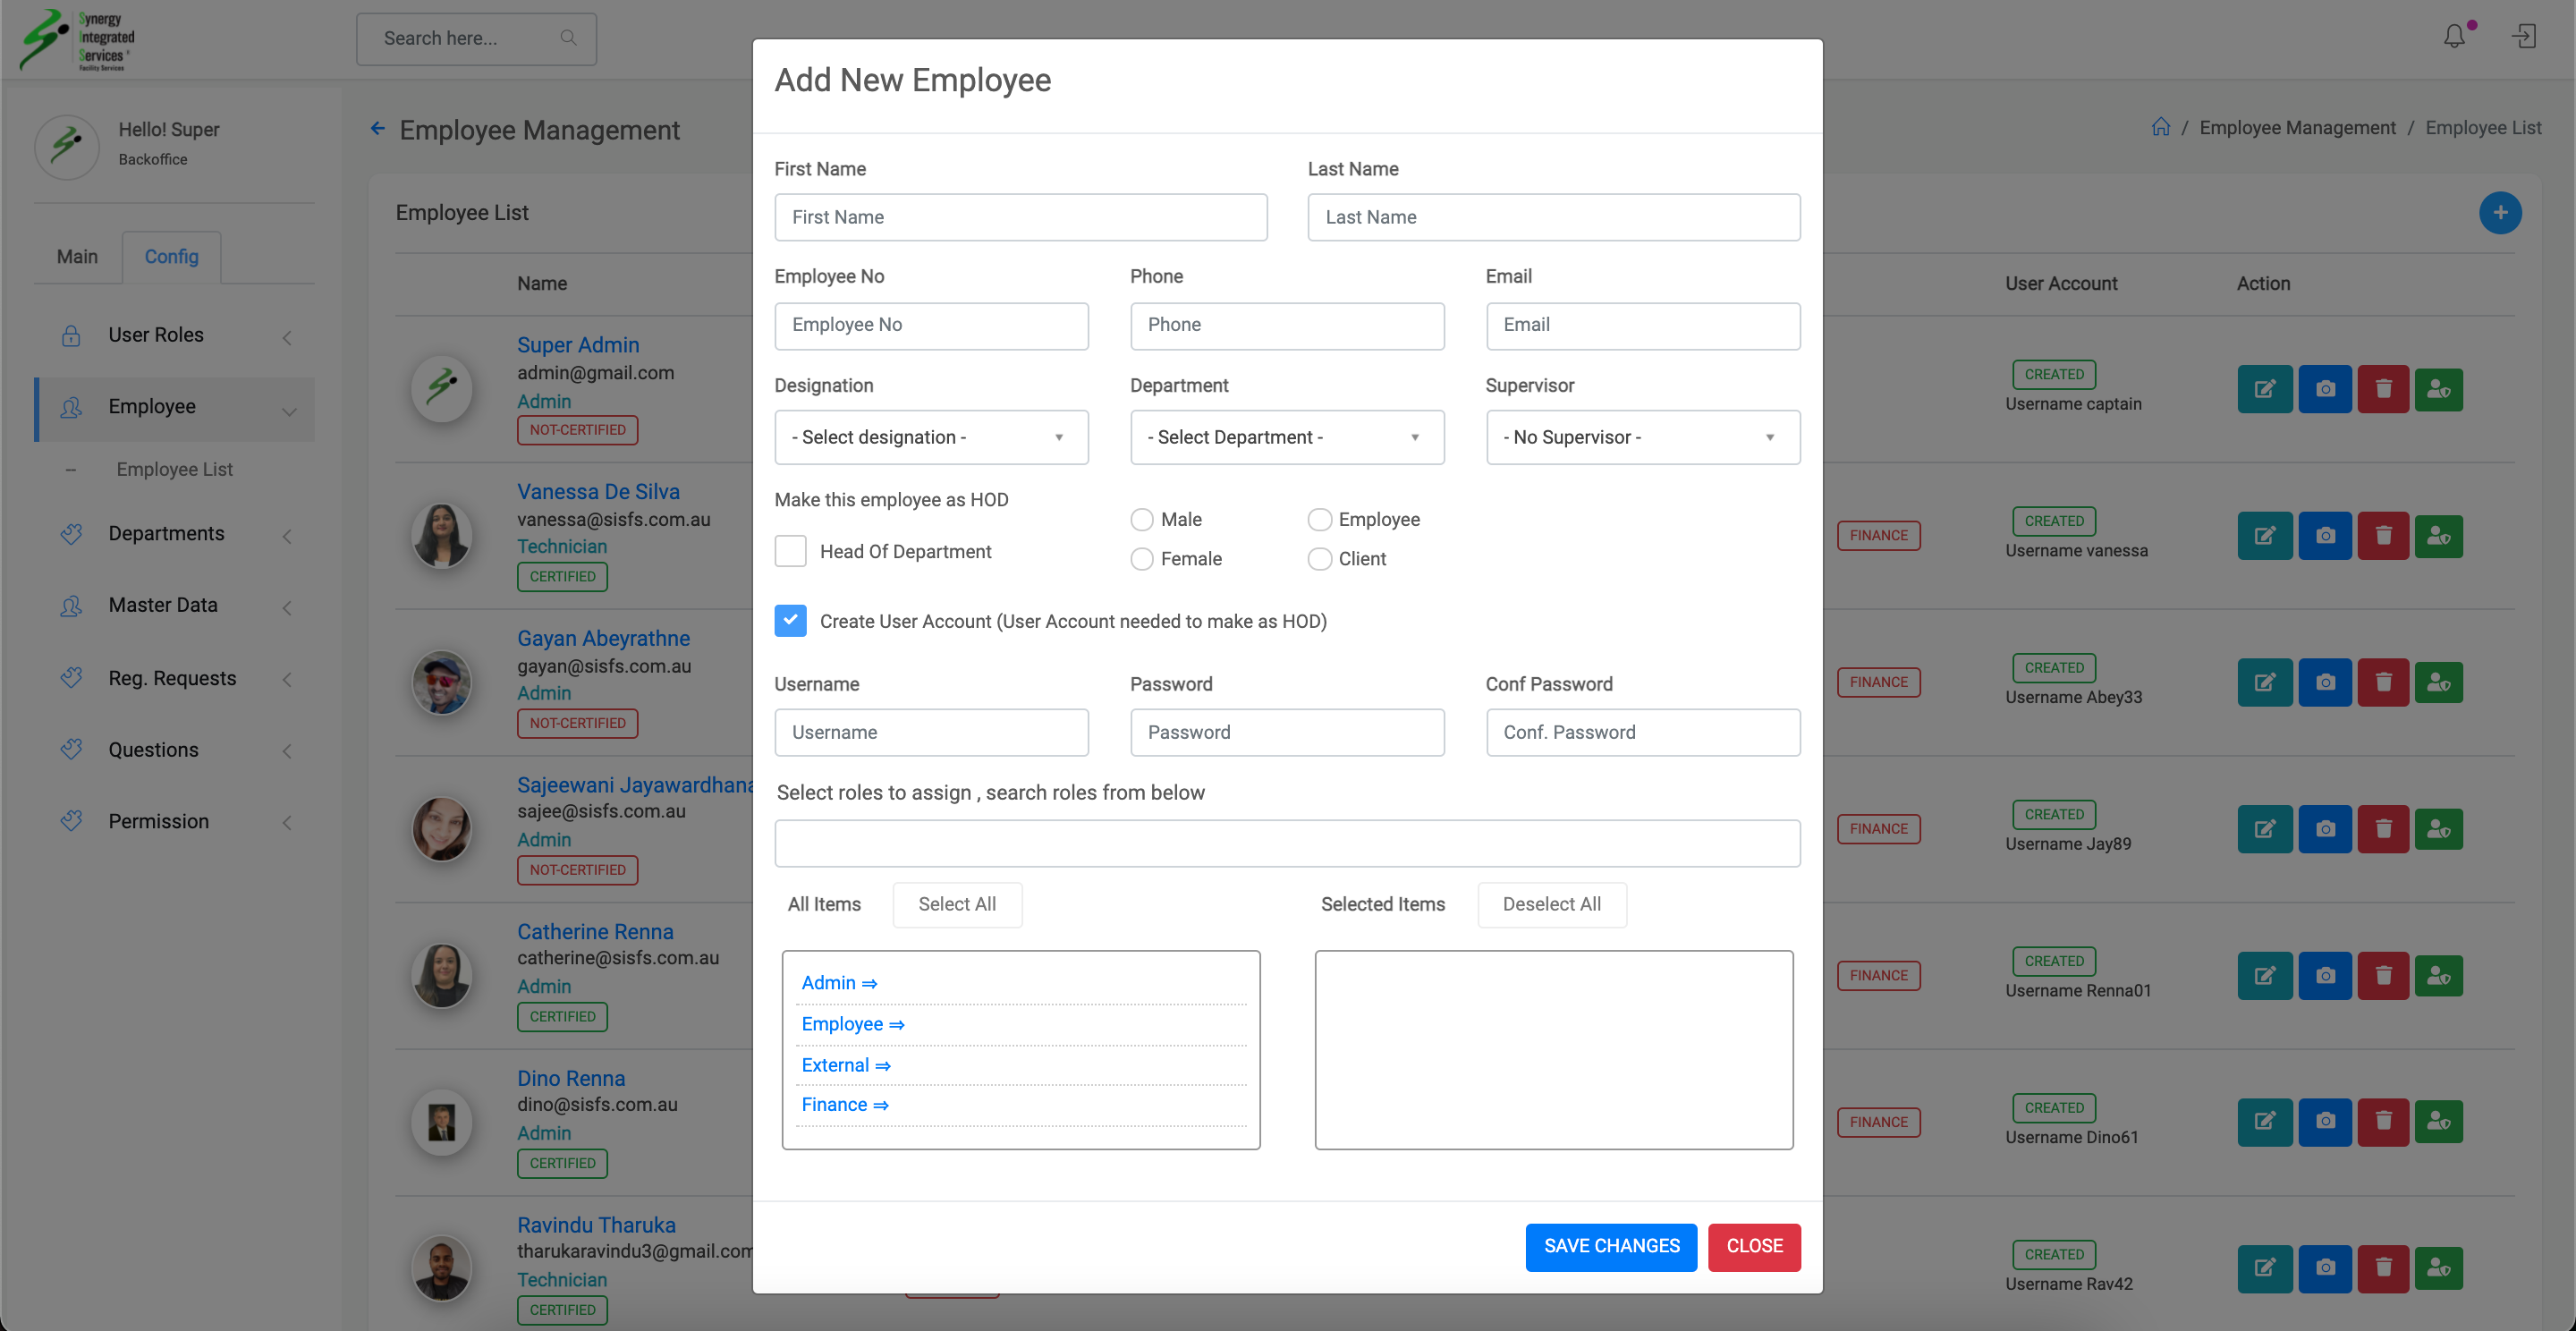
Create Employee
1. Open any web browser
Go to sisfs.com.au/admin
2. Log into the System
3. Navigate to Config > Employee > Employee List
4. Click on plus icon - Pop up will appear
5. Fill the data in pop-up
6. Click on Save Changes - Save data
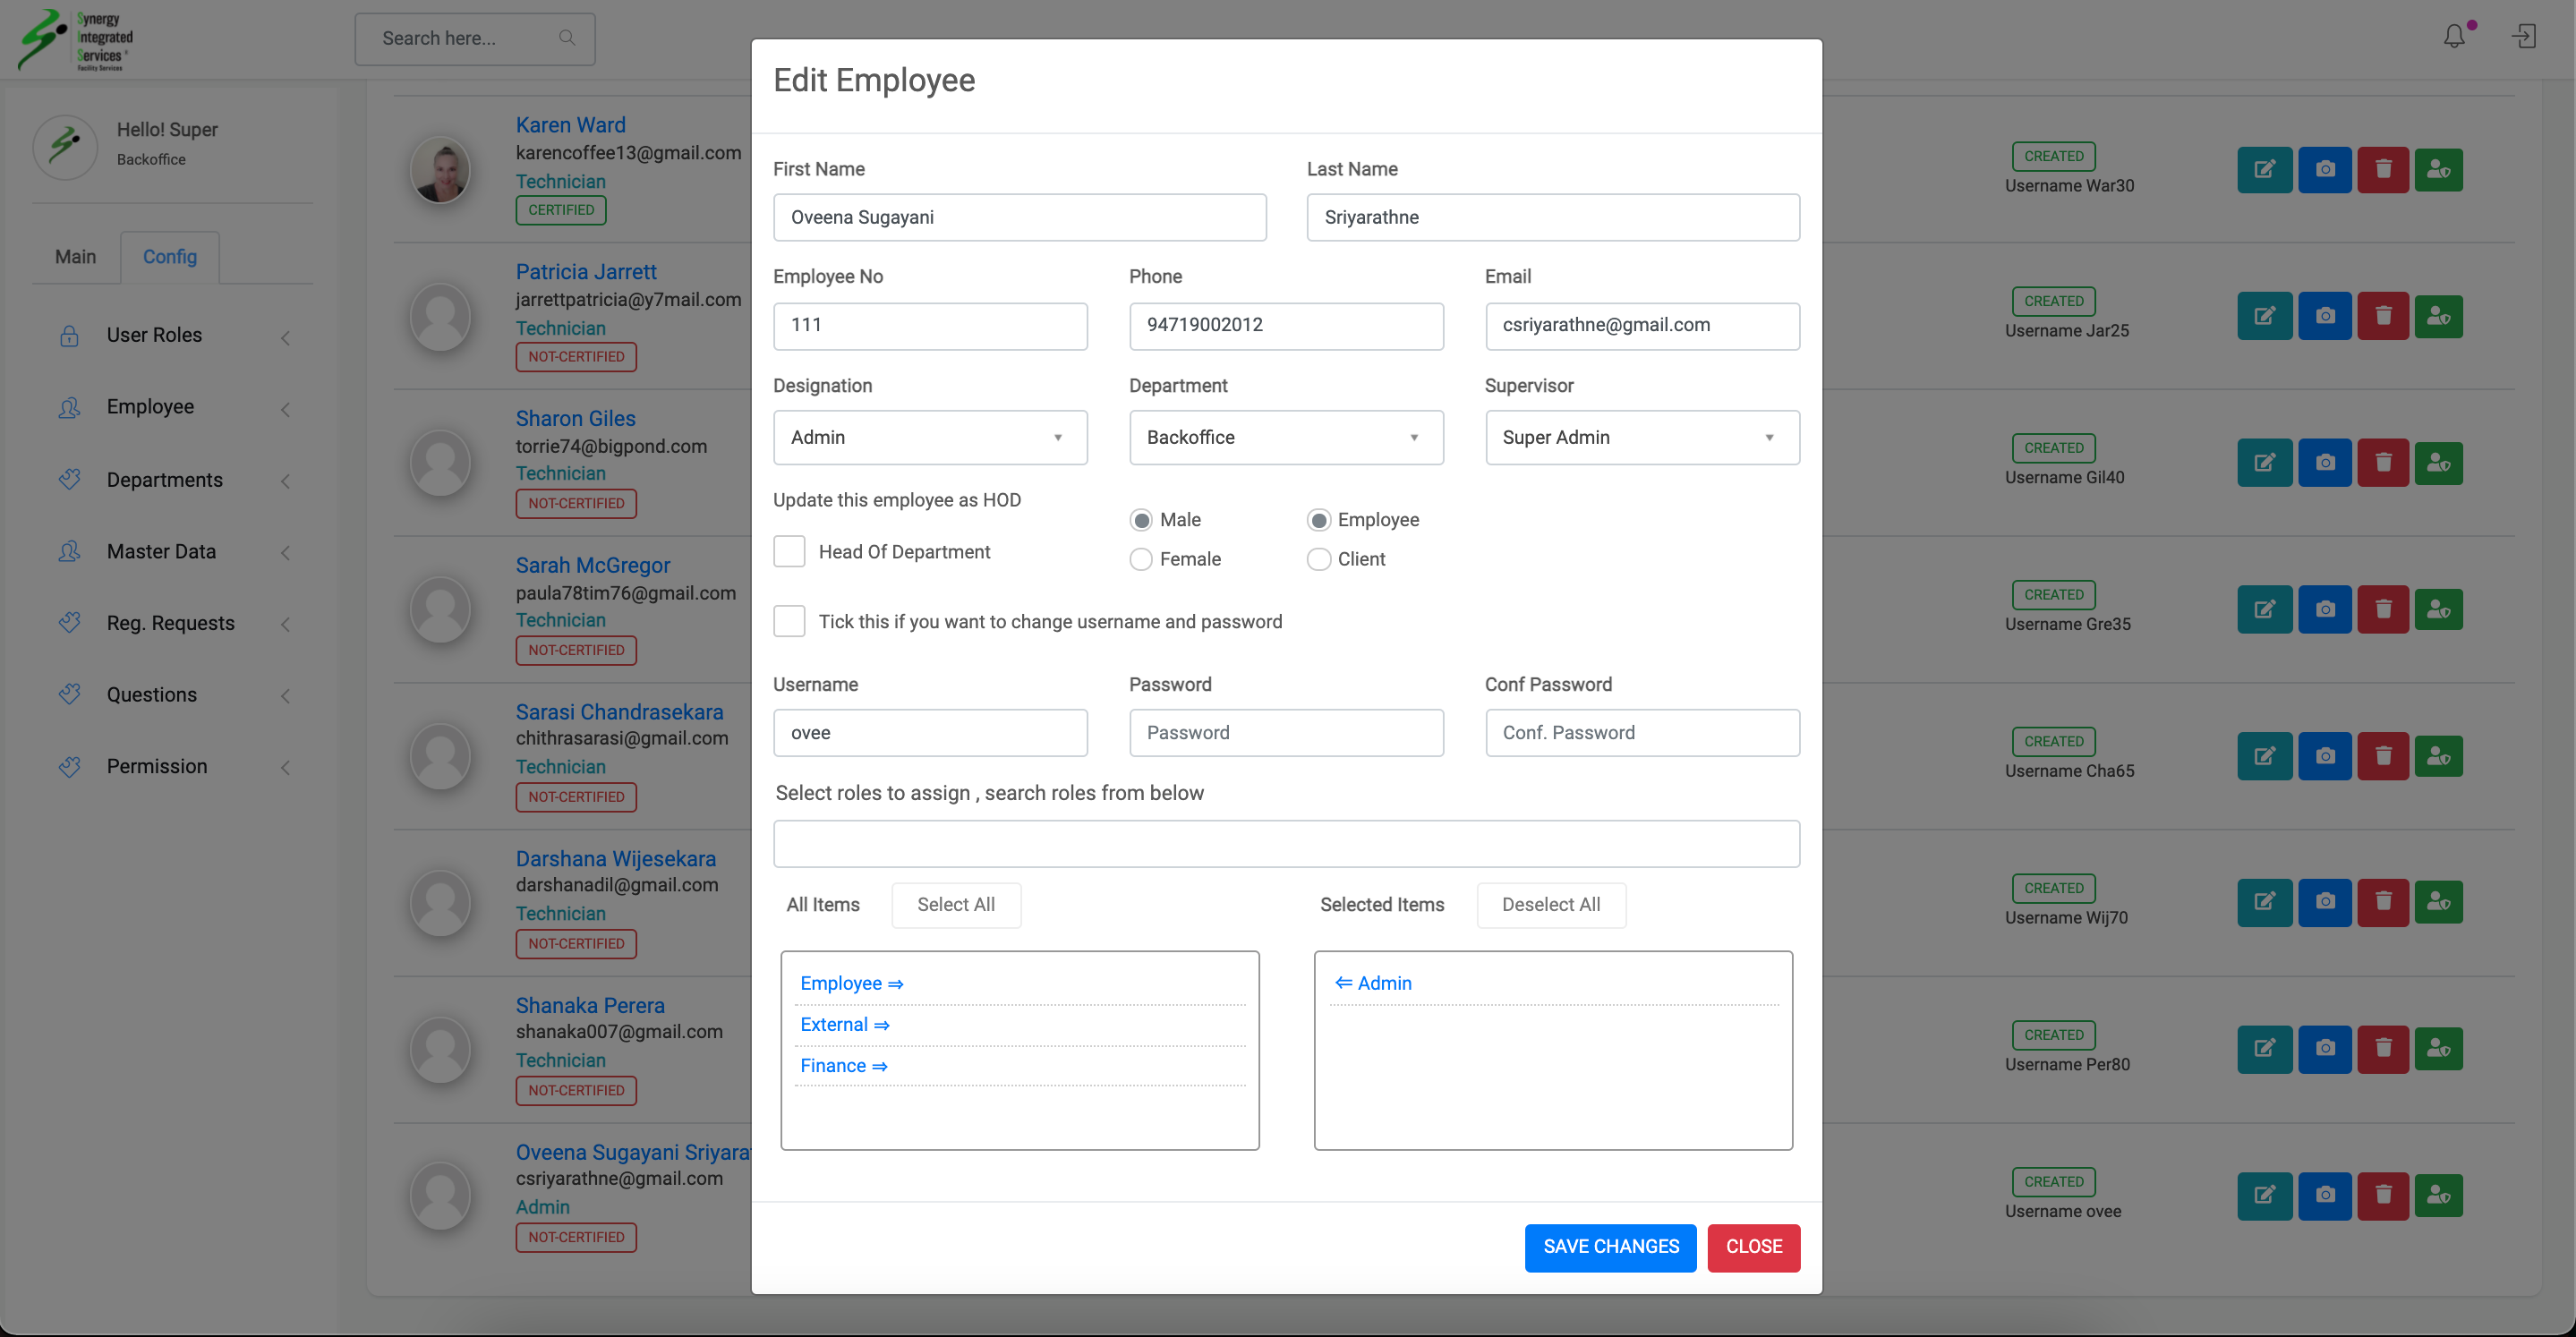
Edit Employee Data
1. Open any web browser
Go to sisfs.com.au/admin
2. Log into the System
3. Navigate to Config > Employee > Employee List
4. Click on edit icon - Edit Pop up will appear
5. Edit the data in pop-up
6. Click on Save Changes - Save data
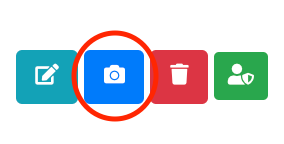
Change employee profile image
1. Open any web browser
Go to sisfs.com.au/admin
2. Log into the System
3. Navigate to Config > Employee > Employee List
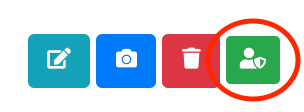
4. Click on camera icon - Image upload Pop up will appear
5. Select the image
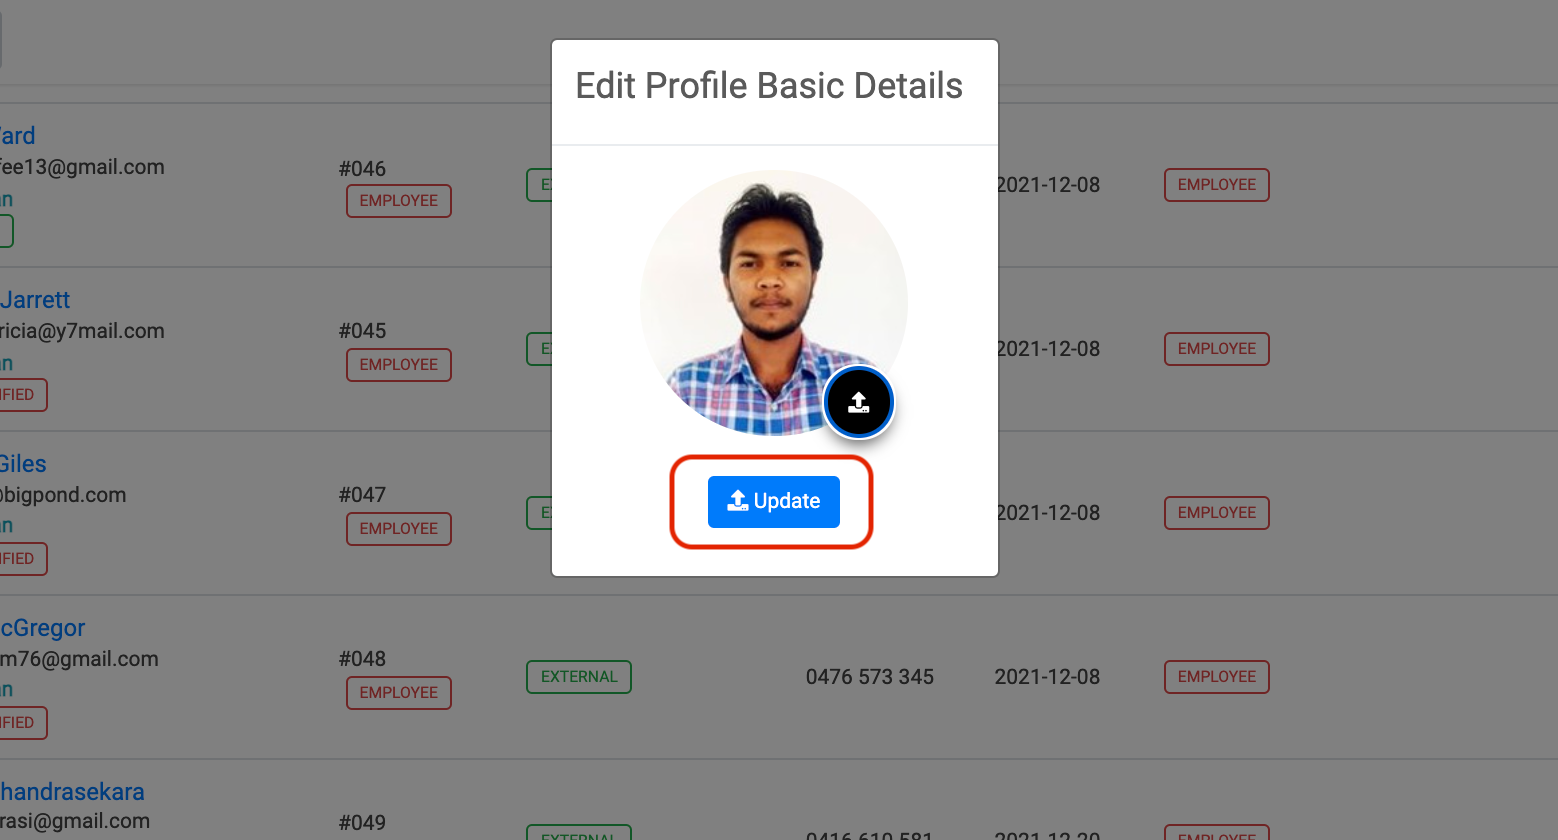
6. Click on Update Button
Step 1
Step 2
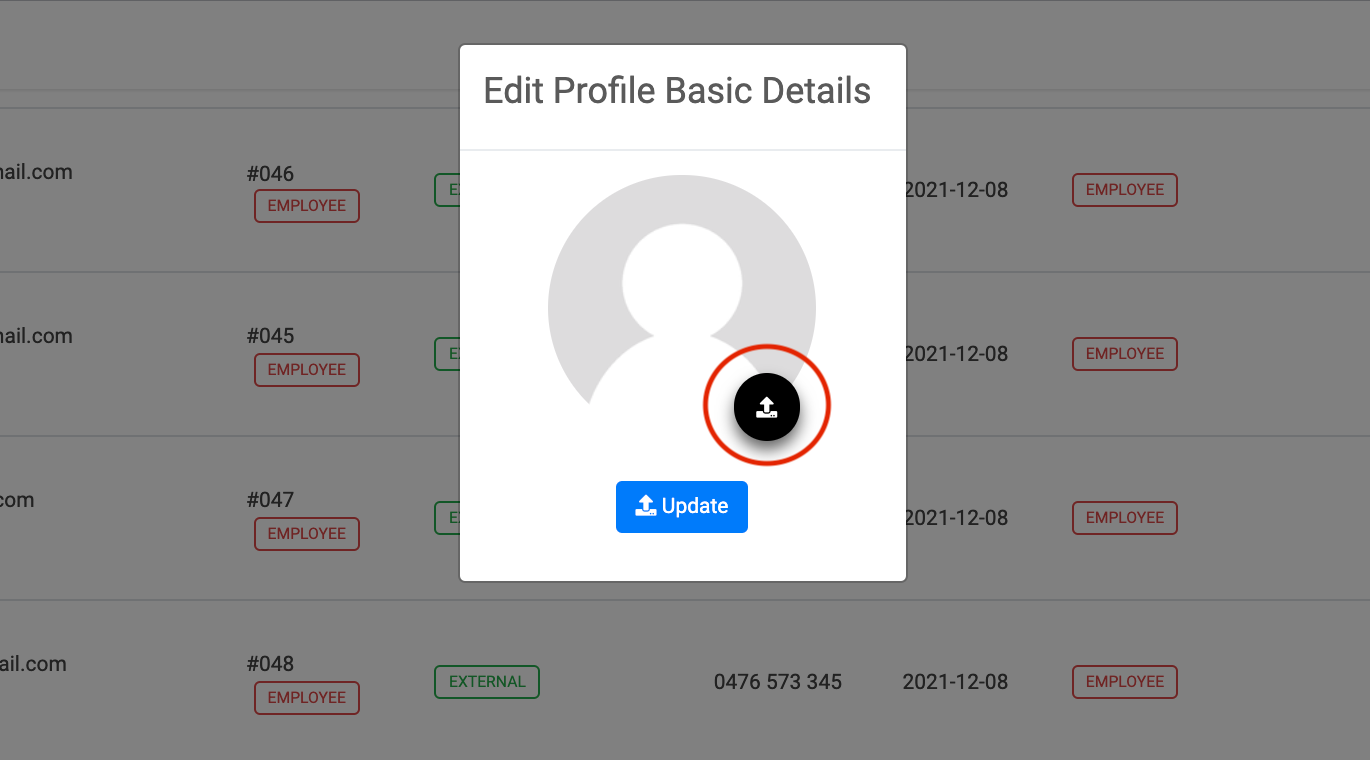
Step 3
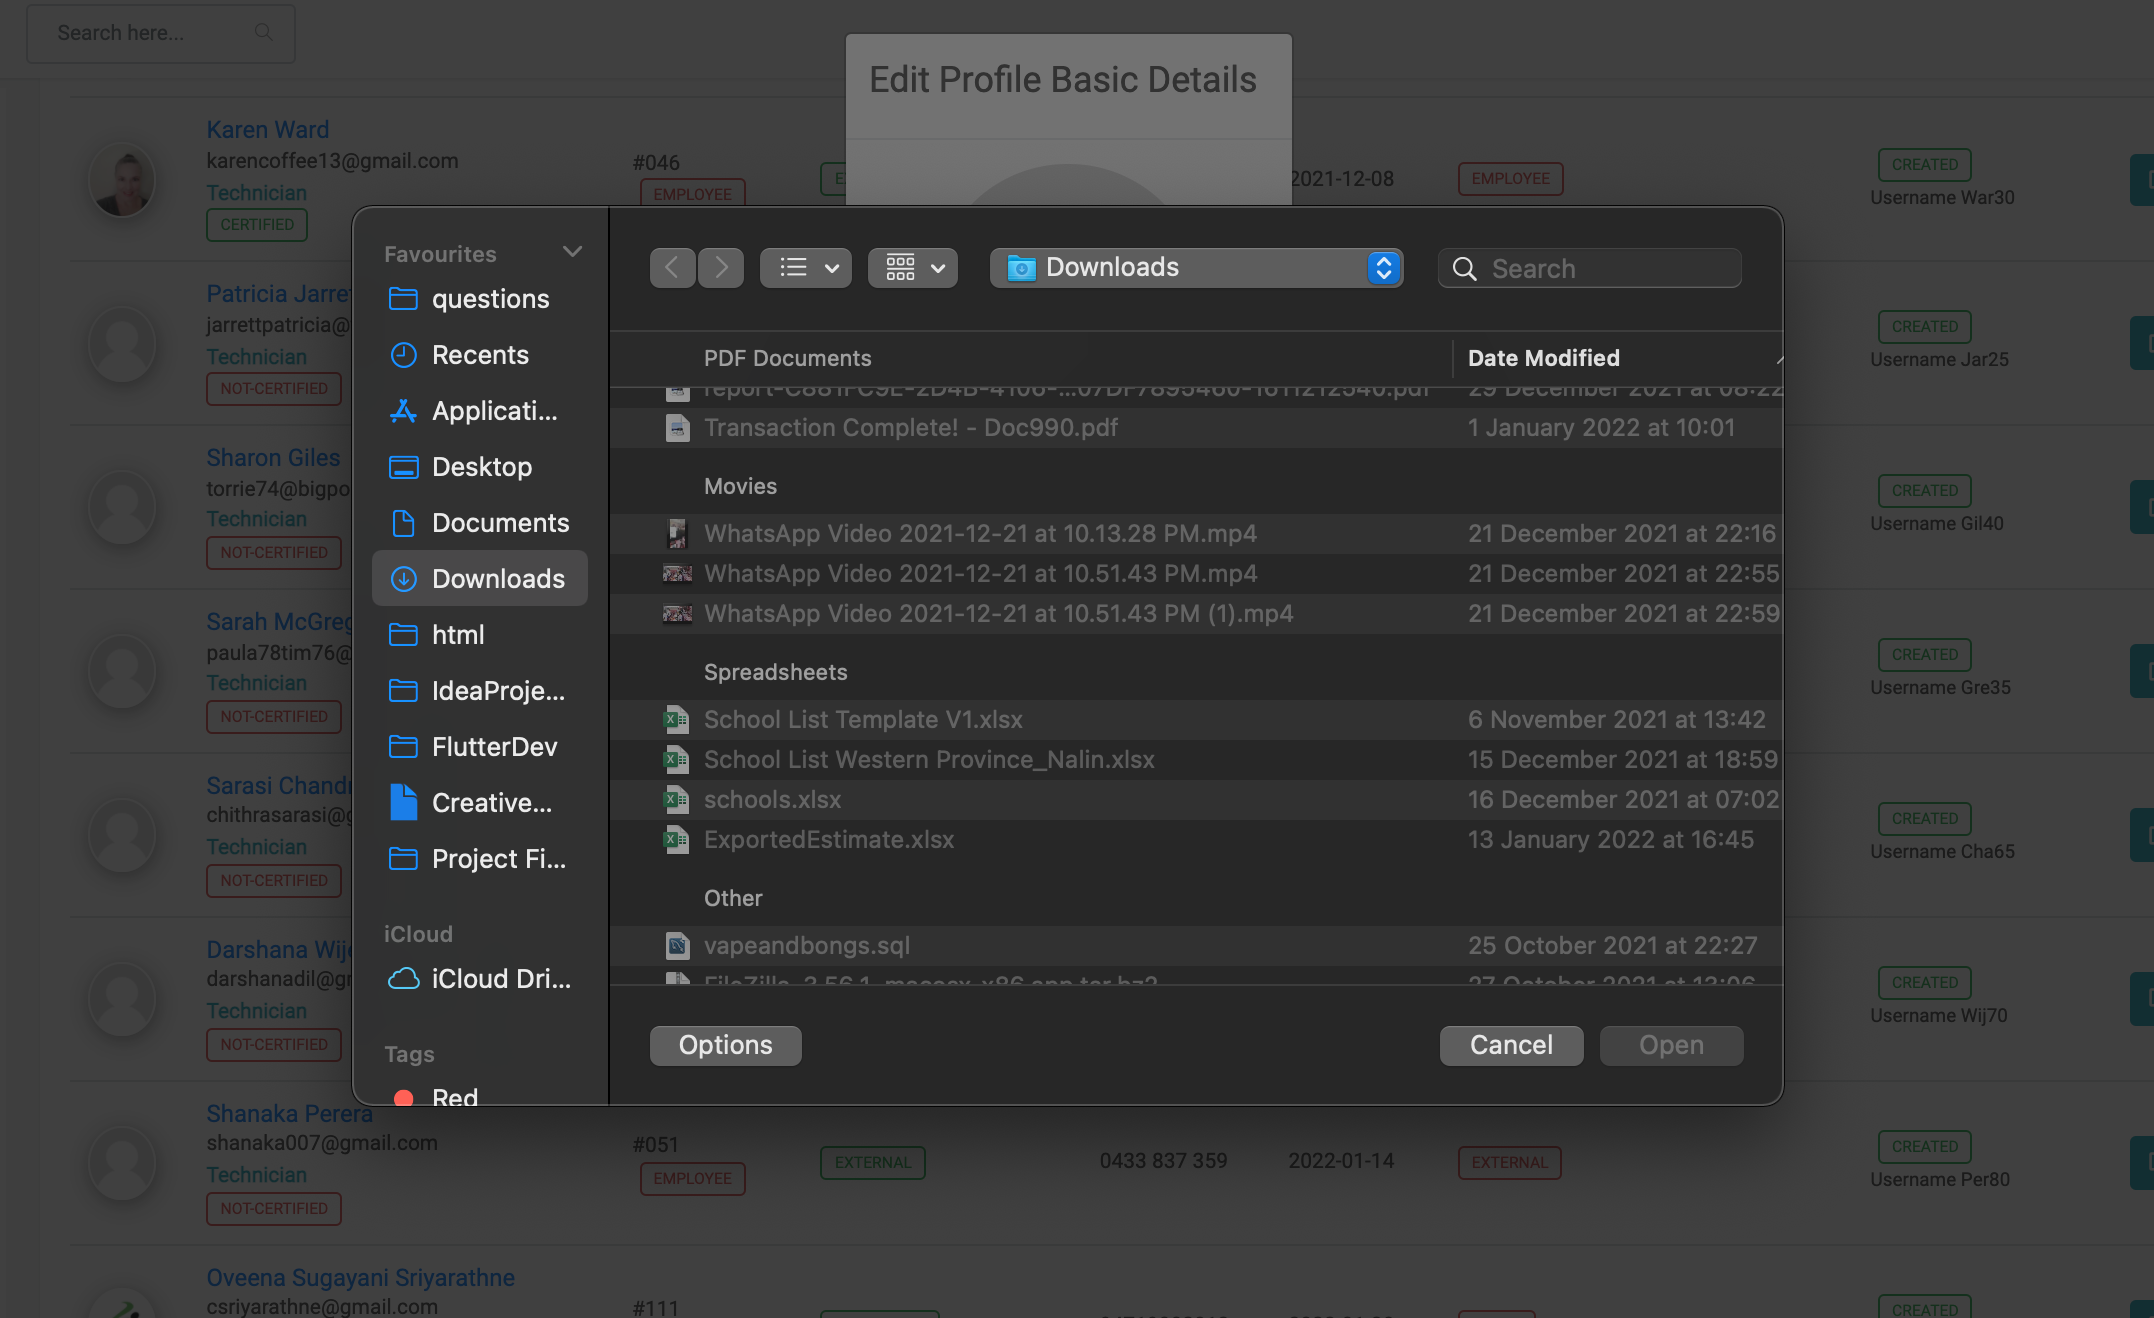
Step 4
Reset employee password
1. Open any web browser
Go to sisfs.com.au/admin
2. Log into the System
3. Navigate to Config > Employee > Employee List
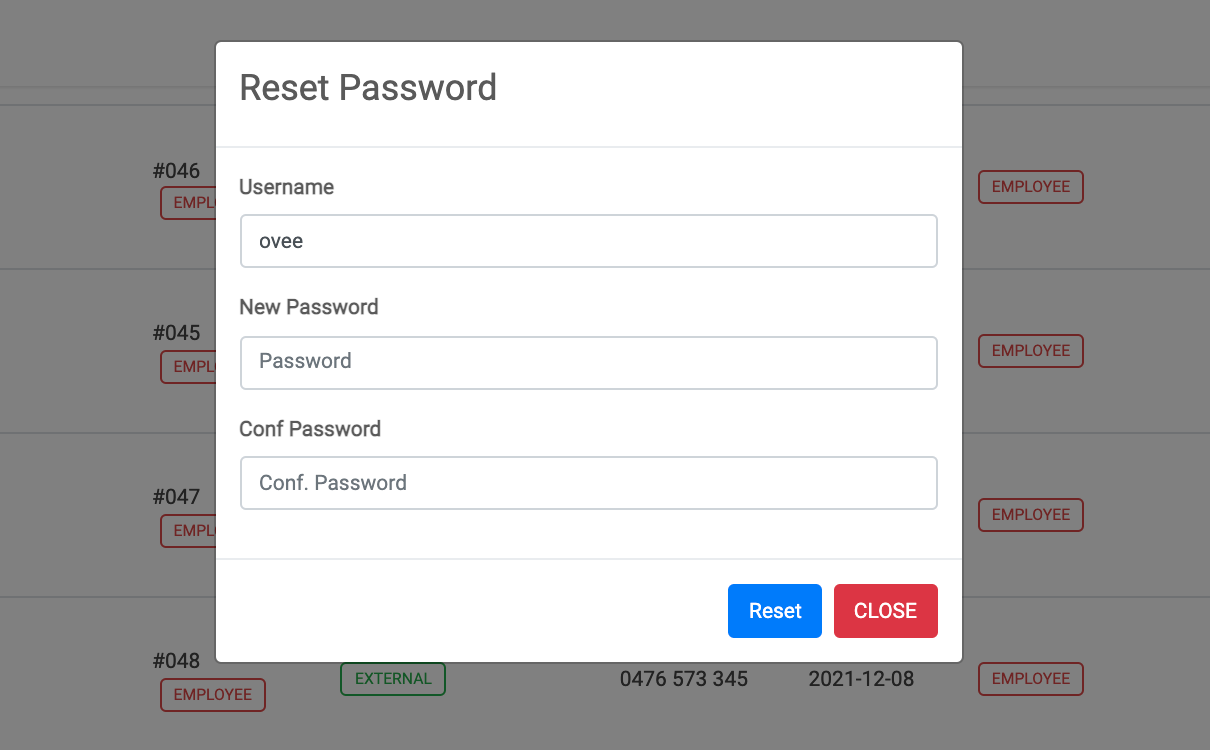
4. Click on user shield icon - Password reset Pop up will appear
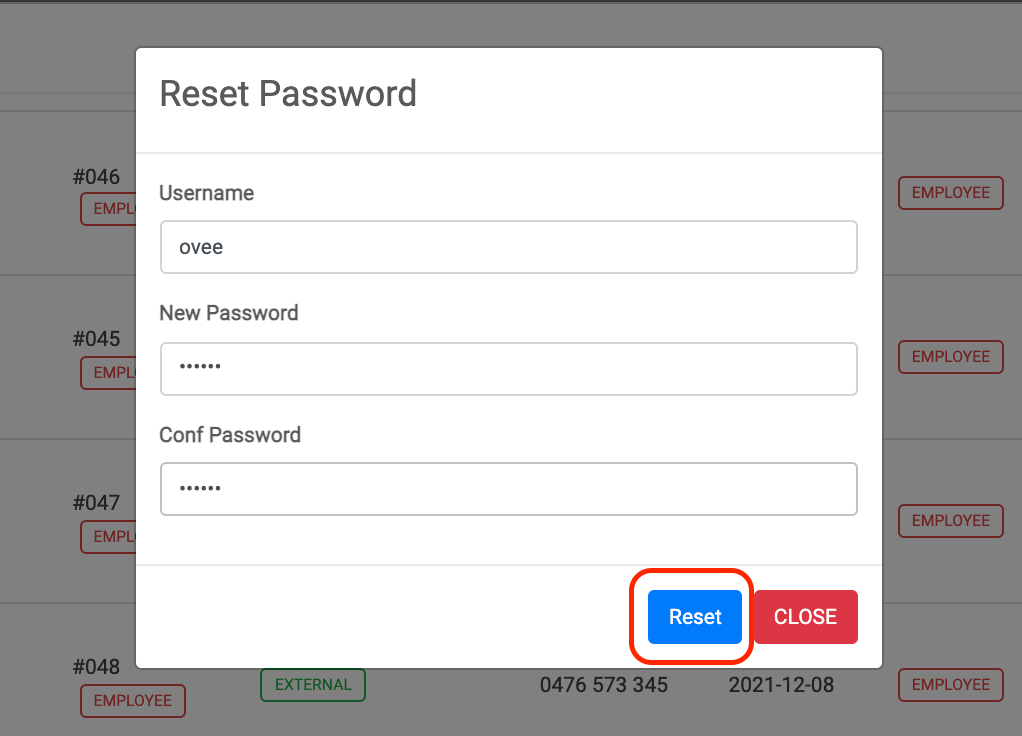
5. Enter new password and confirm password
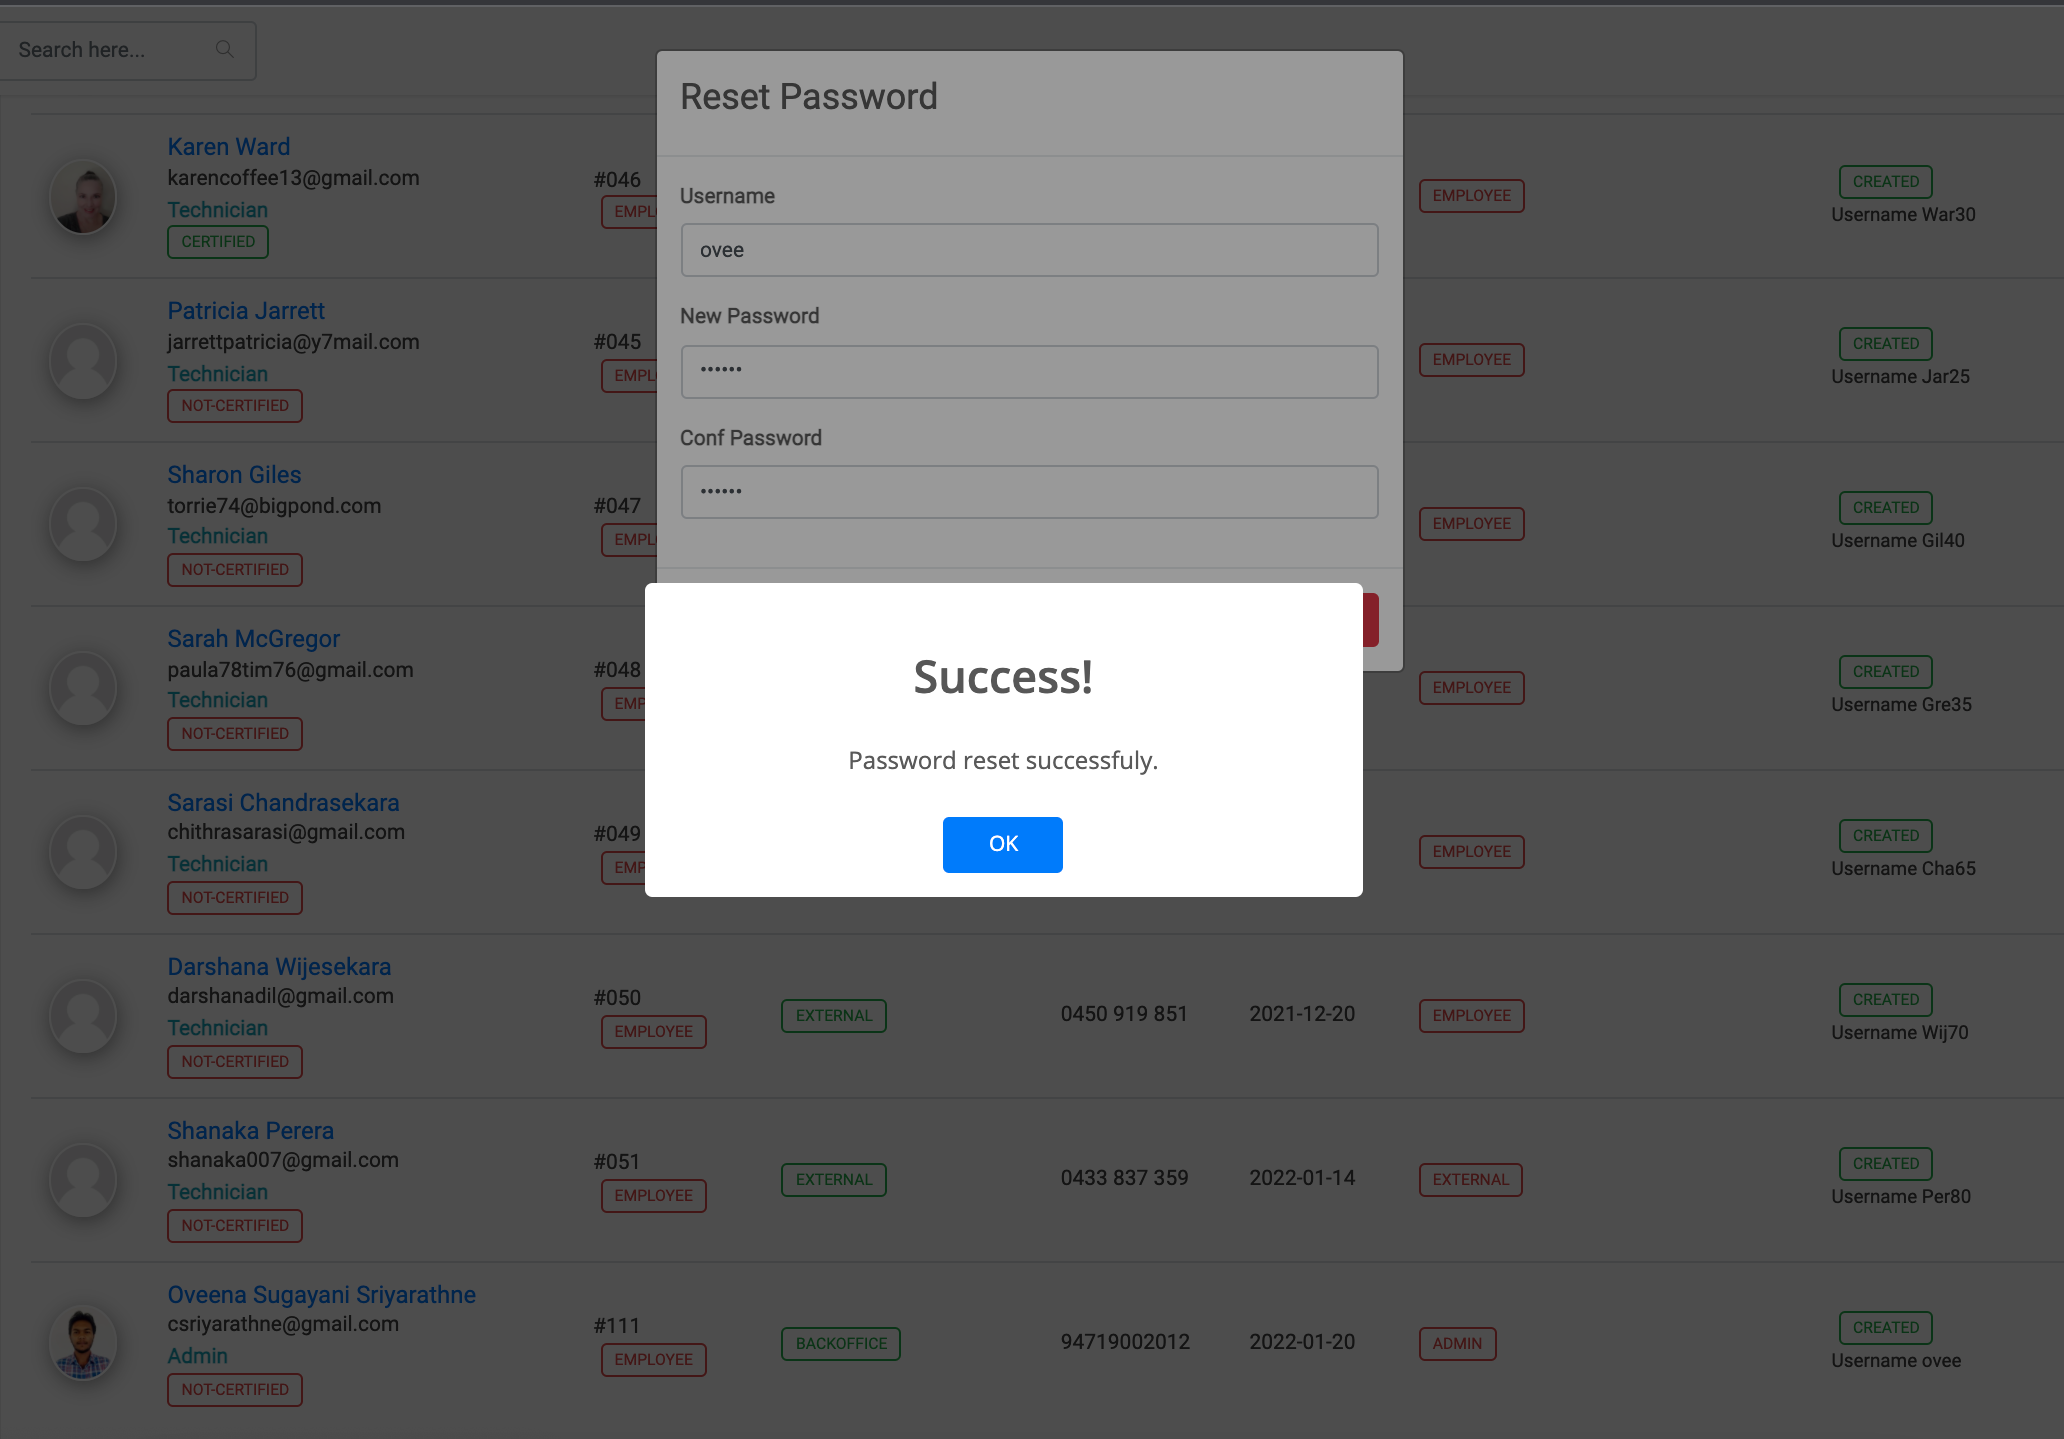
6. Click on Reset Button
Step 1
Step 2
Step 3
Step 4
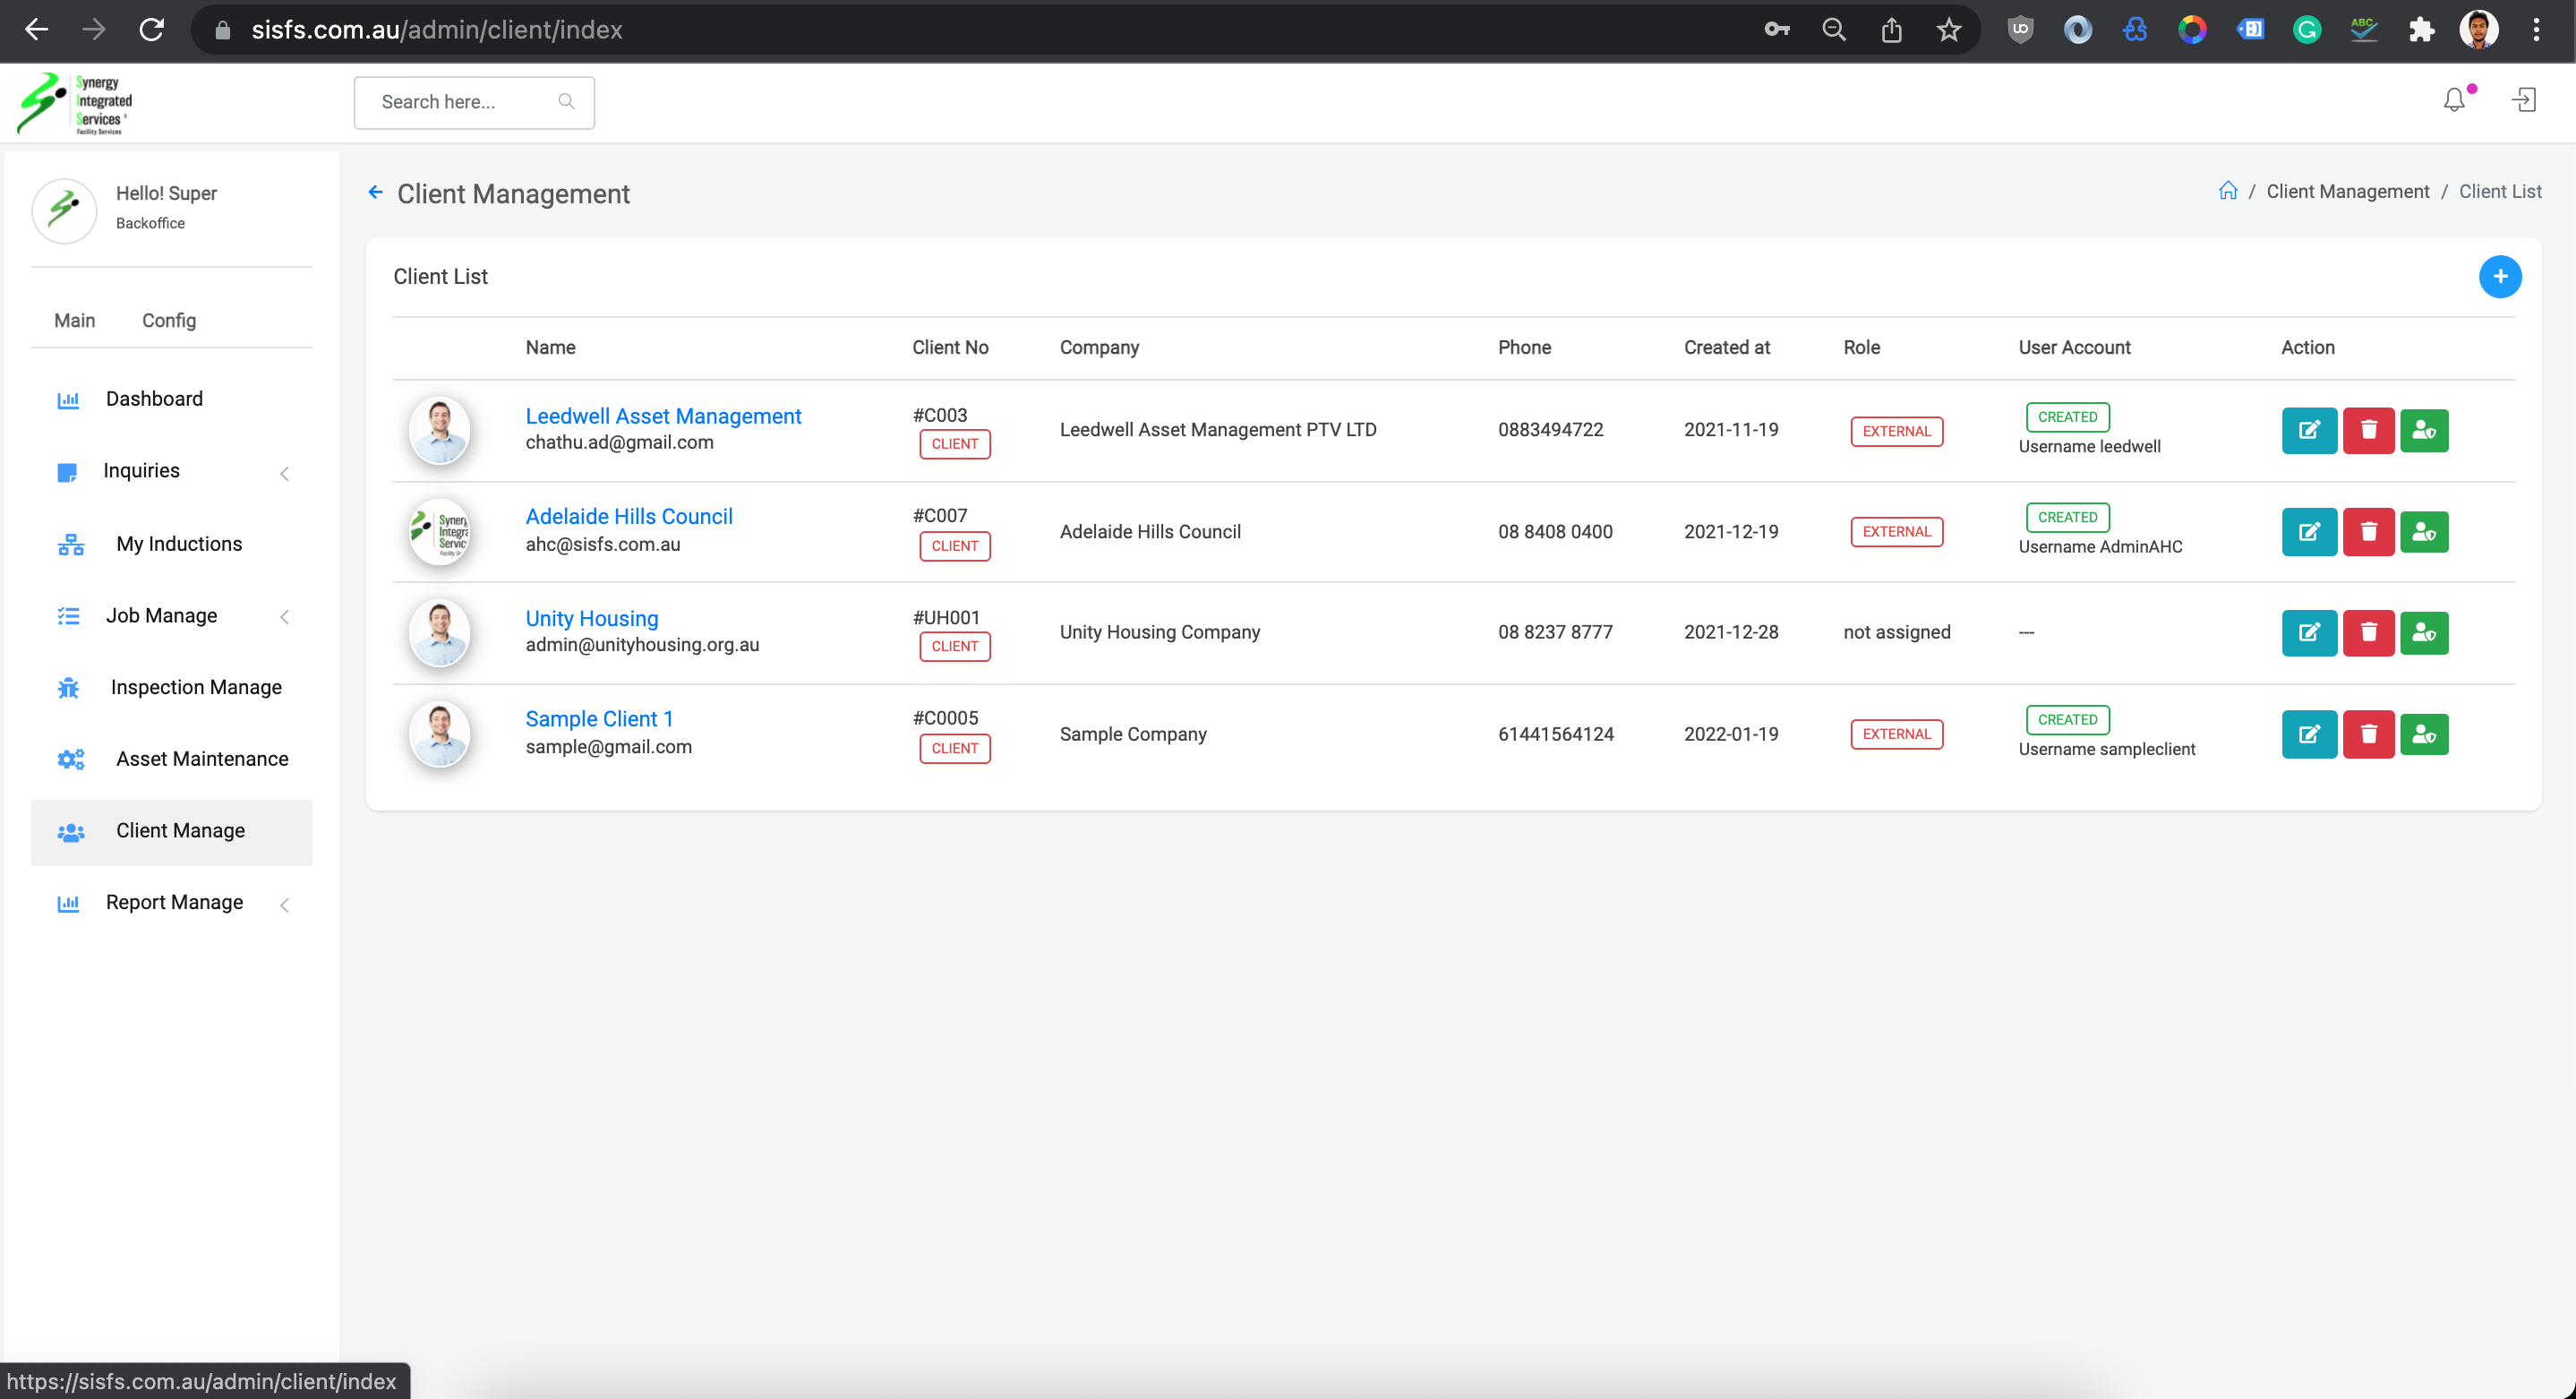
Client List
1. Open any web browser
Go to sisfs.com.au/admin
2. Log into the System
3. Navigate to Main > Client Manage
Create Client
1. Open any web browser
Go to sisfs.com.au/admin
2. Log into the System
3. Navigate to Main > Client Manage
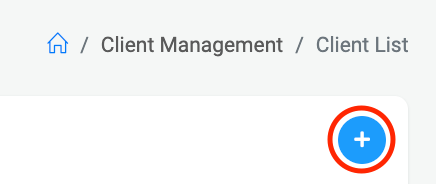
4. Click on blue color round plus icon - New client Pop up will appear
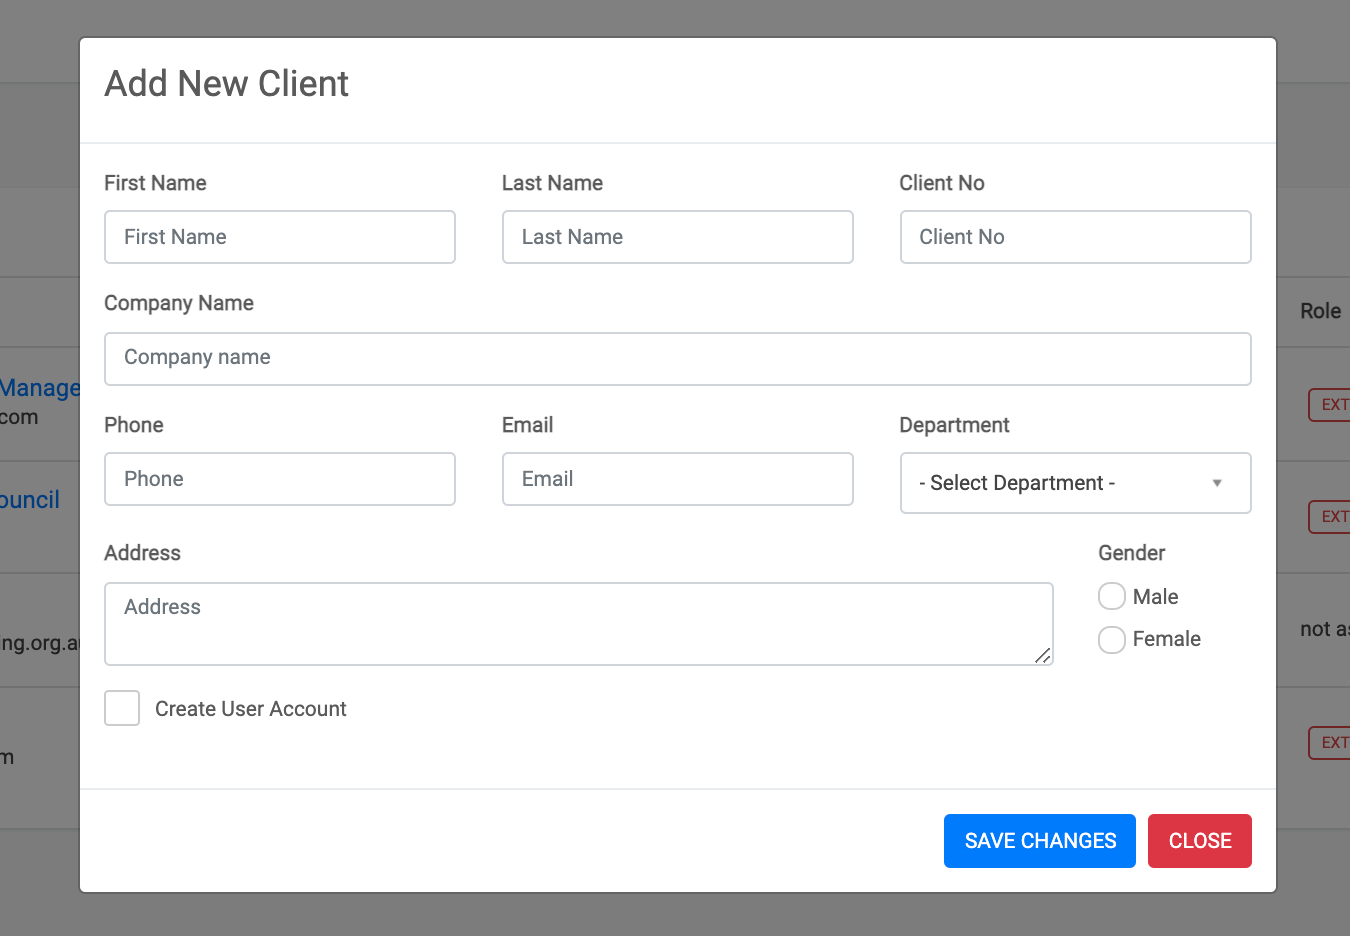
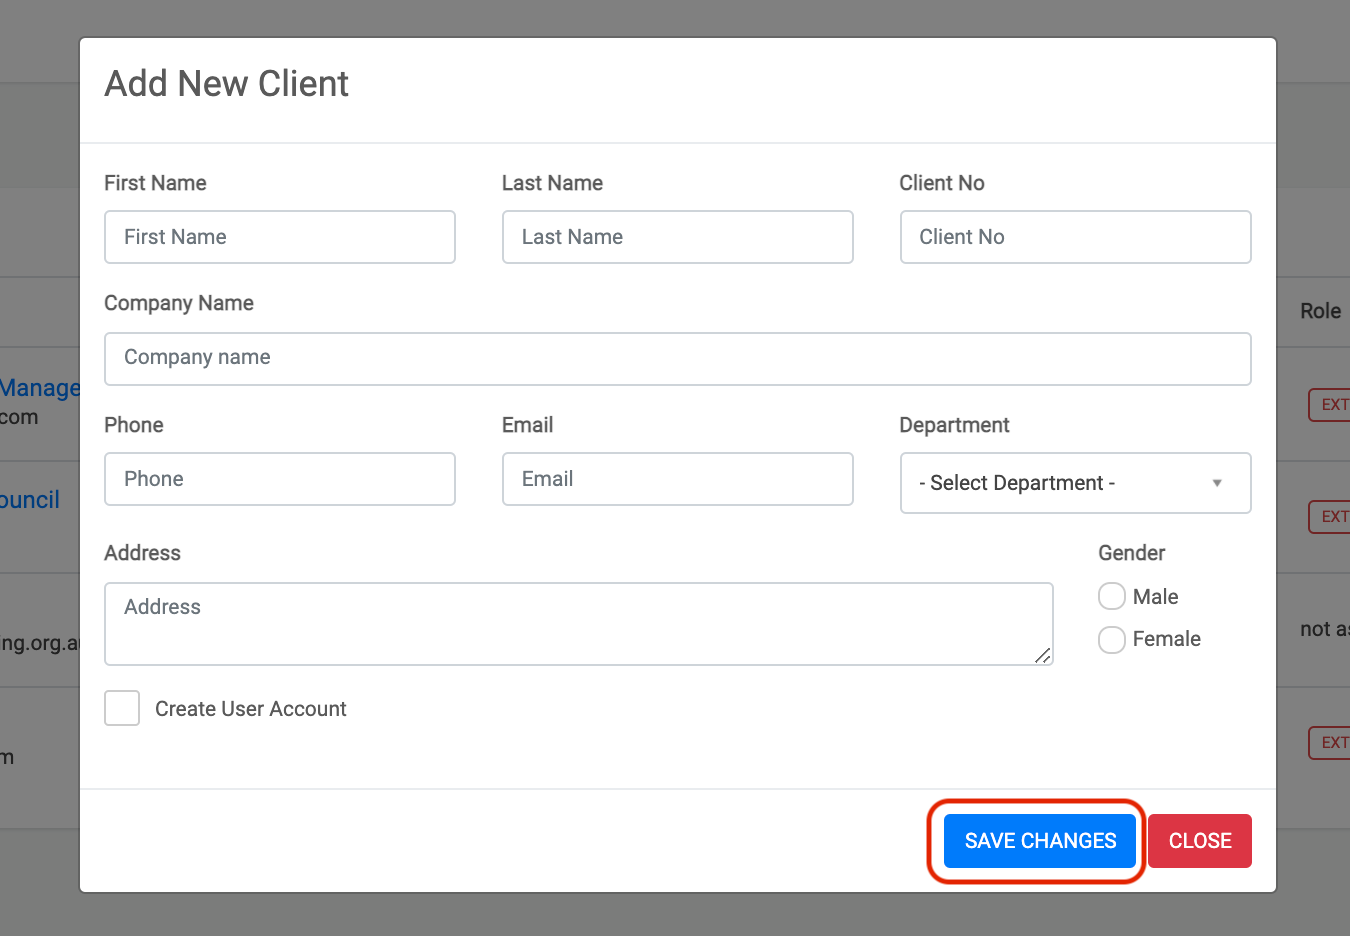
5. Enter the client details
6. Click on Save Button
Step 1
Step 2
Step 3
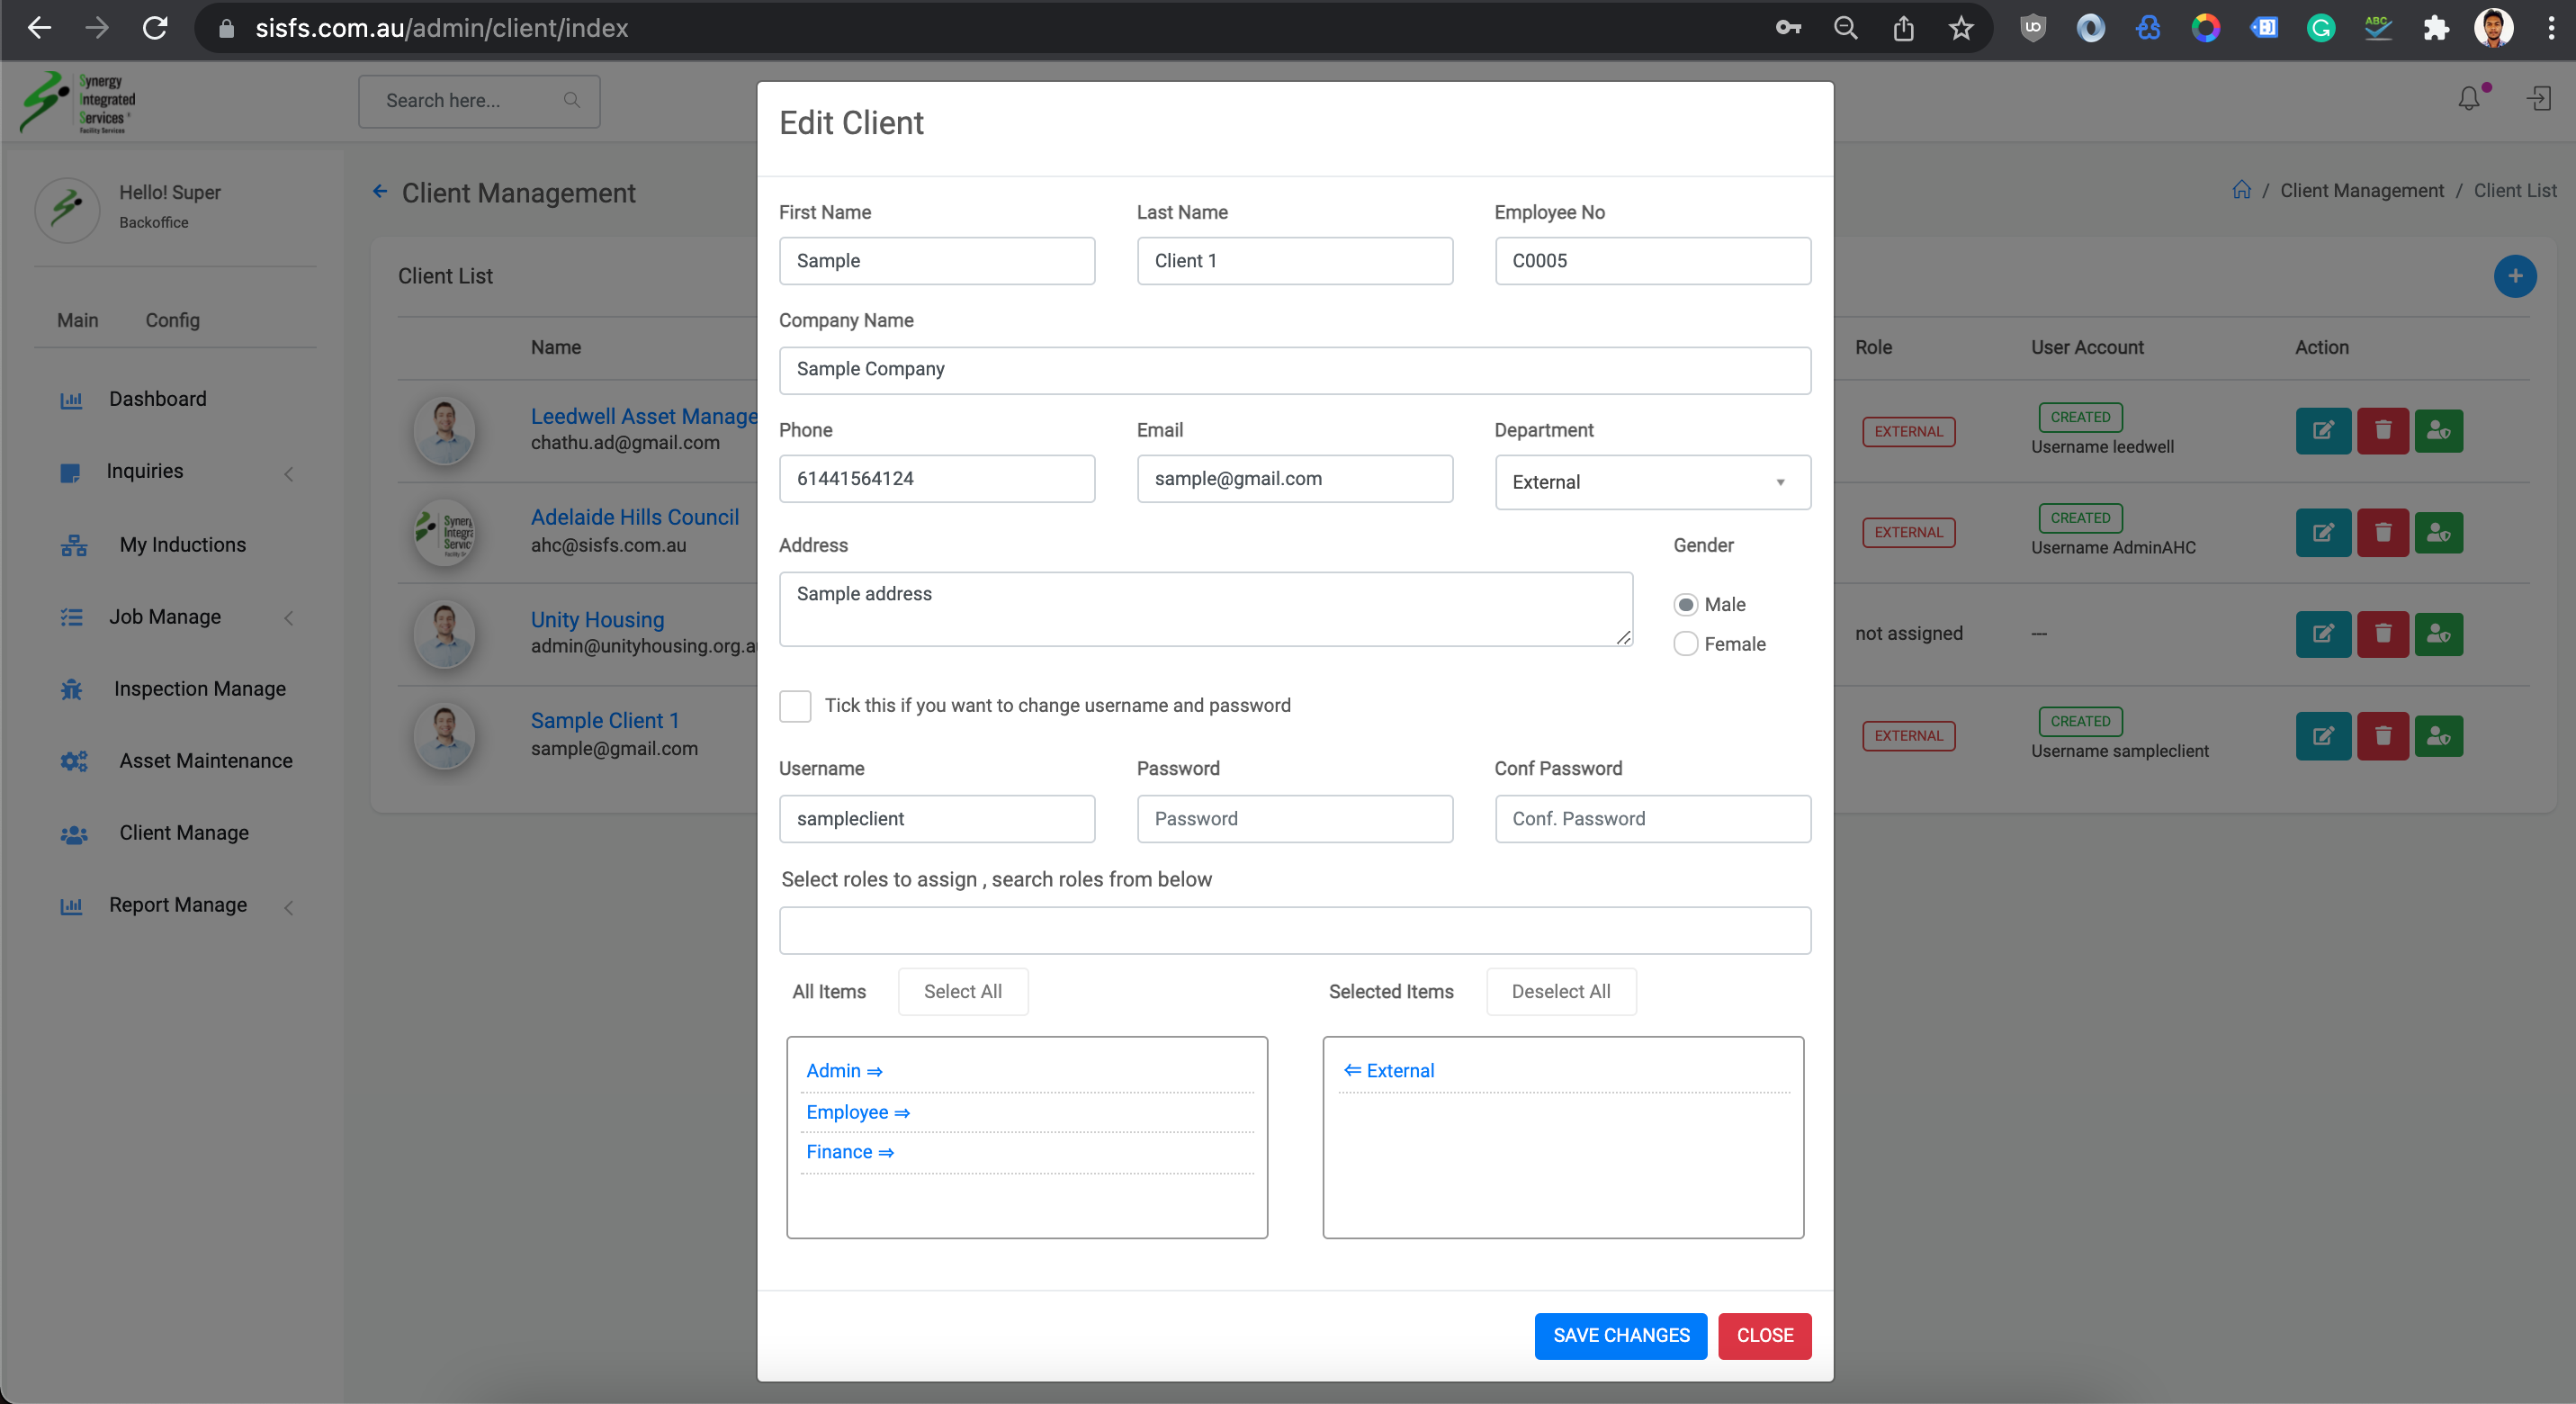
Edit client data
1. Open any web browser
Go to sisfs.com.au/admin
2. Log into the System
3. Navigate to Main > Client Manage
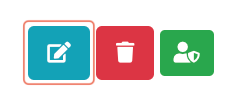
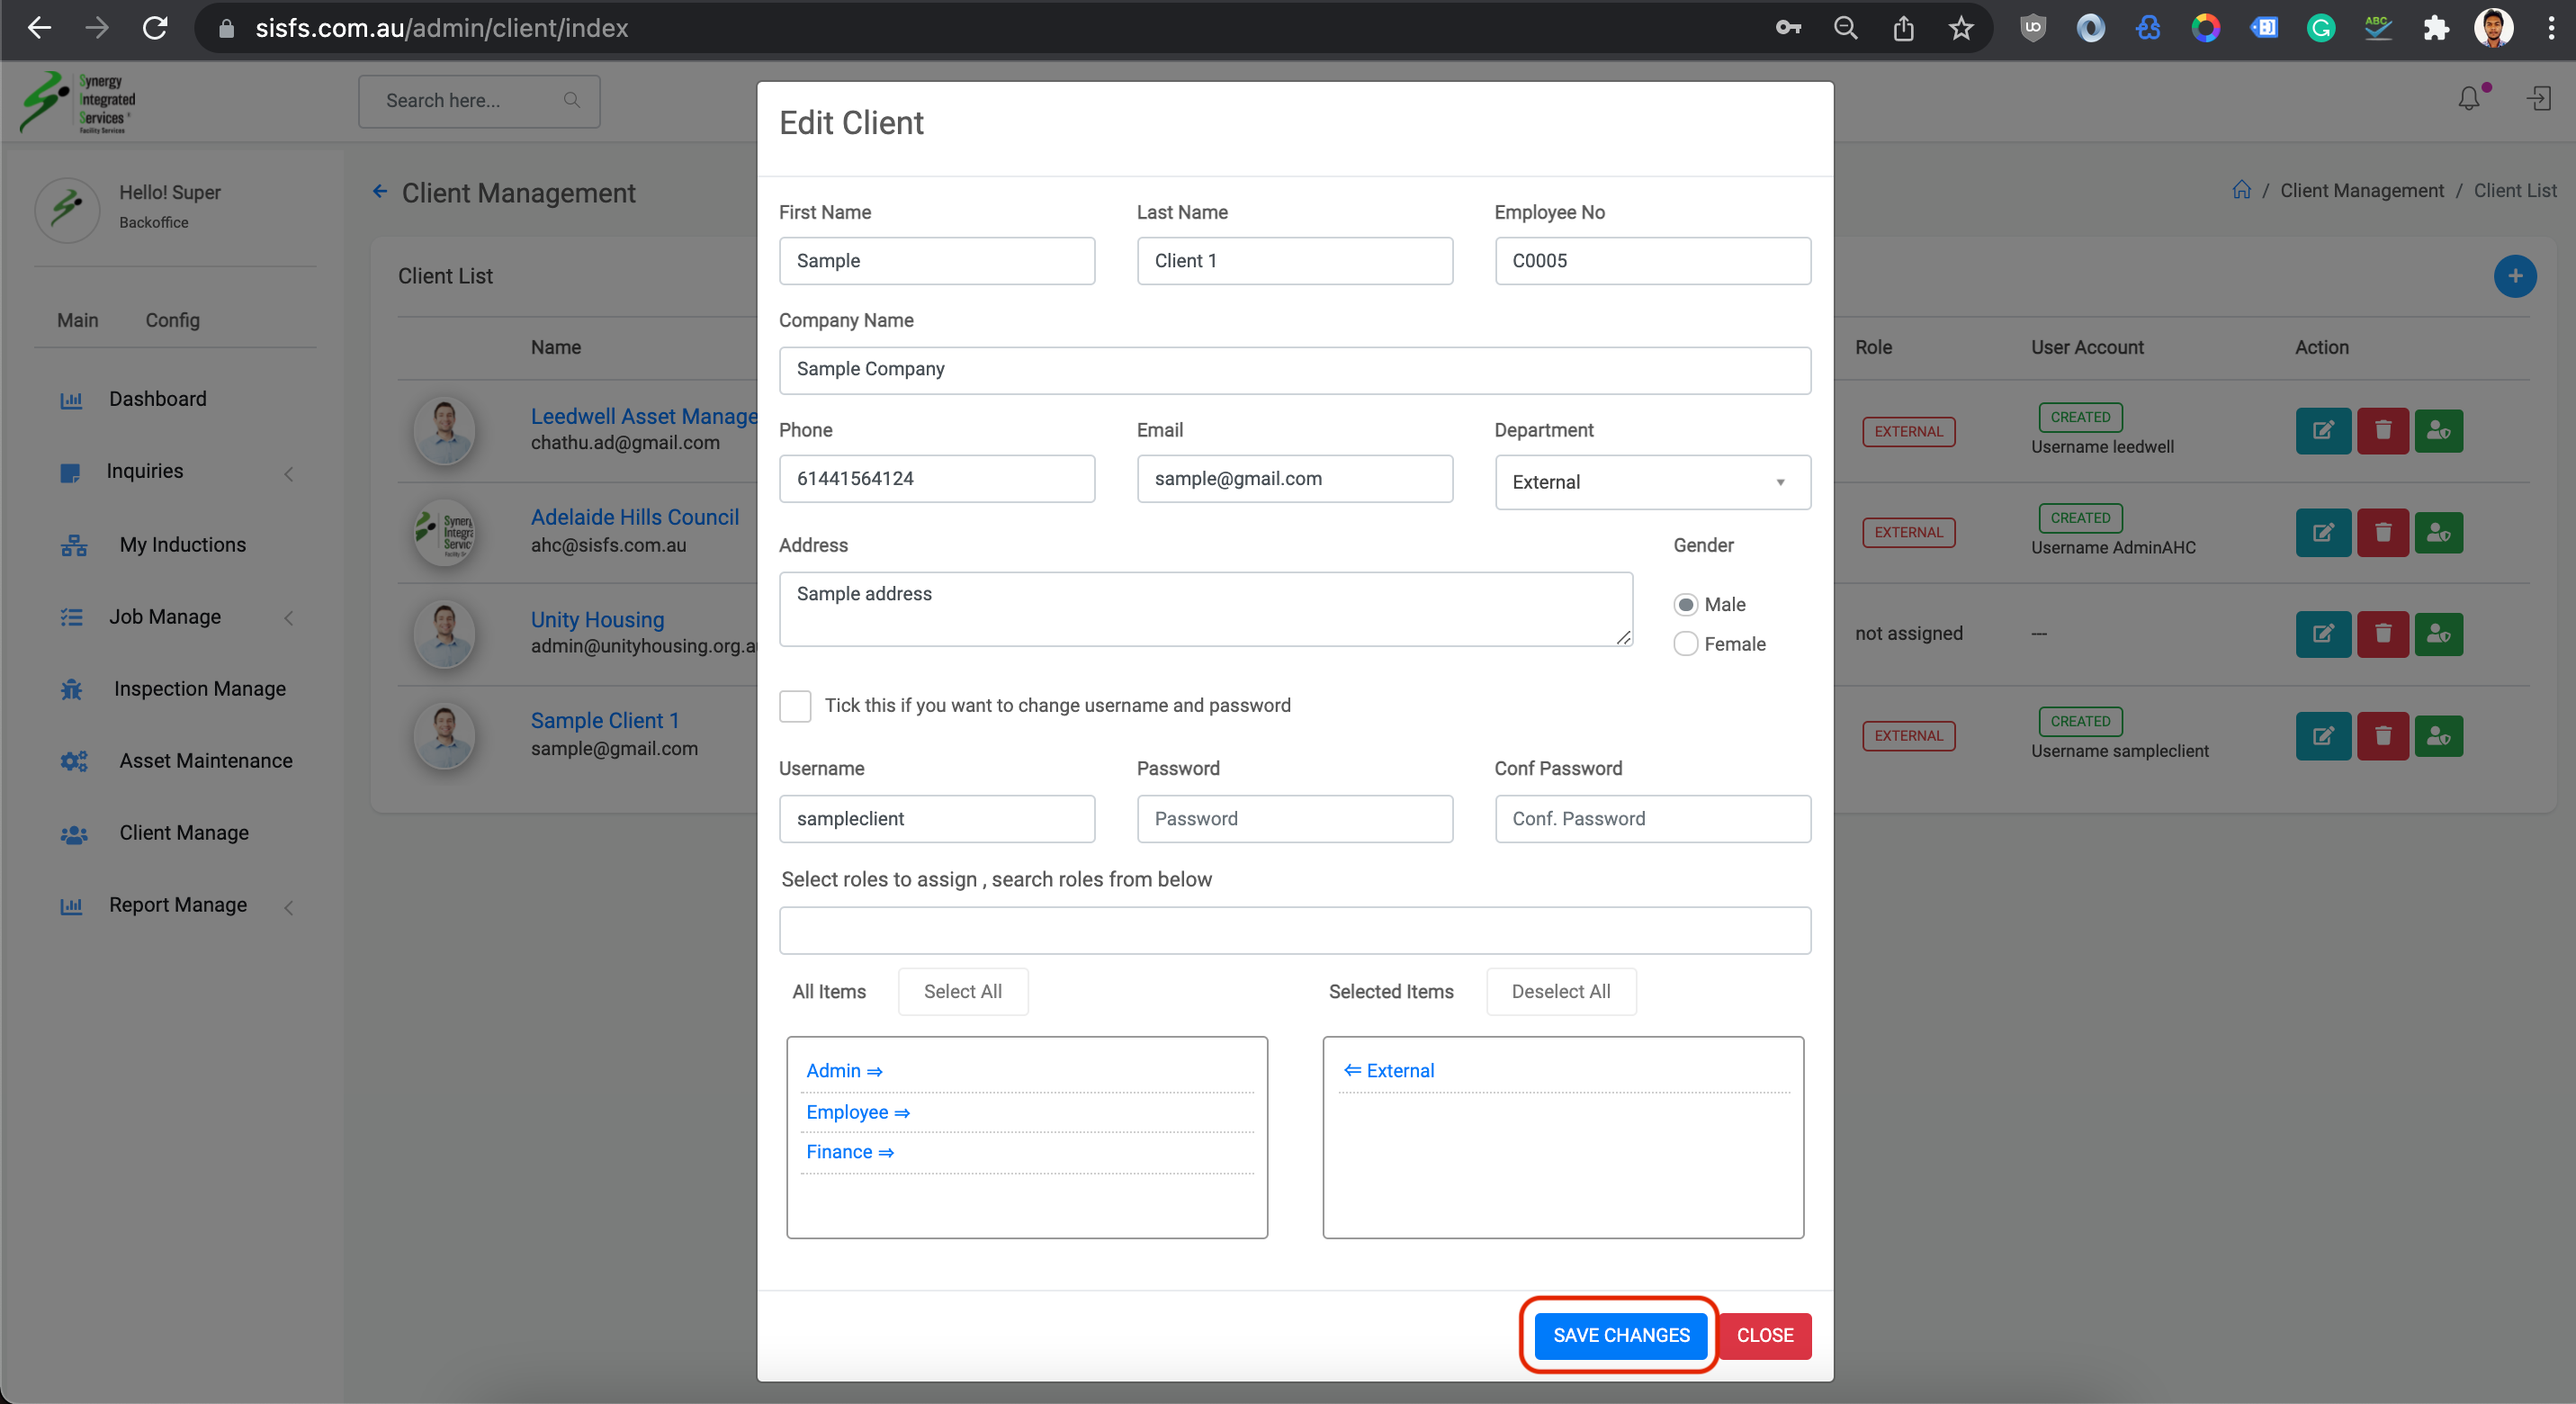
4. Click on edit icon - Edit client Pop up will appear
5. Enter the client details
6. Click on Save Button
Step 1
Step 2
Step 3
Reset client password
1. Open any web browser
Go to sisfs.com.au/admin
2. Log into the System
3. Navigate to Main > Client Manage
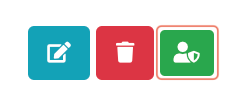
4. Click on User Shield icon - Password reset pop up will appear
5. Enter the new password
6. Click on Reset Button
Step 1
Step 2
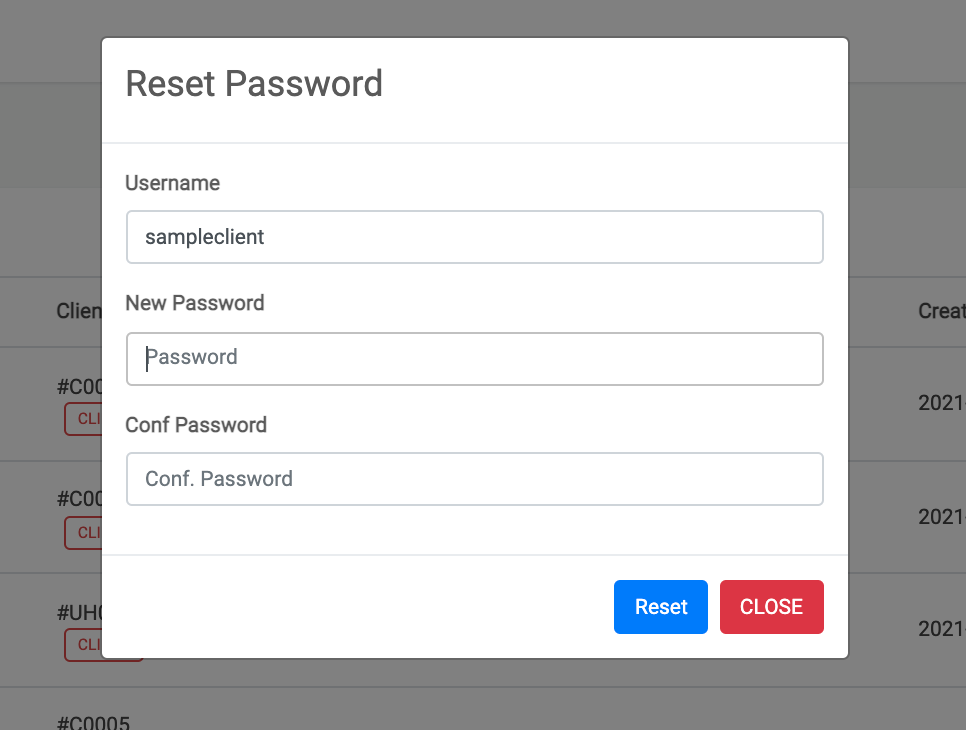
Step 3

Master Section, Task list
1. Open any web browser
Go to sisfs.com.au/admin
2. Log into the System
3. Navigate to Main > Job Manage > Master Data

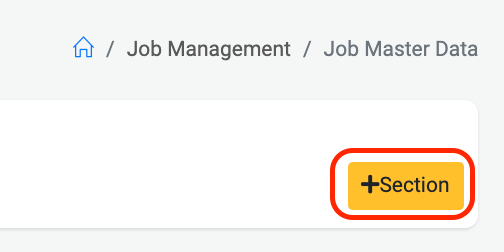
Create Master Section
1. Open any web browser
Go to sisfs.com.au/admin
2. Log into the System
3. Navigate to Main > Job Manage > Master Data
4. Click on + Section button
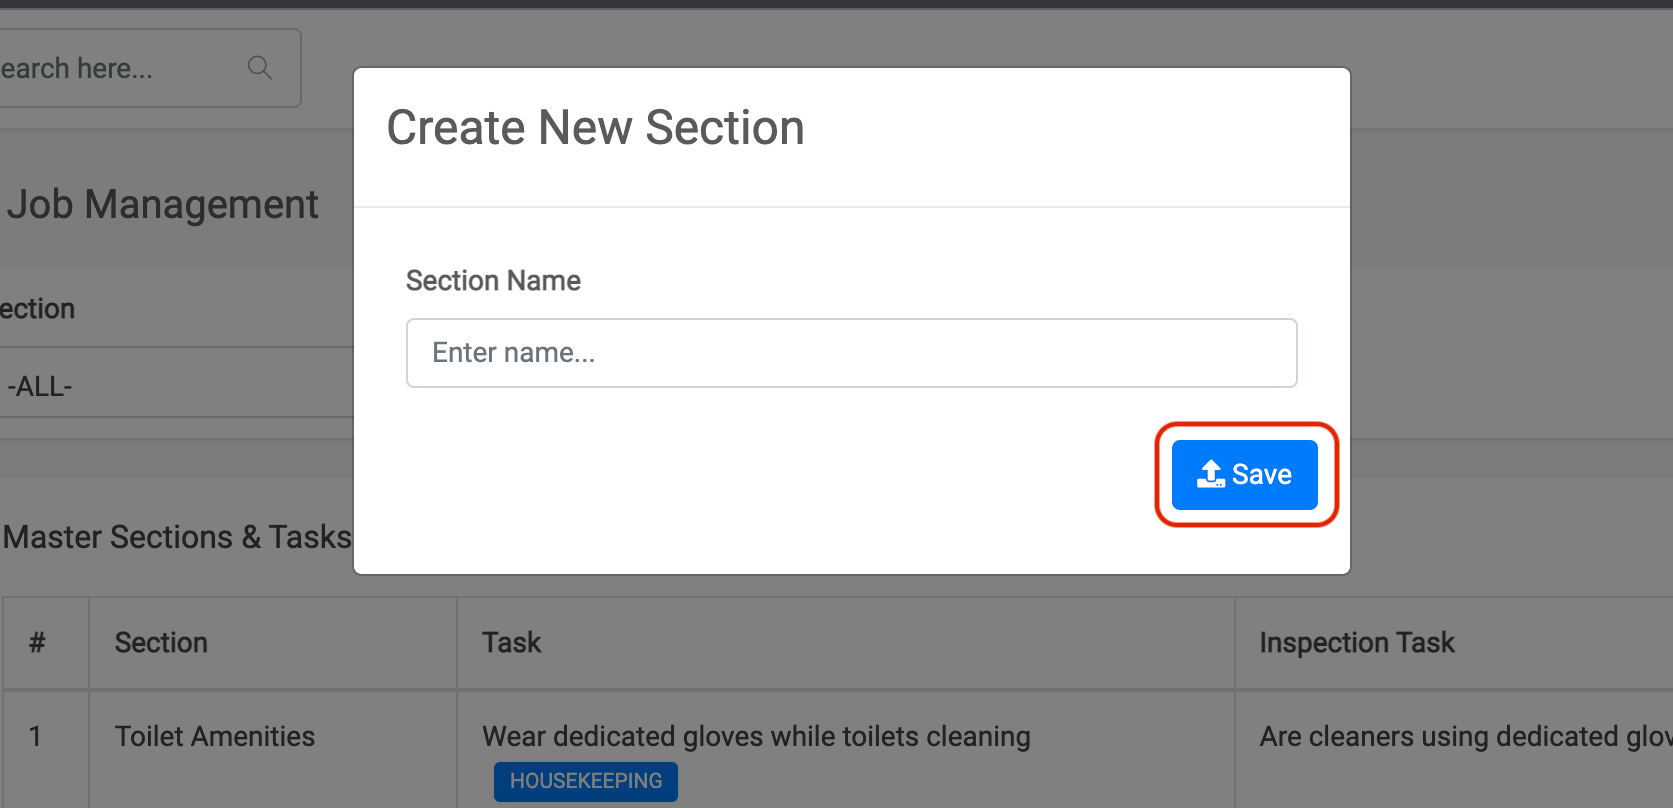
5. Master section create pop up will appear
6. Click on save button
Step 1
Step 2
Create Master Task
1. Open any web browser
Go to sisfs.com.au/admin
2. Log into the System
3. Navigate to Main > Job Manage > Master Data
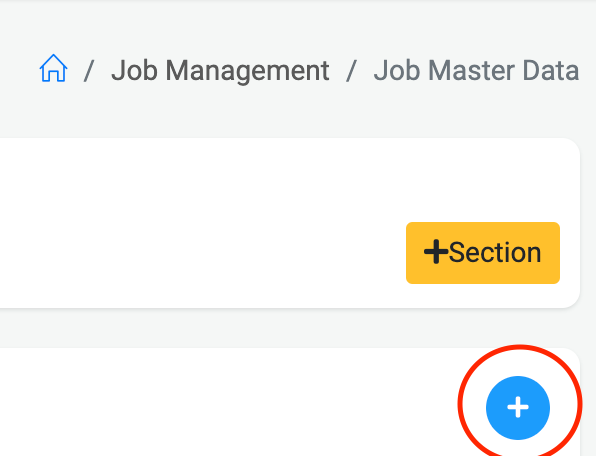
4. Click on + Task button
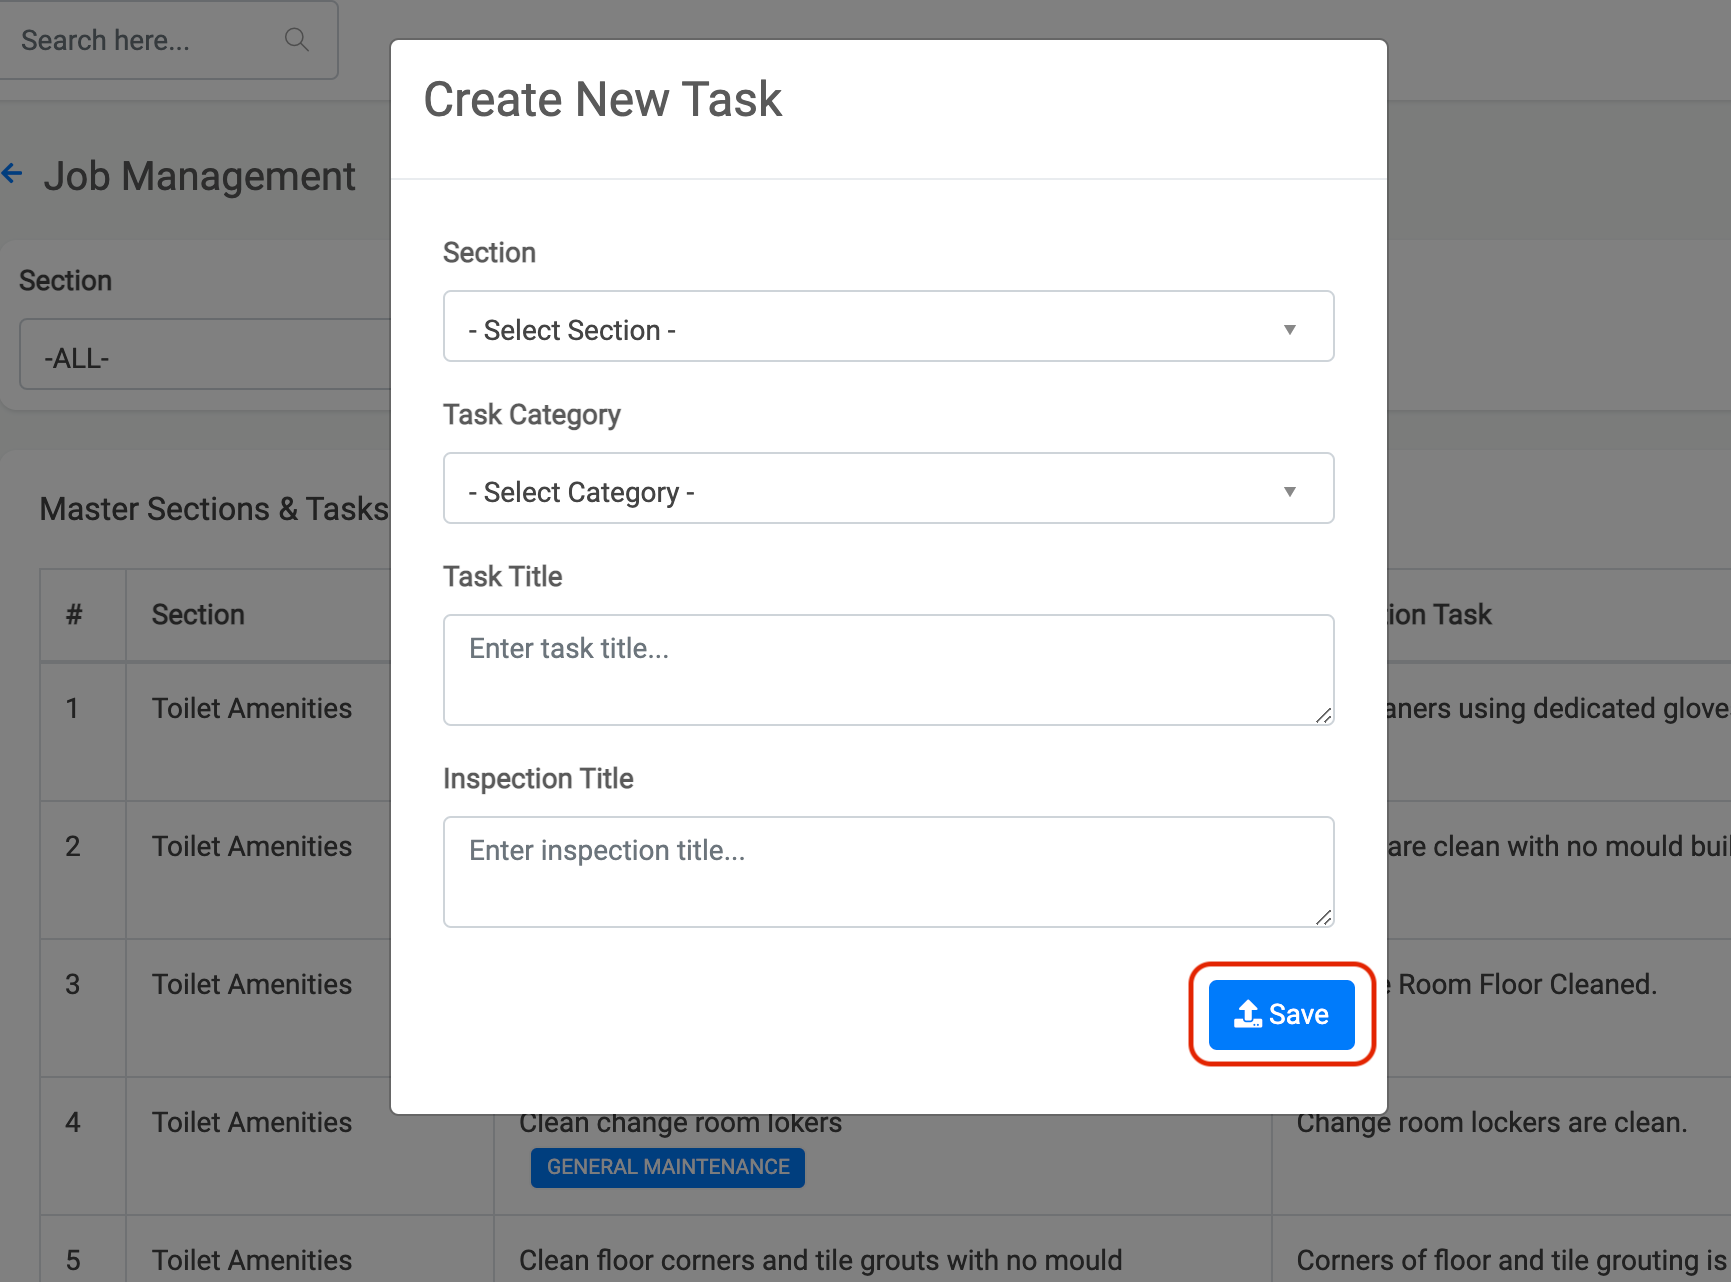
5. Master Task create pop up will appear
6. Click on save button
Step 1
Step 2
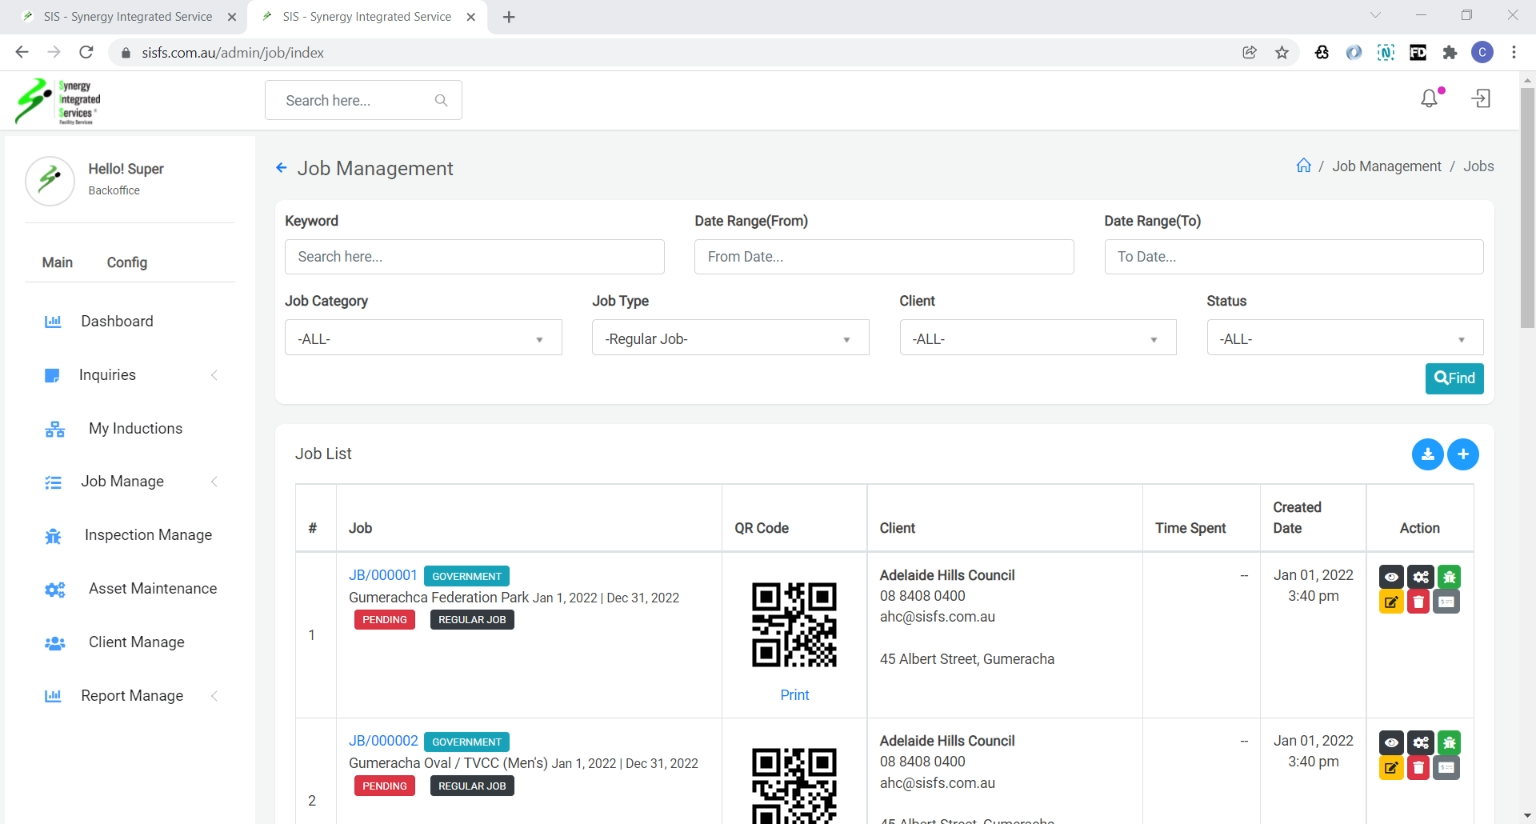
View Job List
1. Open any web browser
Go to sisfs.com.au/admin
2. Log into the System
3. Navigate to Main > Job Manage > Job
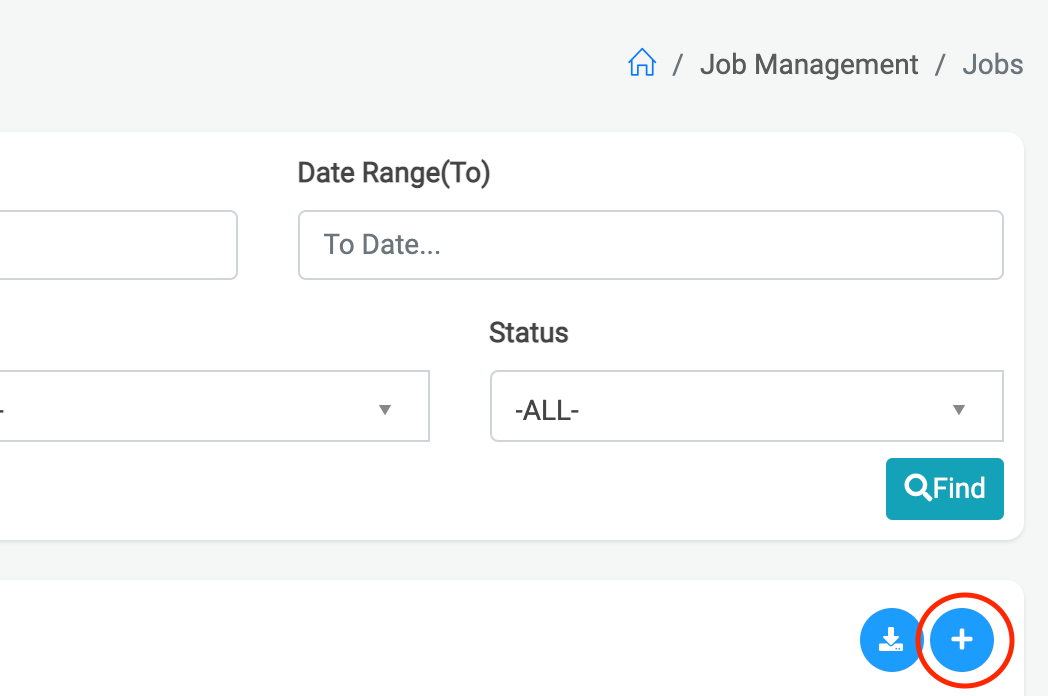
Create new job
1. Open any web browser
Go to sisfs.com.au/admin
2. Log into the System
3. Navigate to Main > Job Manage > Job
4. Click on + button
5. Page will redirect to job create view
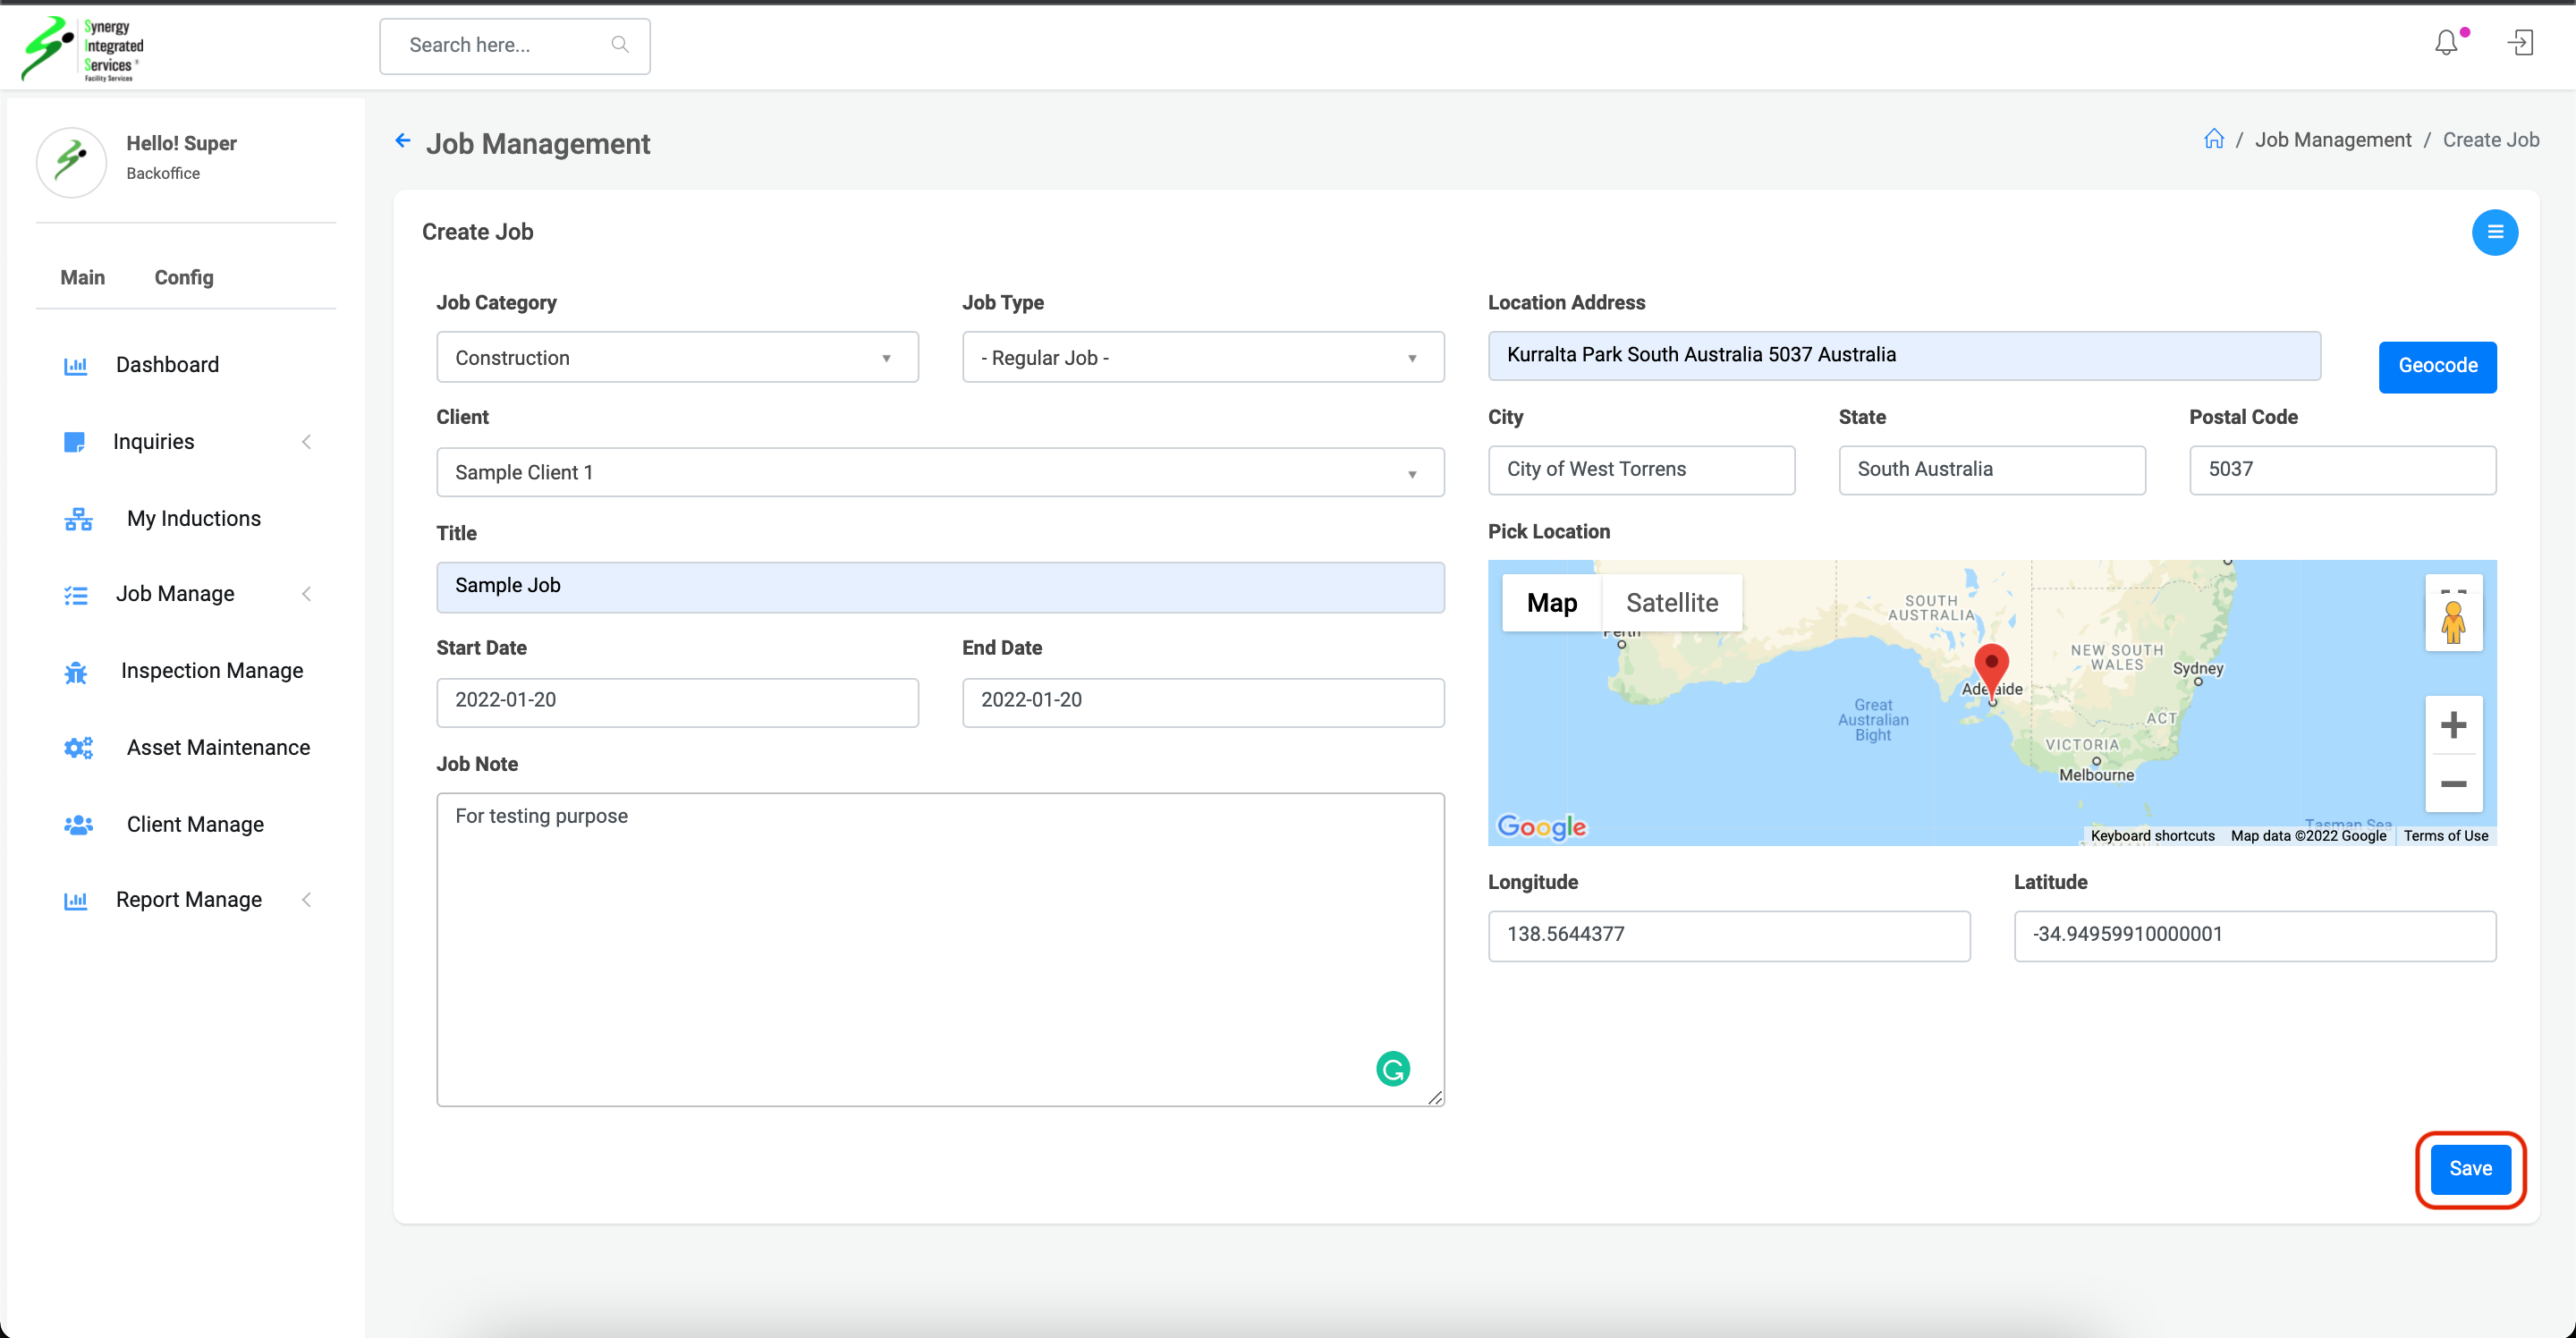
6. Fill job details
7. Click on save button
Step 1
Step 2
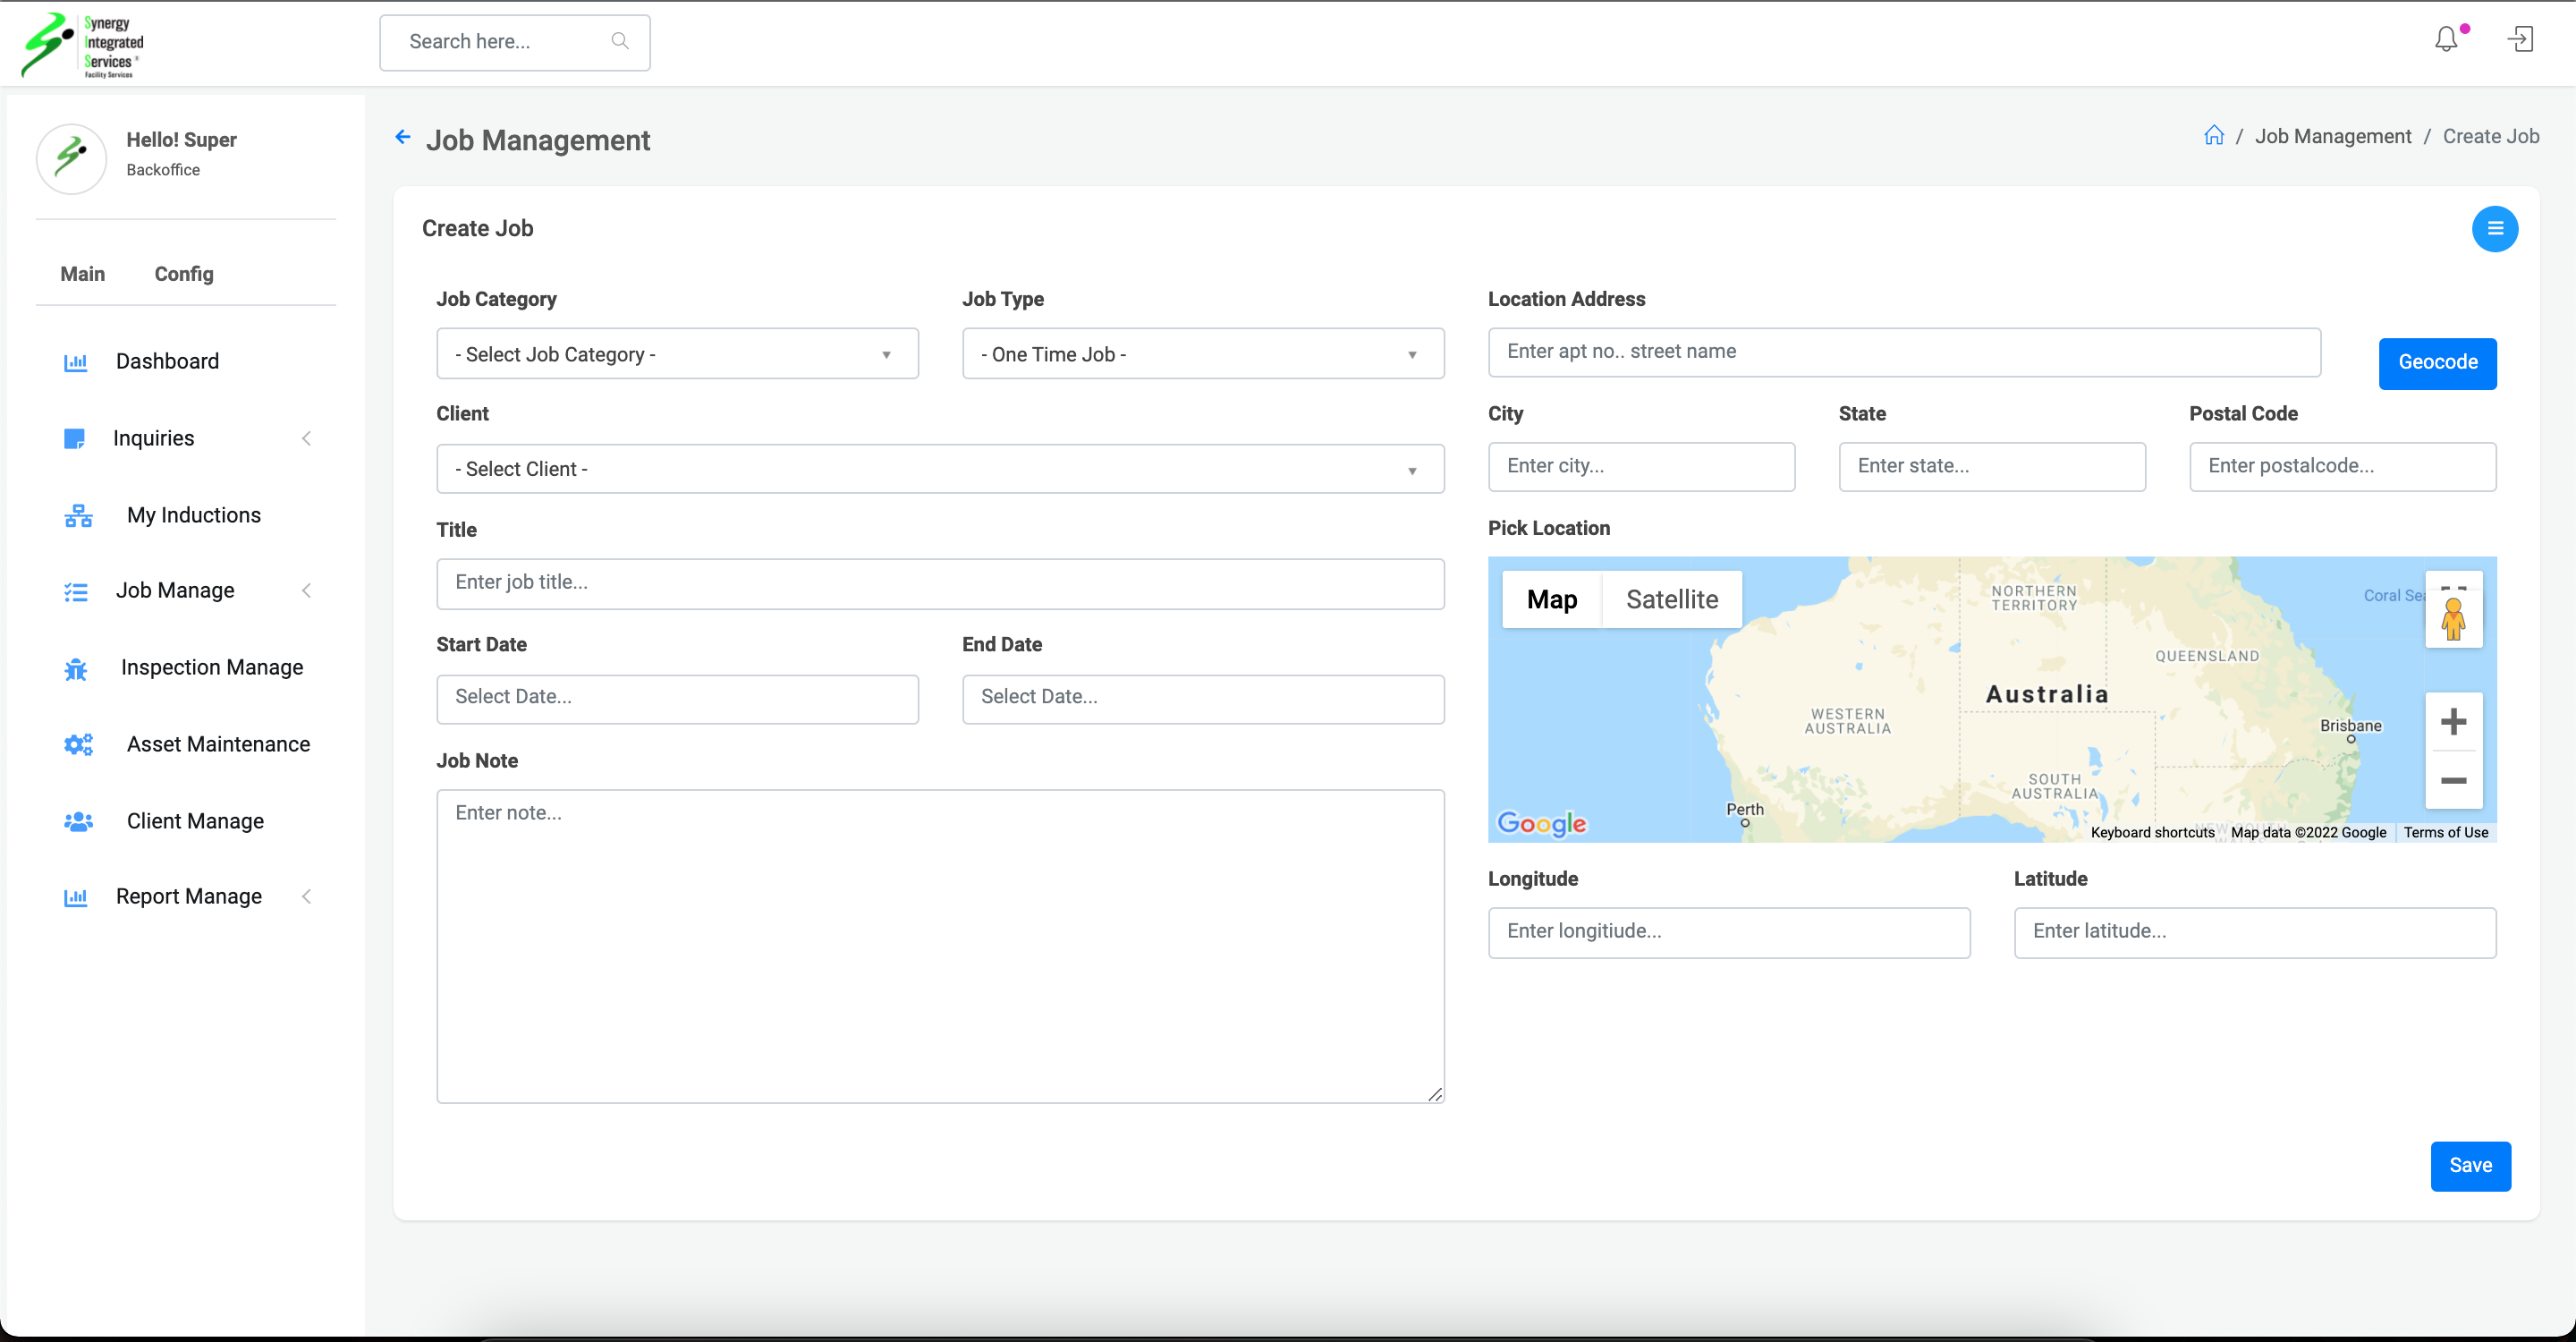
Step 3
Edit Job Data
1. Open any web browser
Go to sisfs.com.au/admin
2. Log into the System
3. Navigate to Main > Job Manage > Job
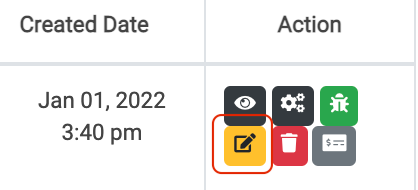
4. Click on edit icon
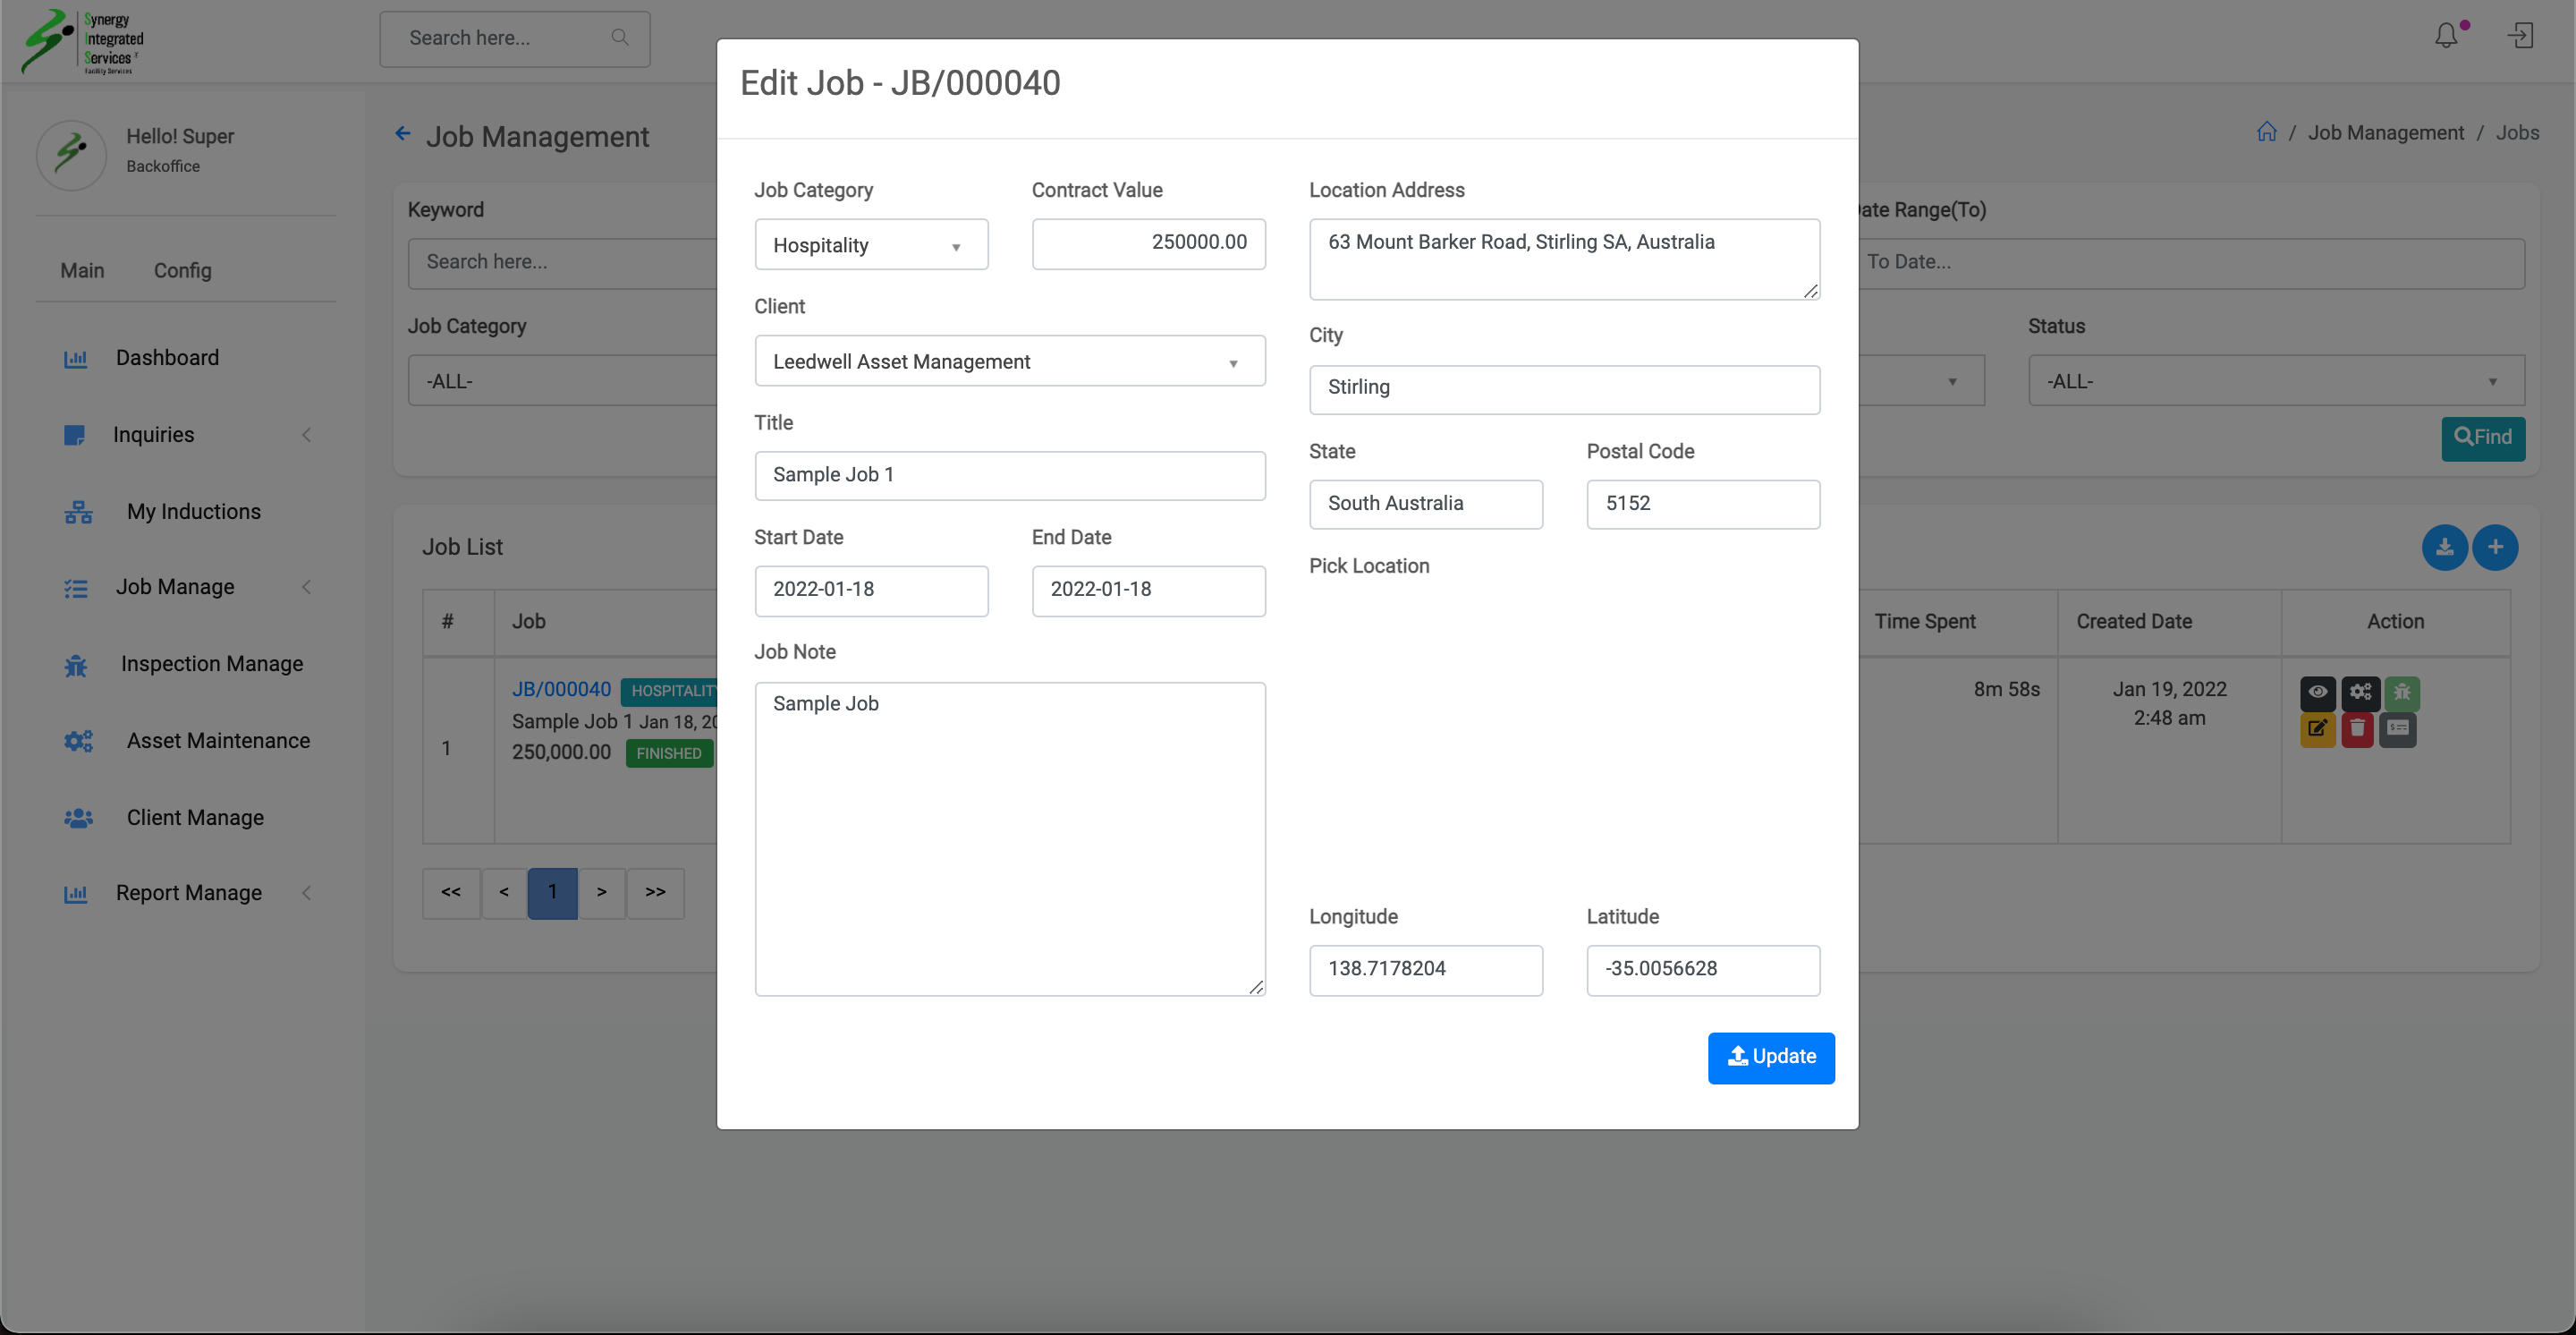
5. Edit view pop up will appear
6. Update job details
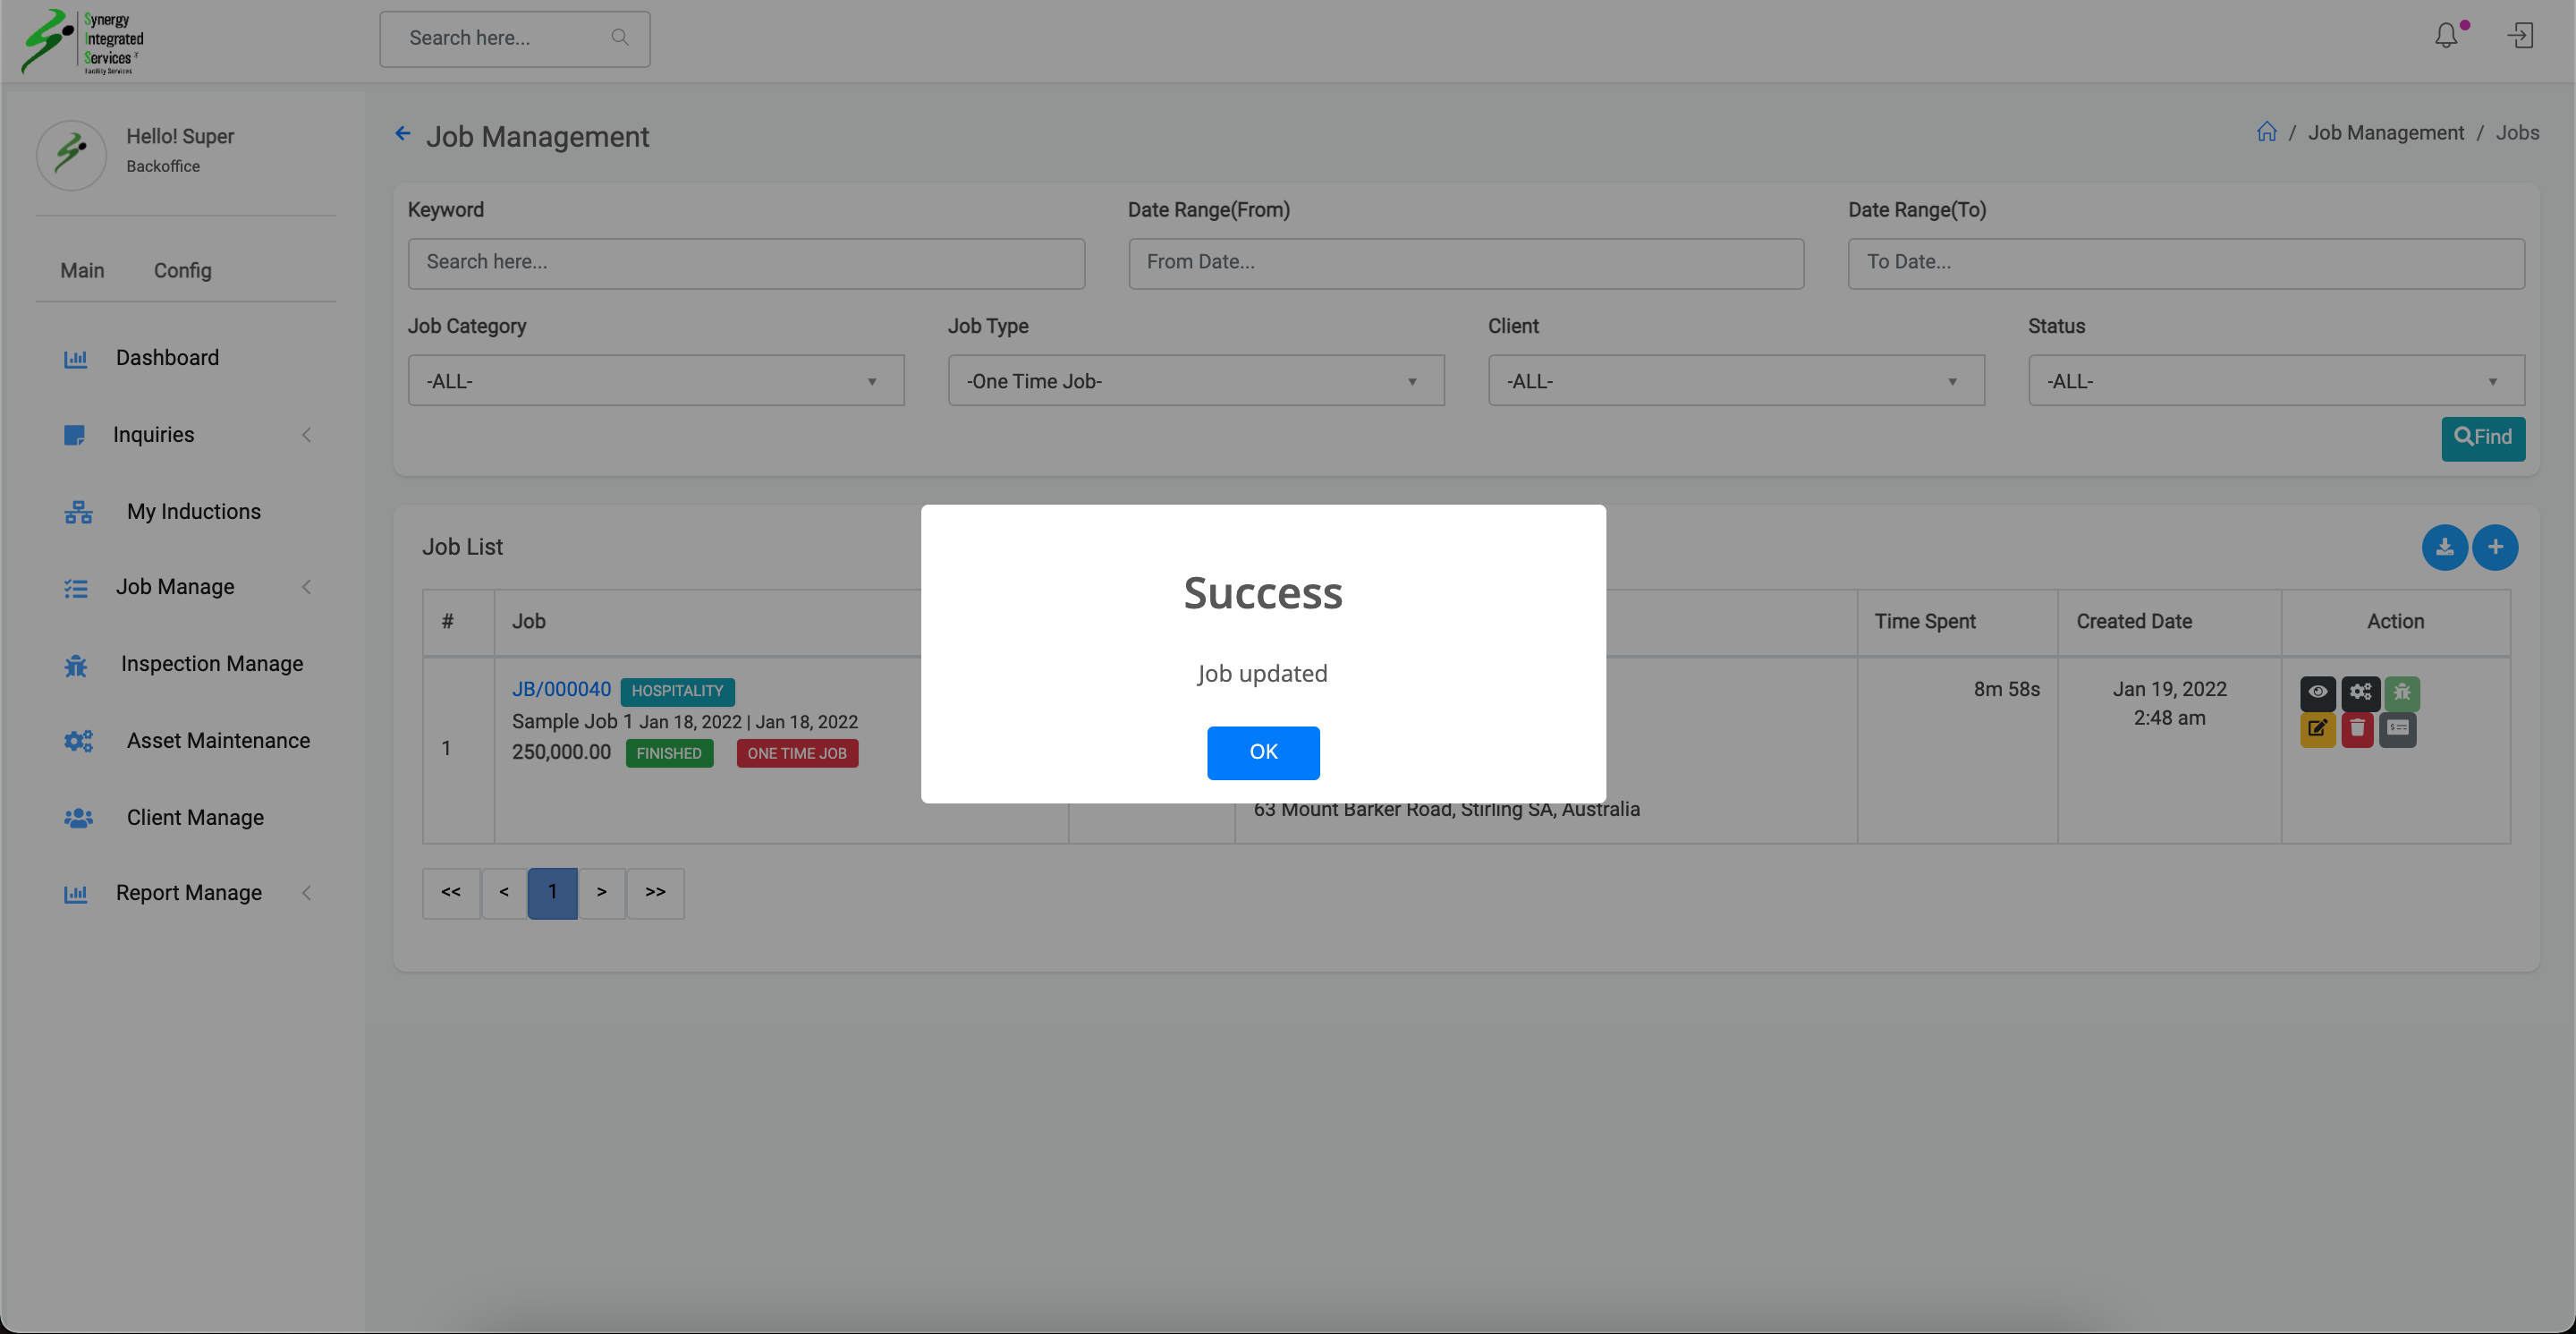
7. Click on Update button
Step 1
Step 2
Step 3
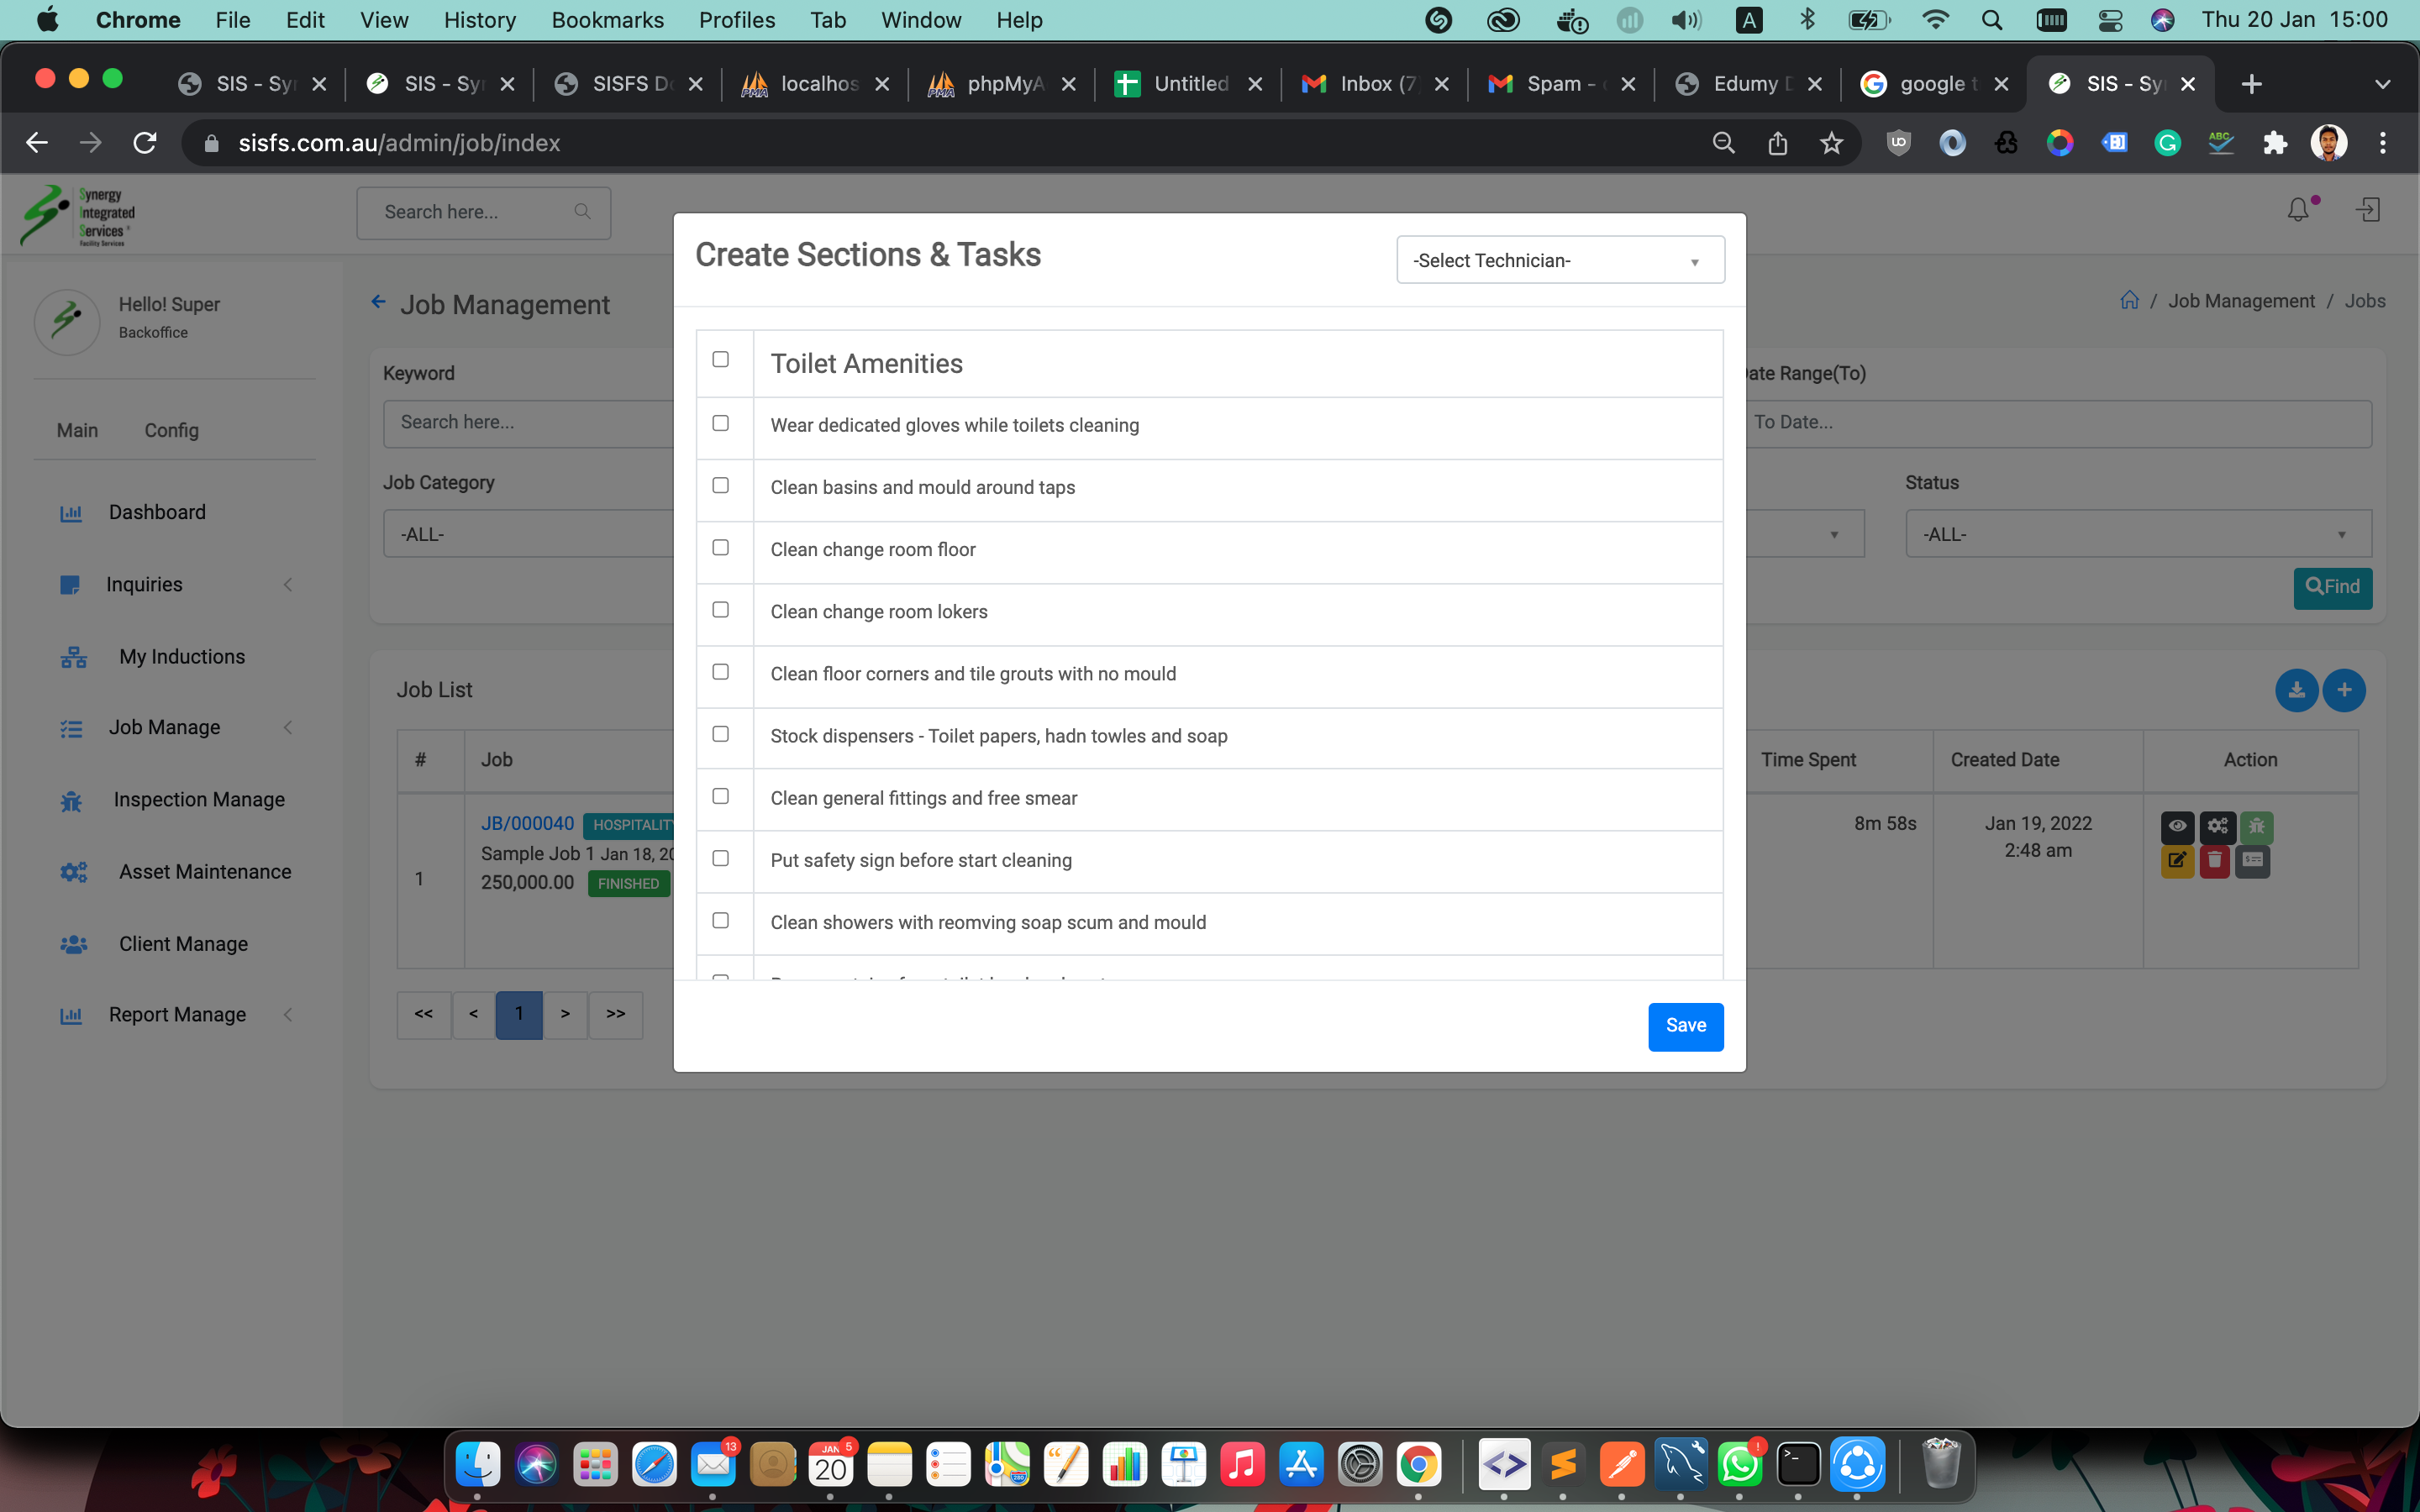
Job Section & Task config
1. Open any web browser
Go to sisfs.com.au/admin
2. Log into the System
3. Navigate to Main > Job Manage > Job
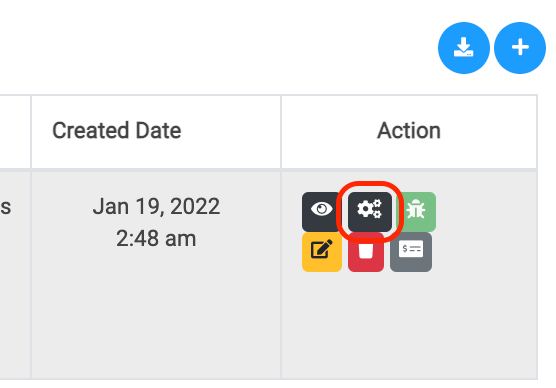
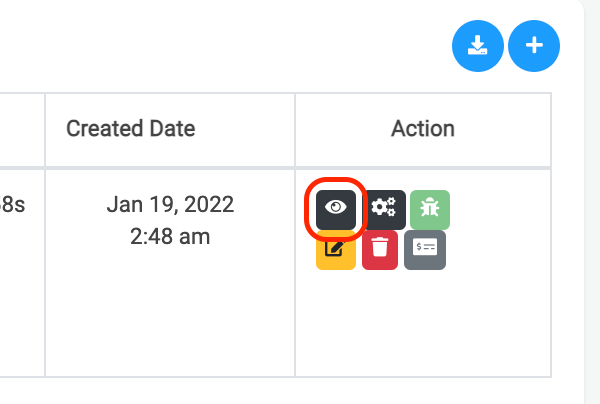
4. Click on gear icon
5. Config section and task pop up will appear
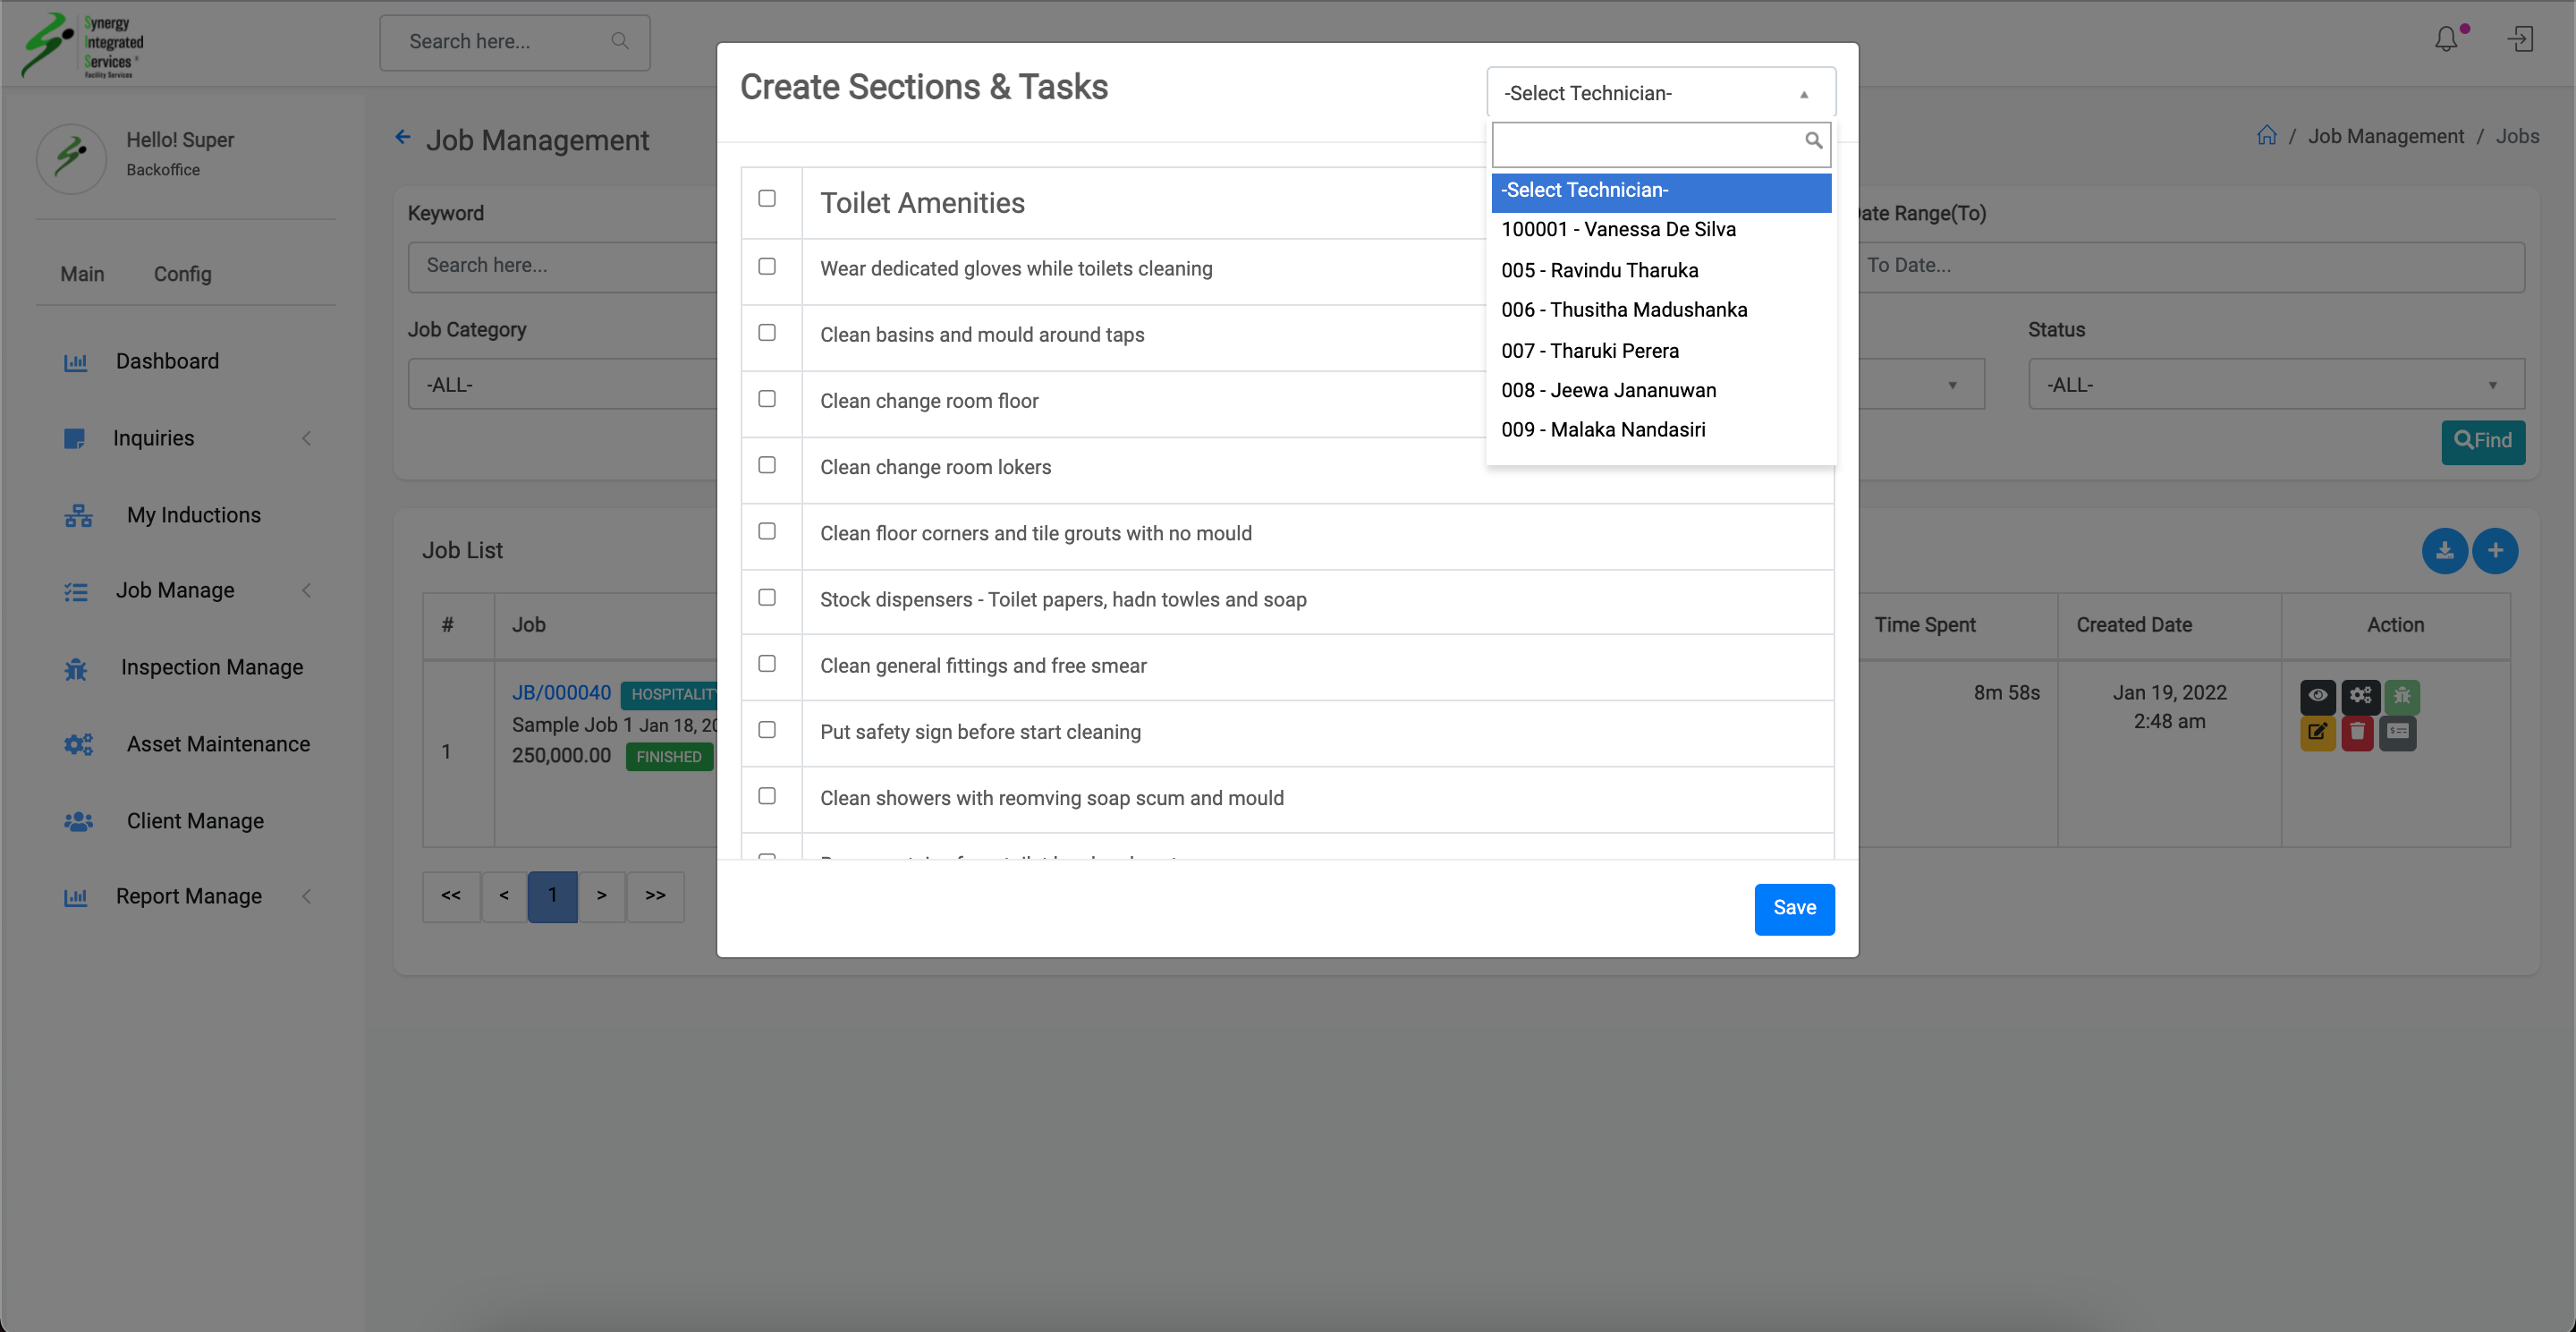
6. Select technician assign for job
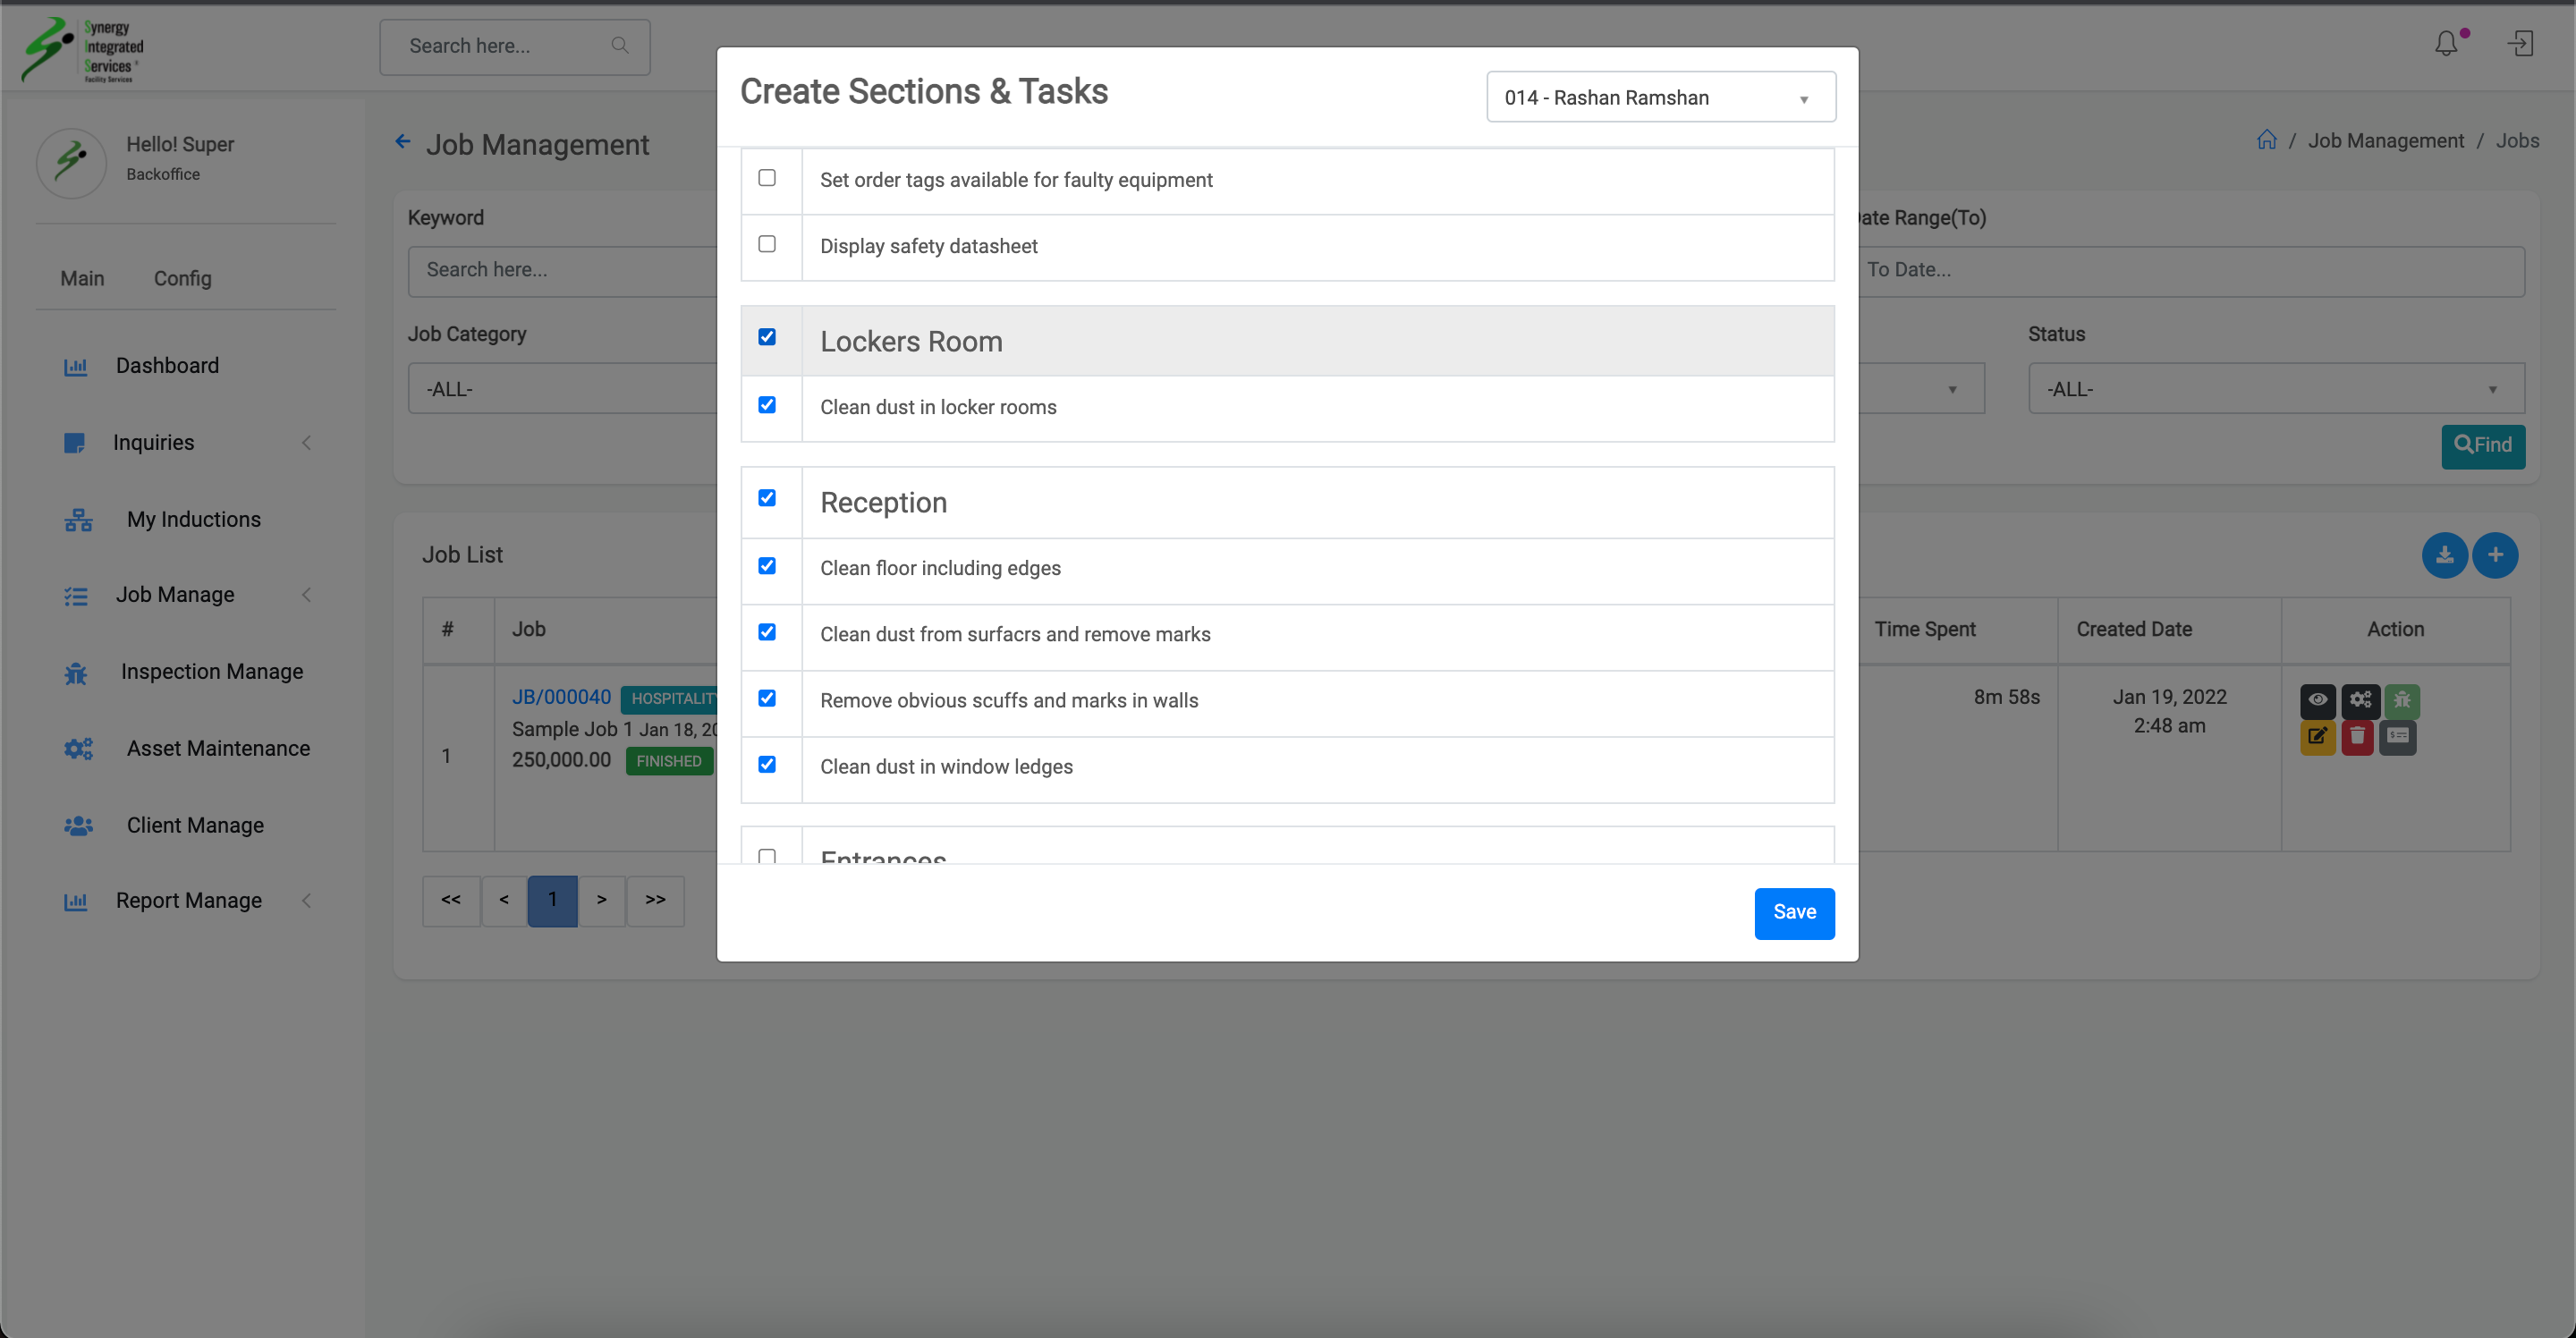
6. Select sectoins and task for job
7. Click on save button
Step 1
Step 2
Step 3
Step 3
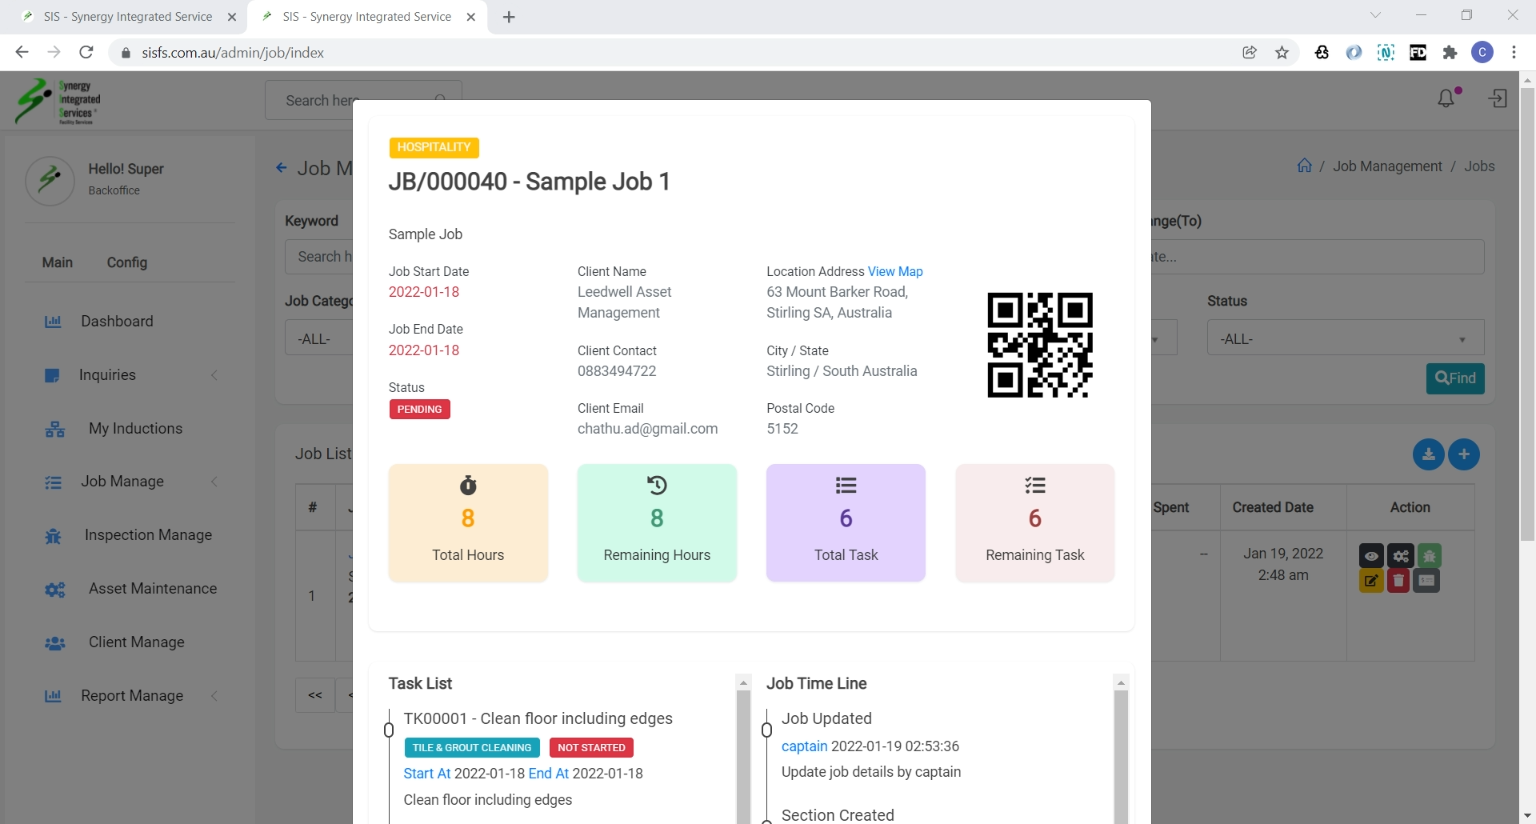
View job details
1. Open any web browser
Go to sisfs.com.au/admin
2. Log into the System
3. Navigate to Main > Job Manage > Job
4. Click on eye icon
5. Job detail view pop up will appear
Step 1
Step 2
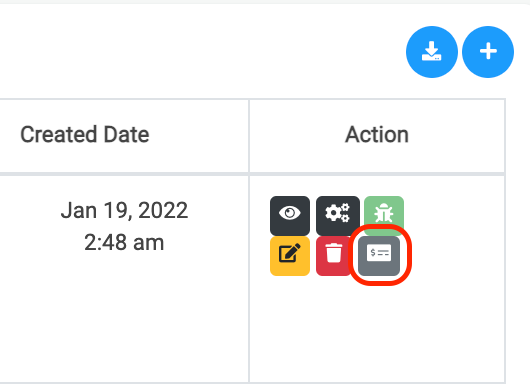
Job cost Manage
1. Open any web browser
Go to sisfs.com.au/admin
2. Log into the System
3. Navigate to Main > Job Manage > Job
4. Click on Dollor bill icon
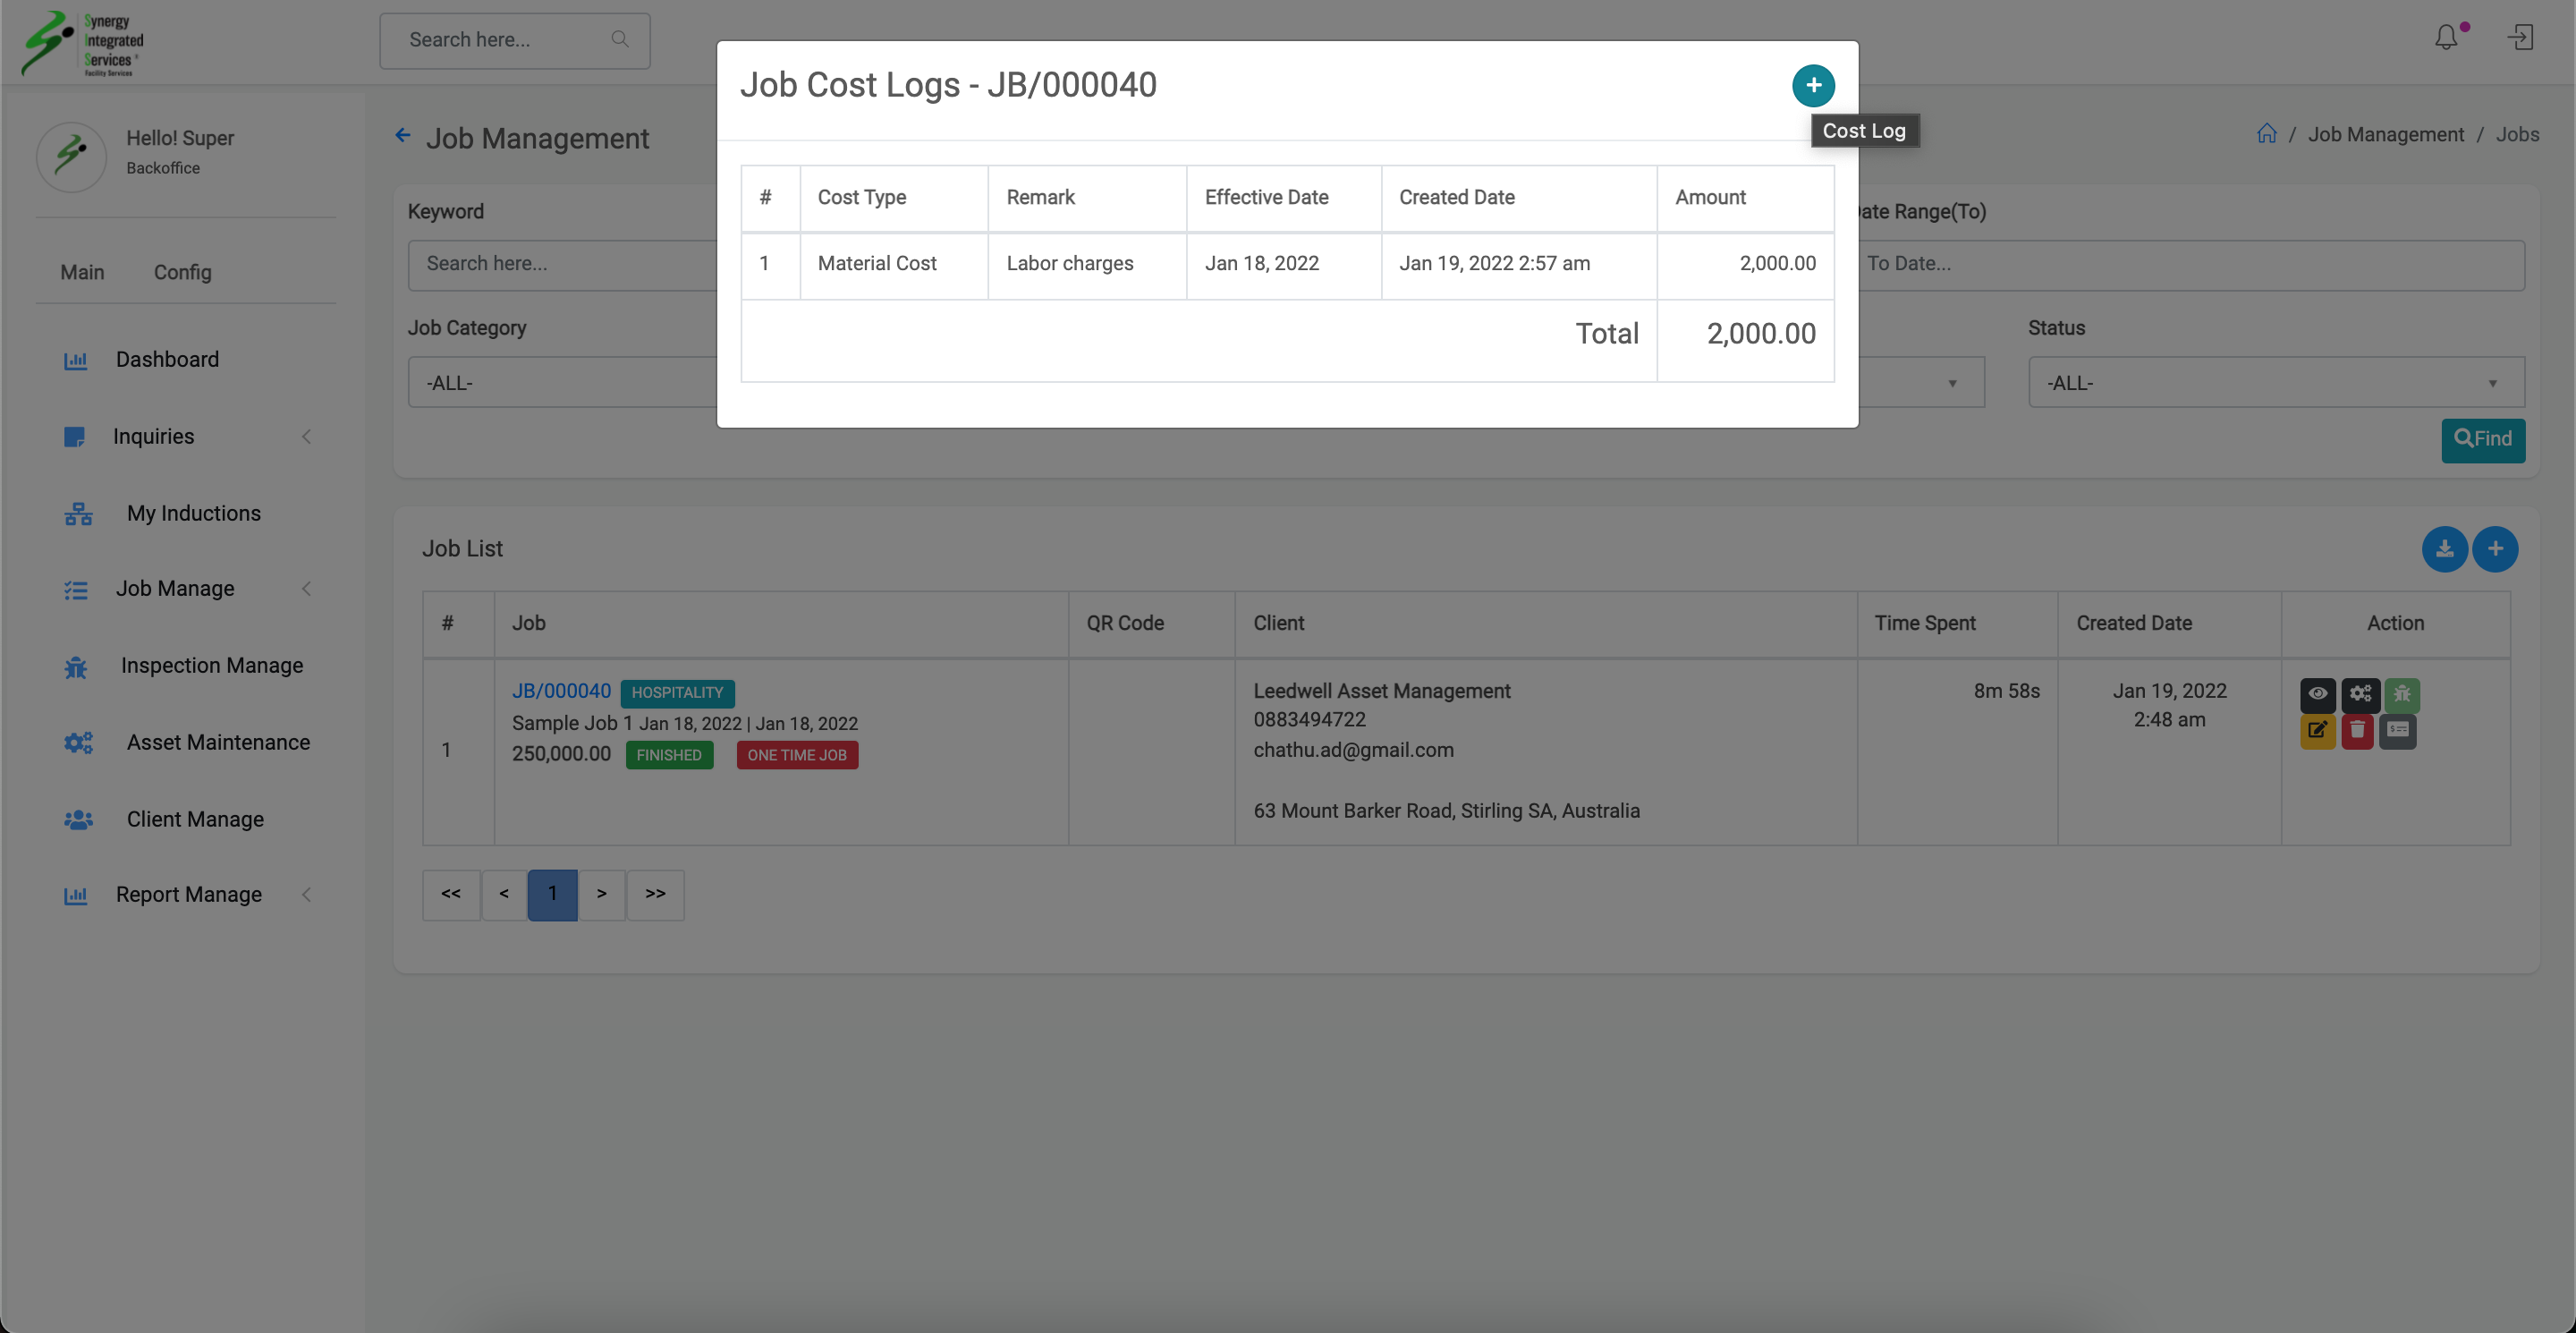
5. Job cost list popup will appear
6. Click on plus icon in popup
7. Fill cost details & save
Step 1
Step 2
Step 3
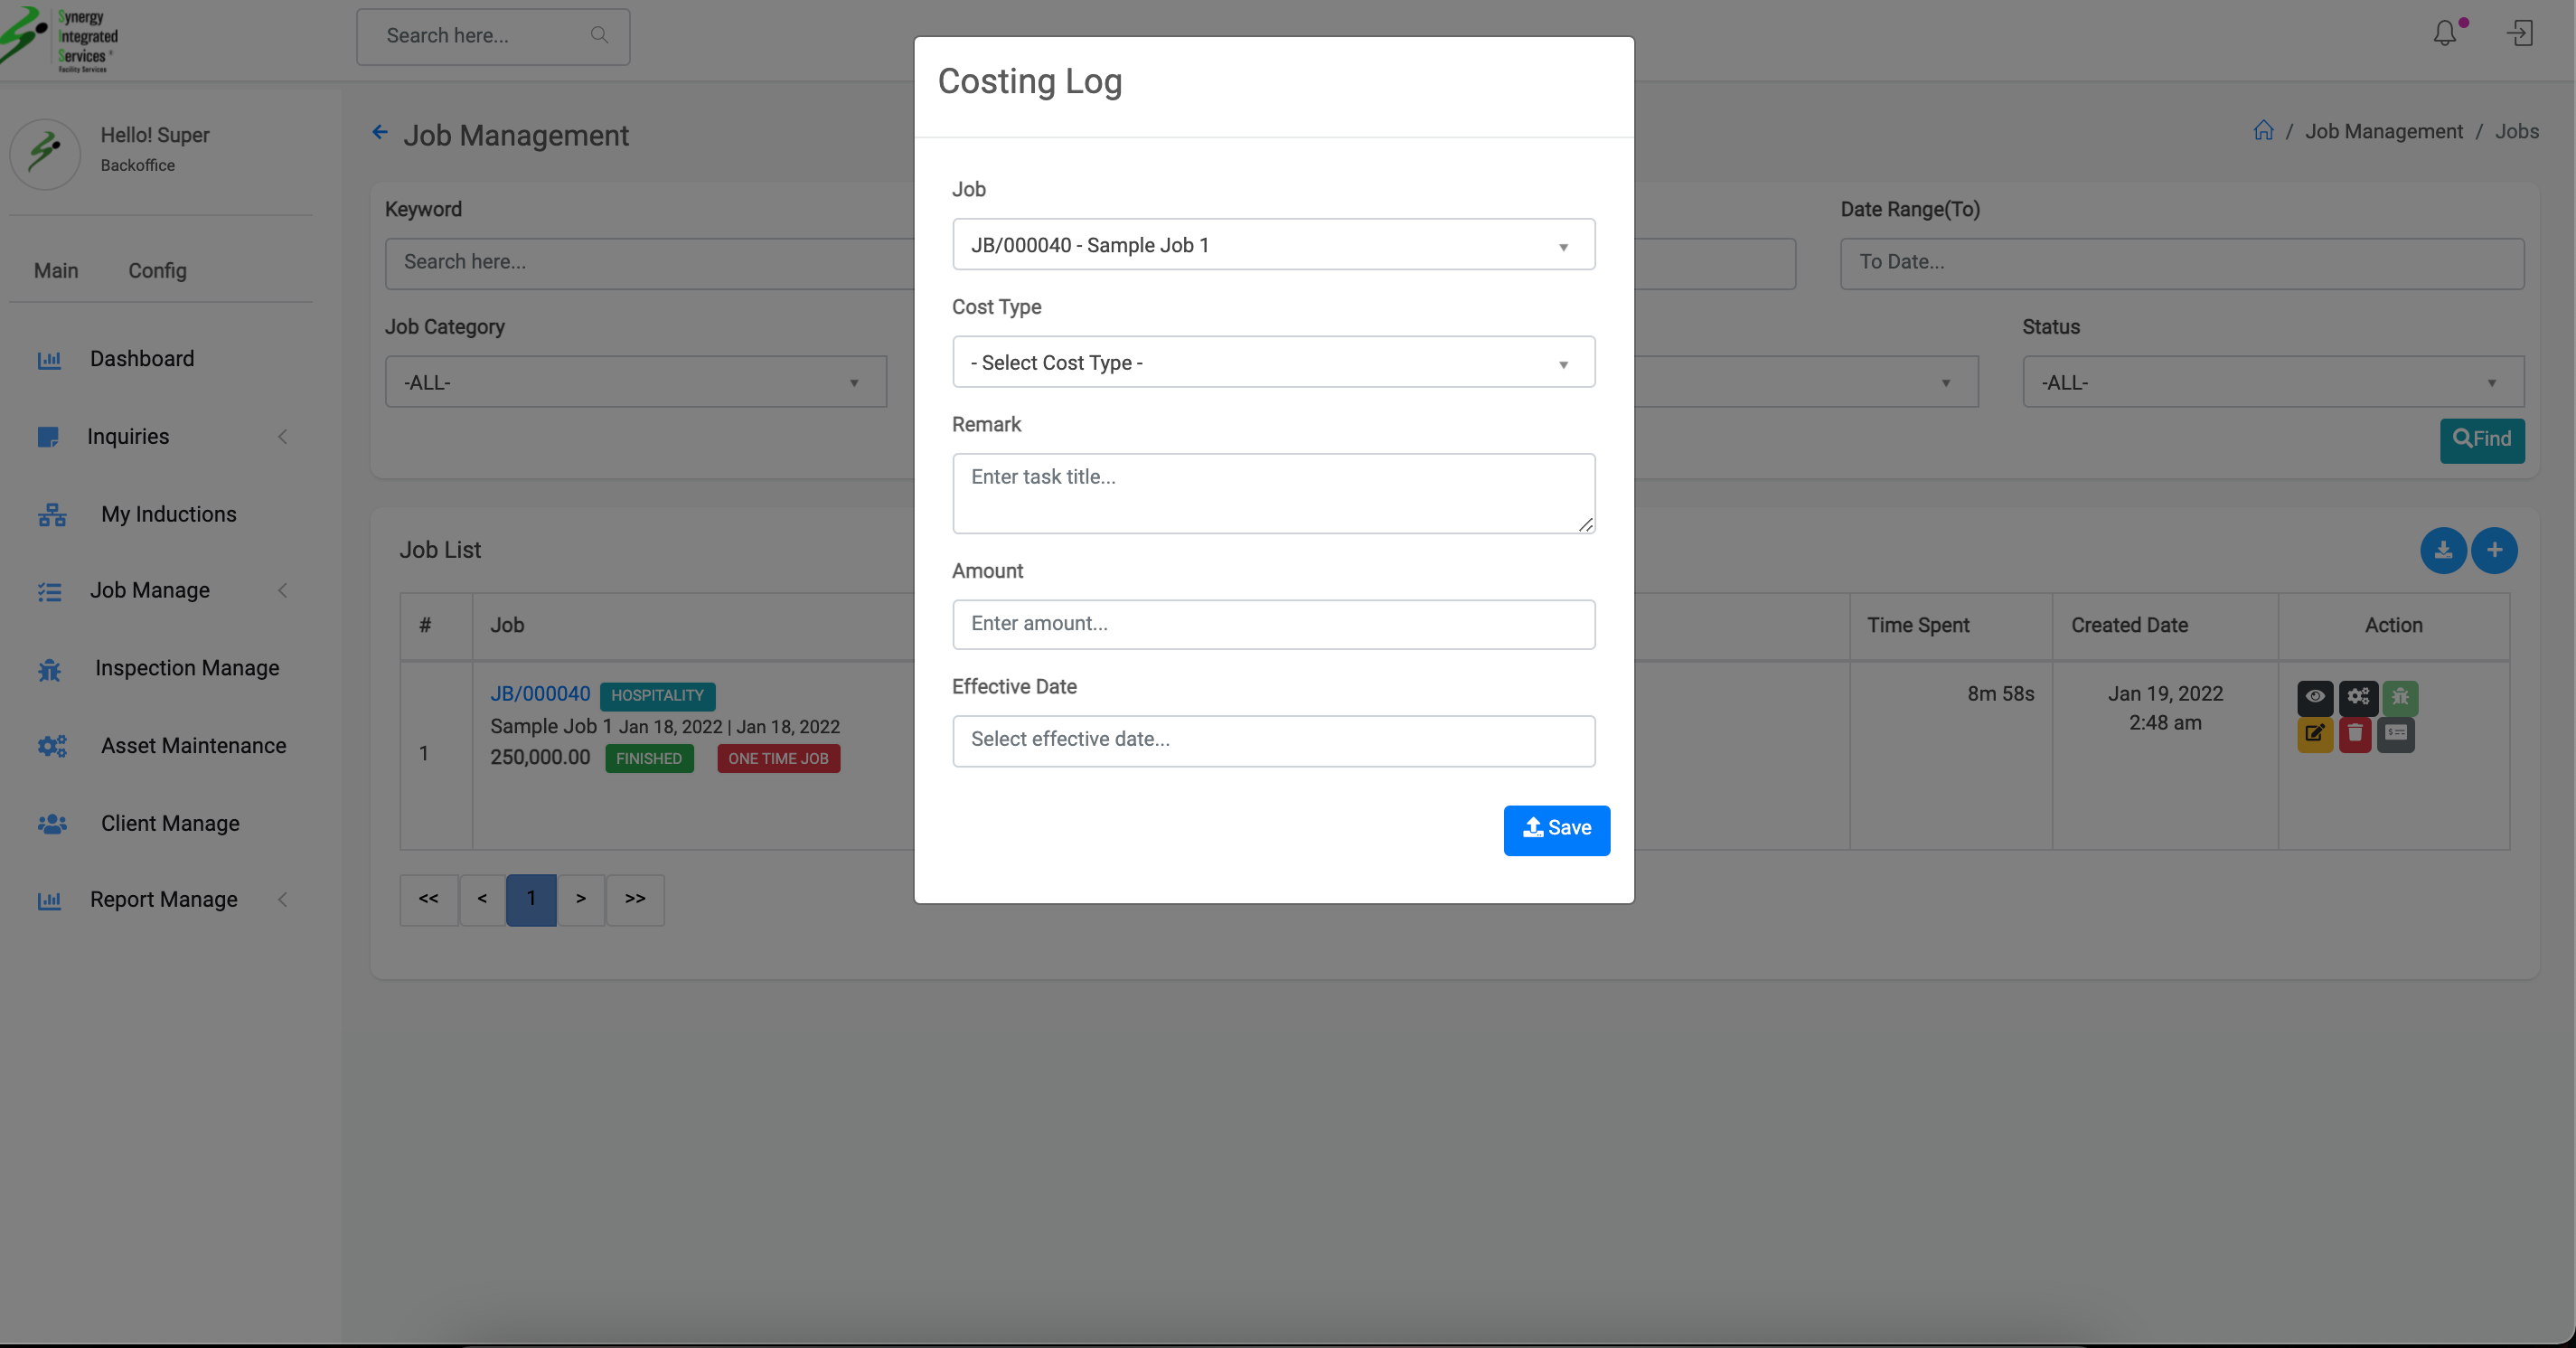
Step 4

Inspection Create
1. Open any web browser
Go to sisfs.com.au/admin
2. Log into the System
3. Navigate to Main > Job Manage > Job
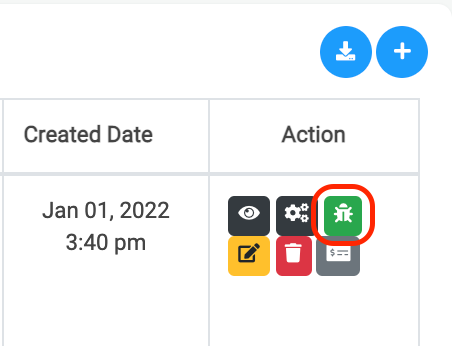
4. Click on Bug icon
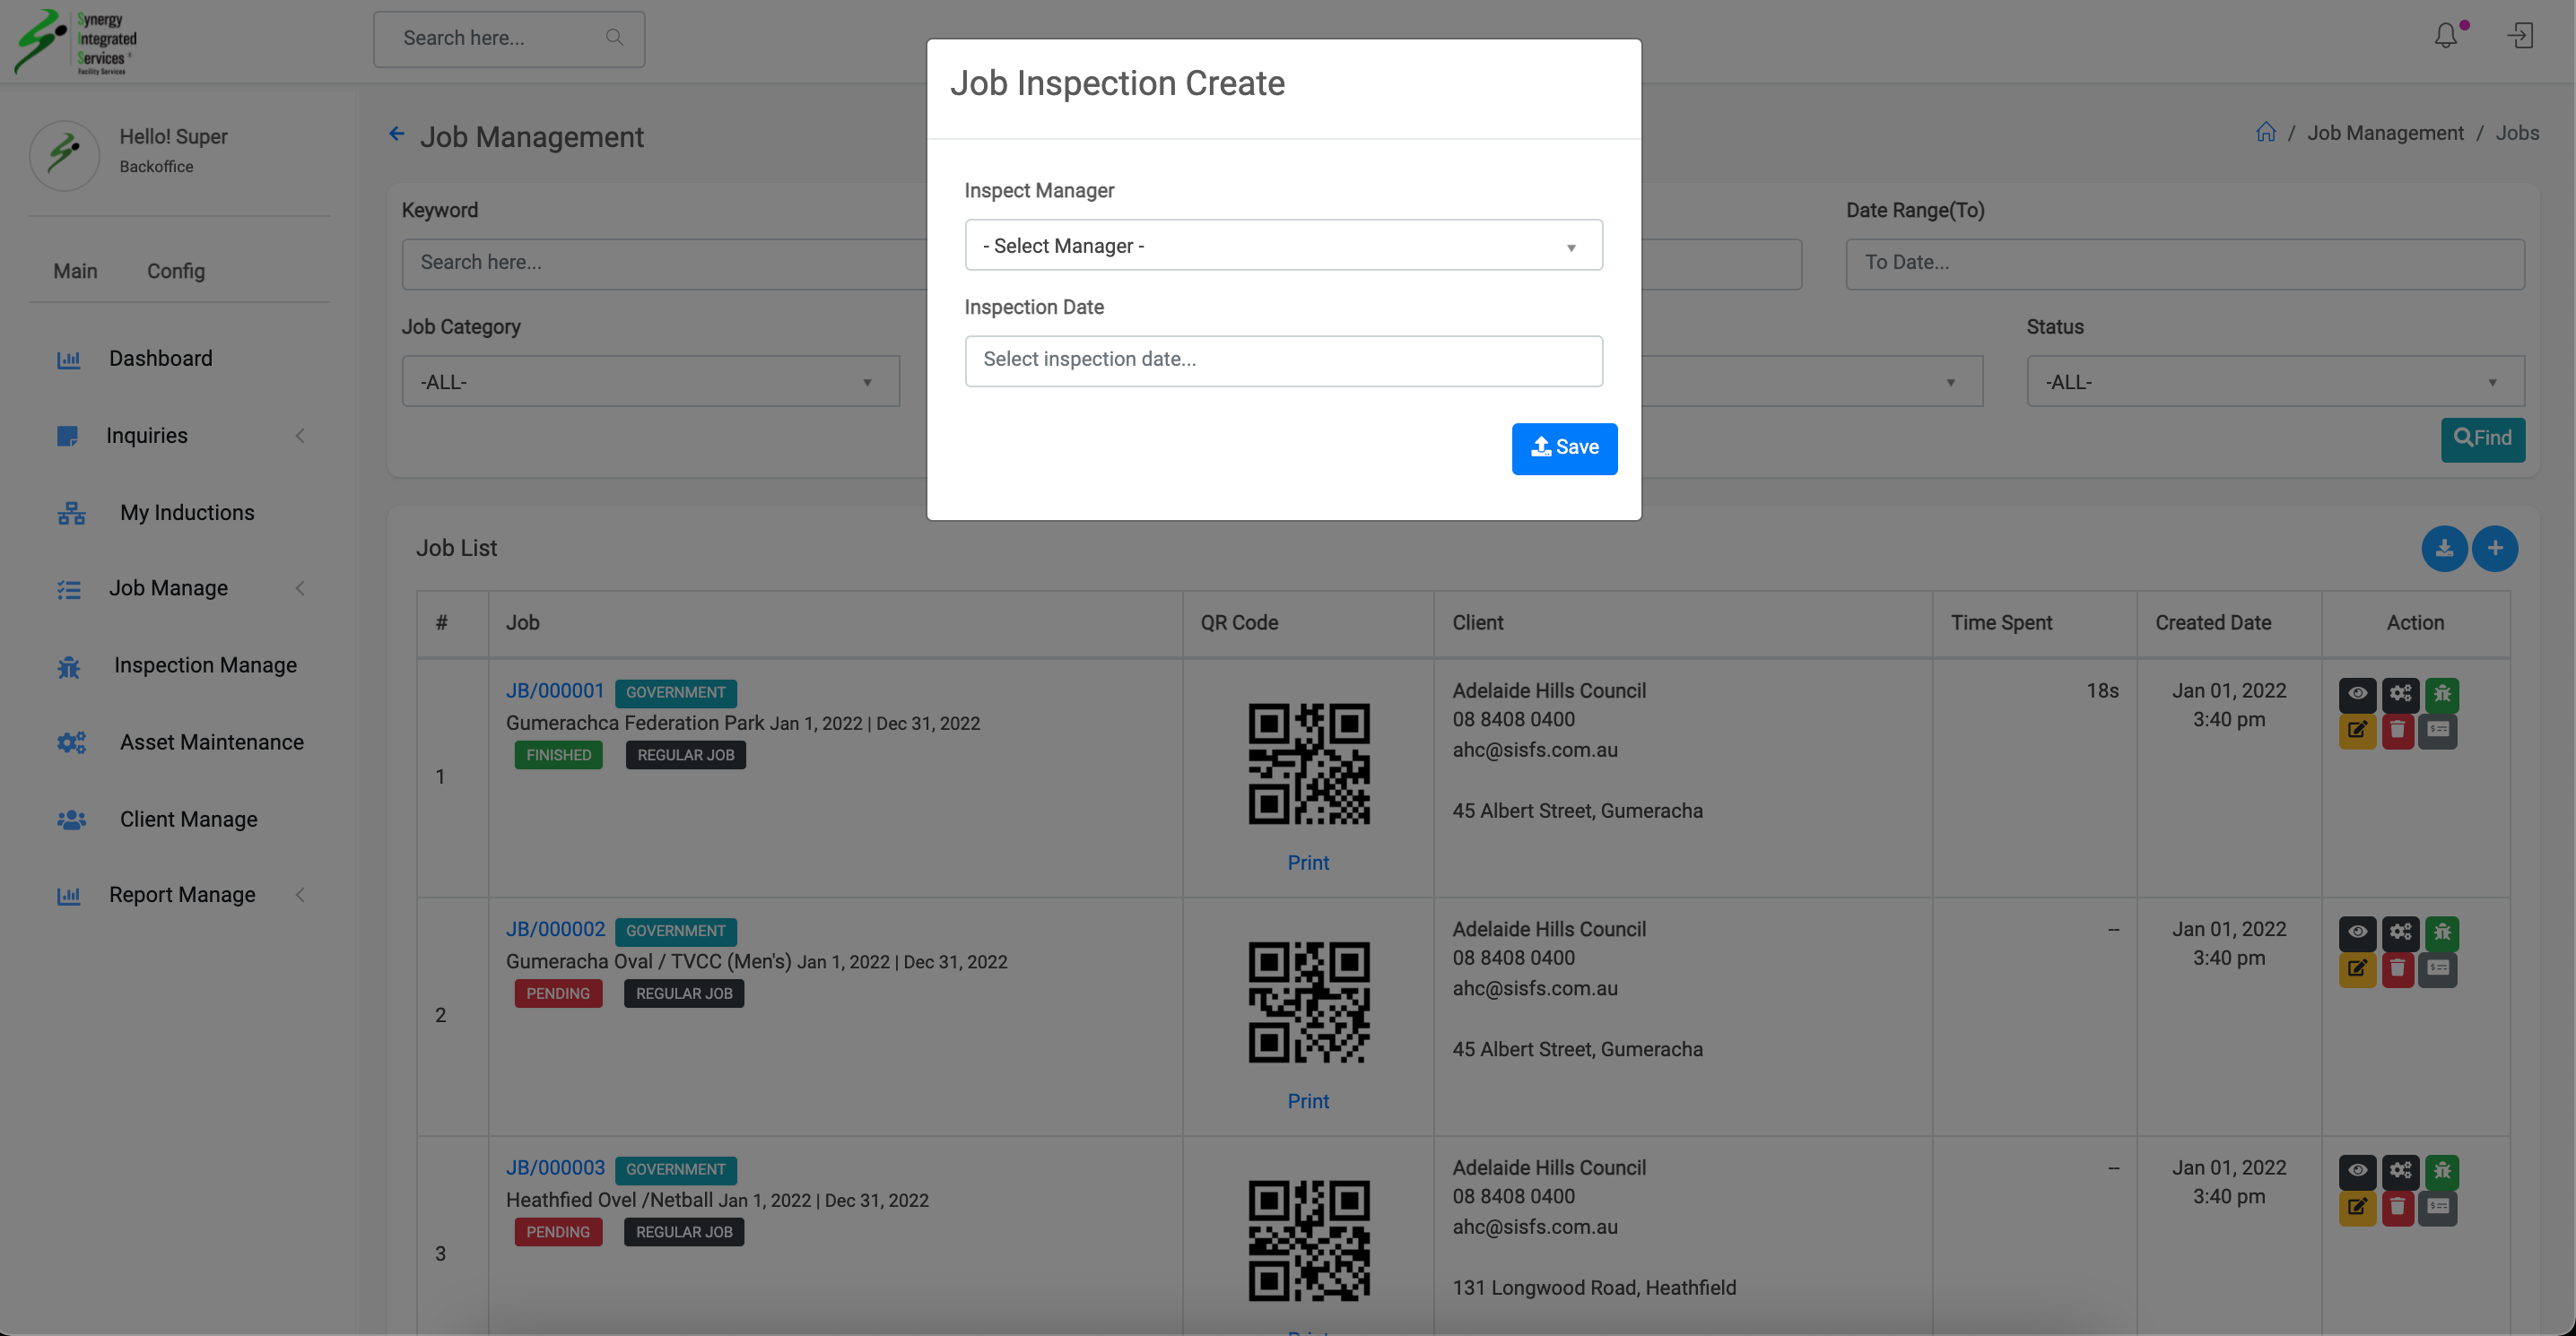
5. Inspection Create popup will appear
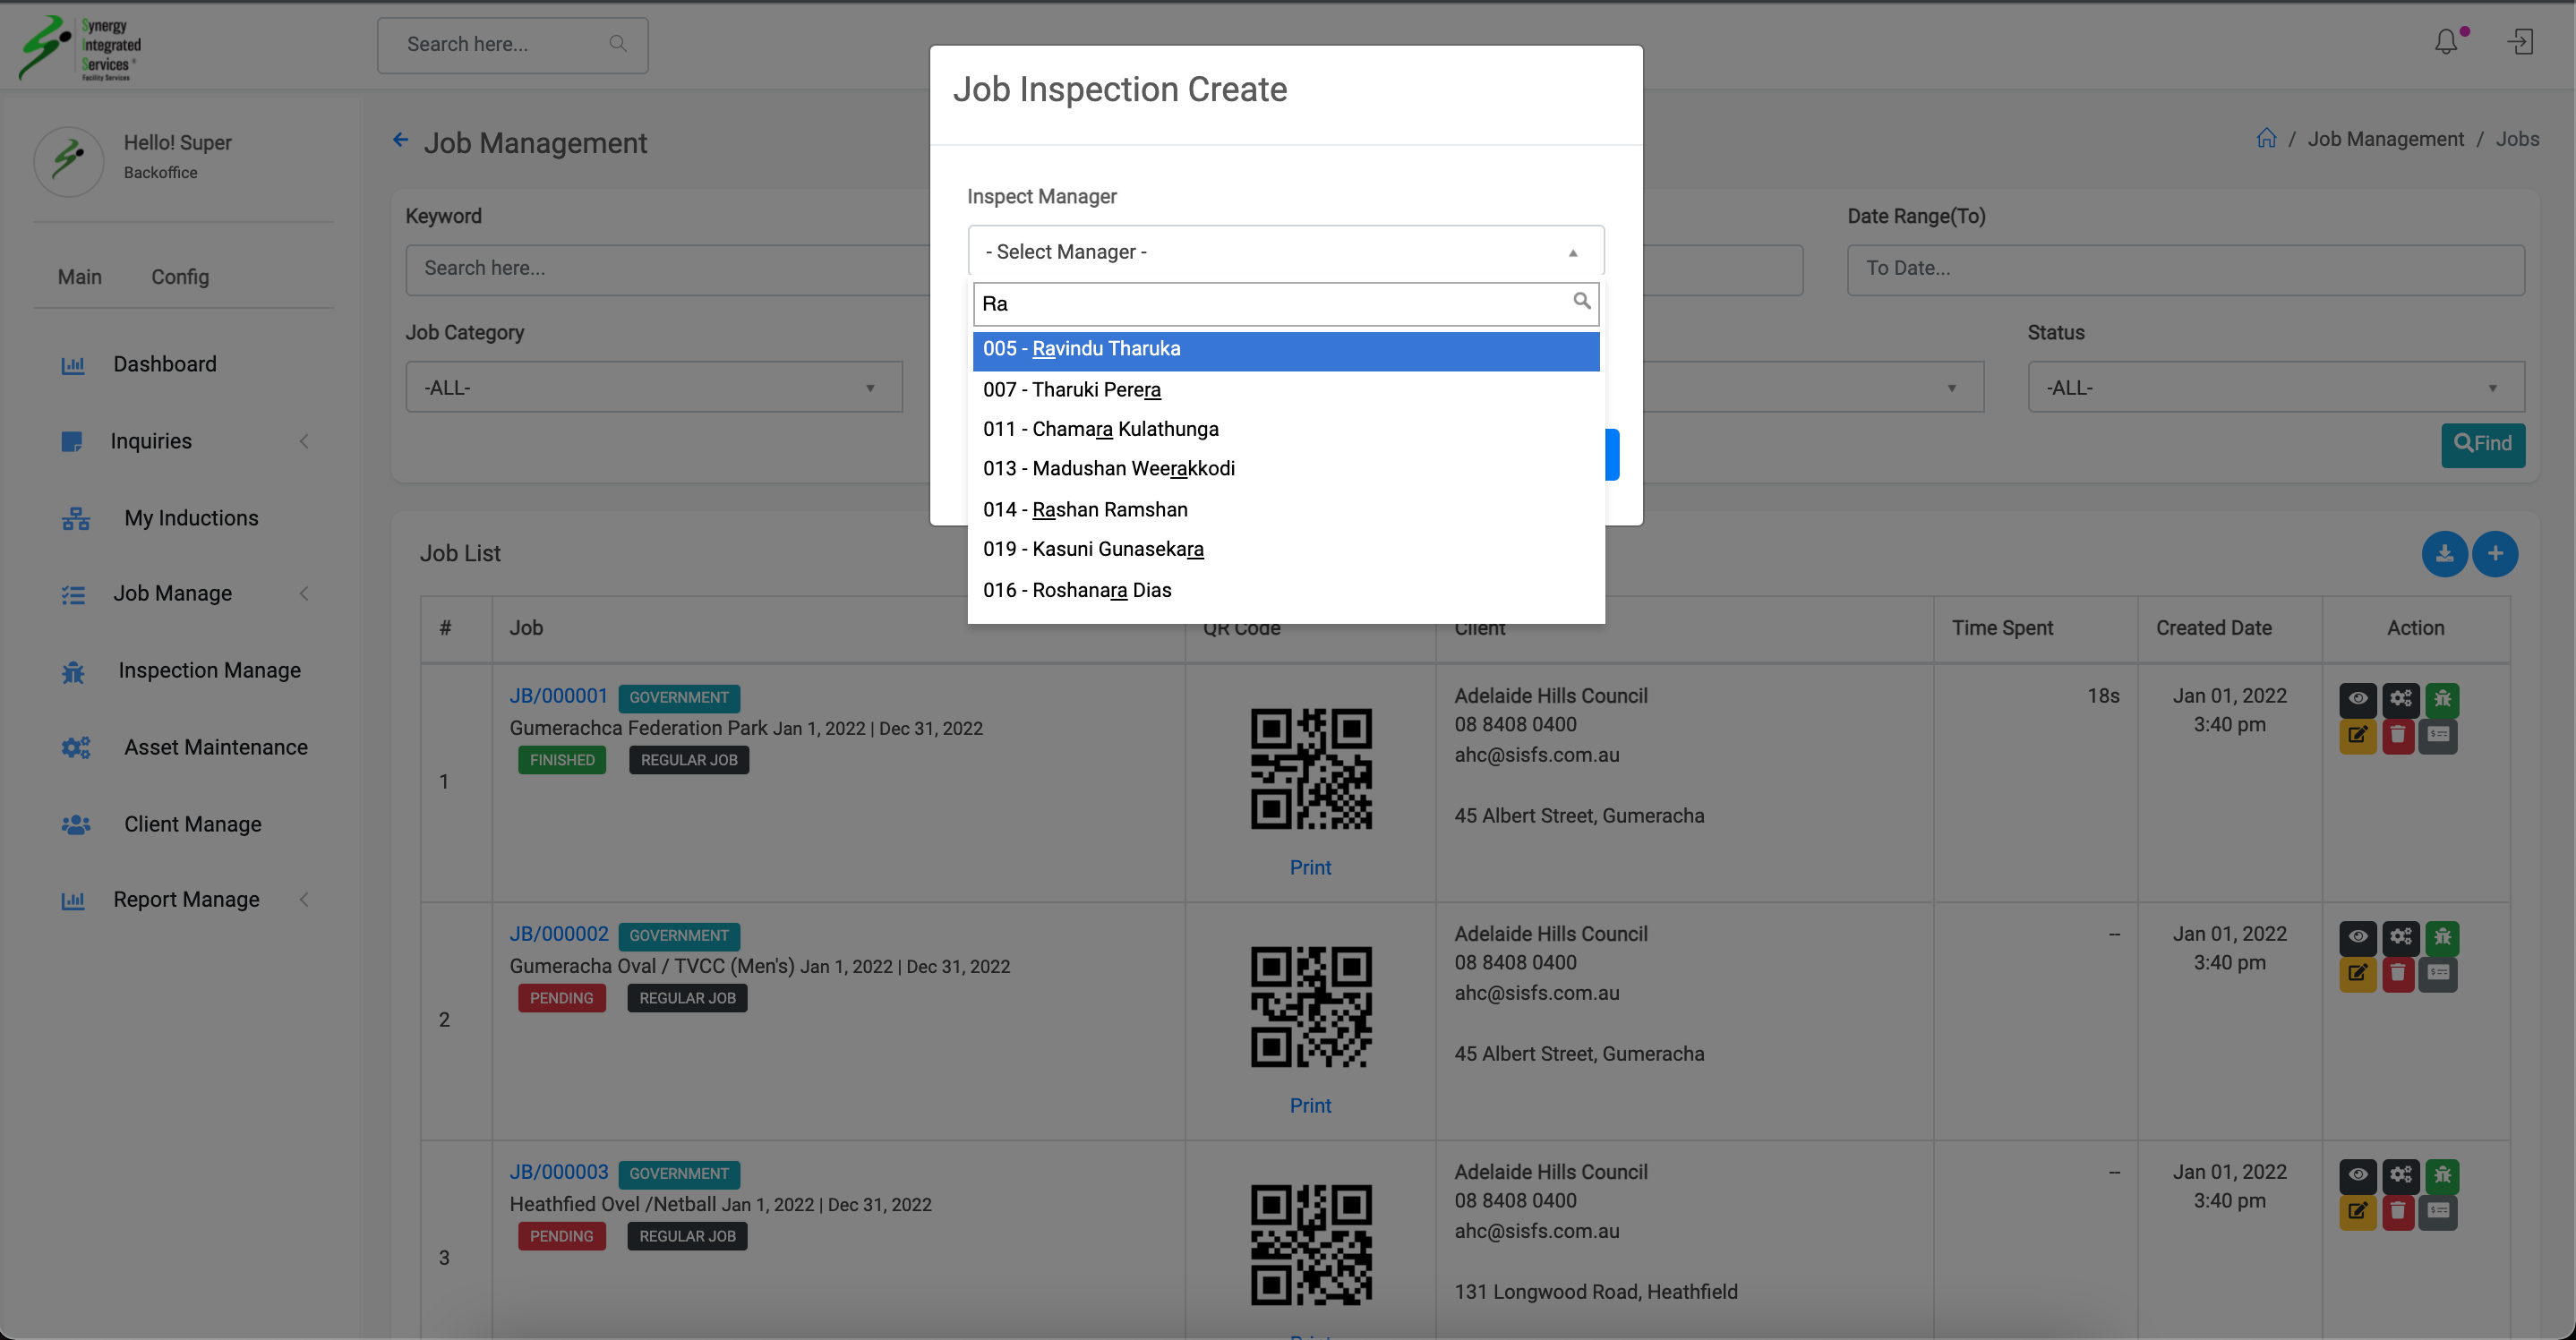
6. Select inspection manager and effective dat
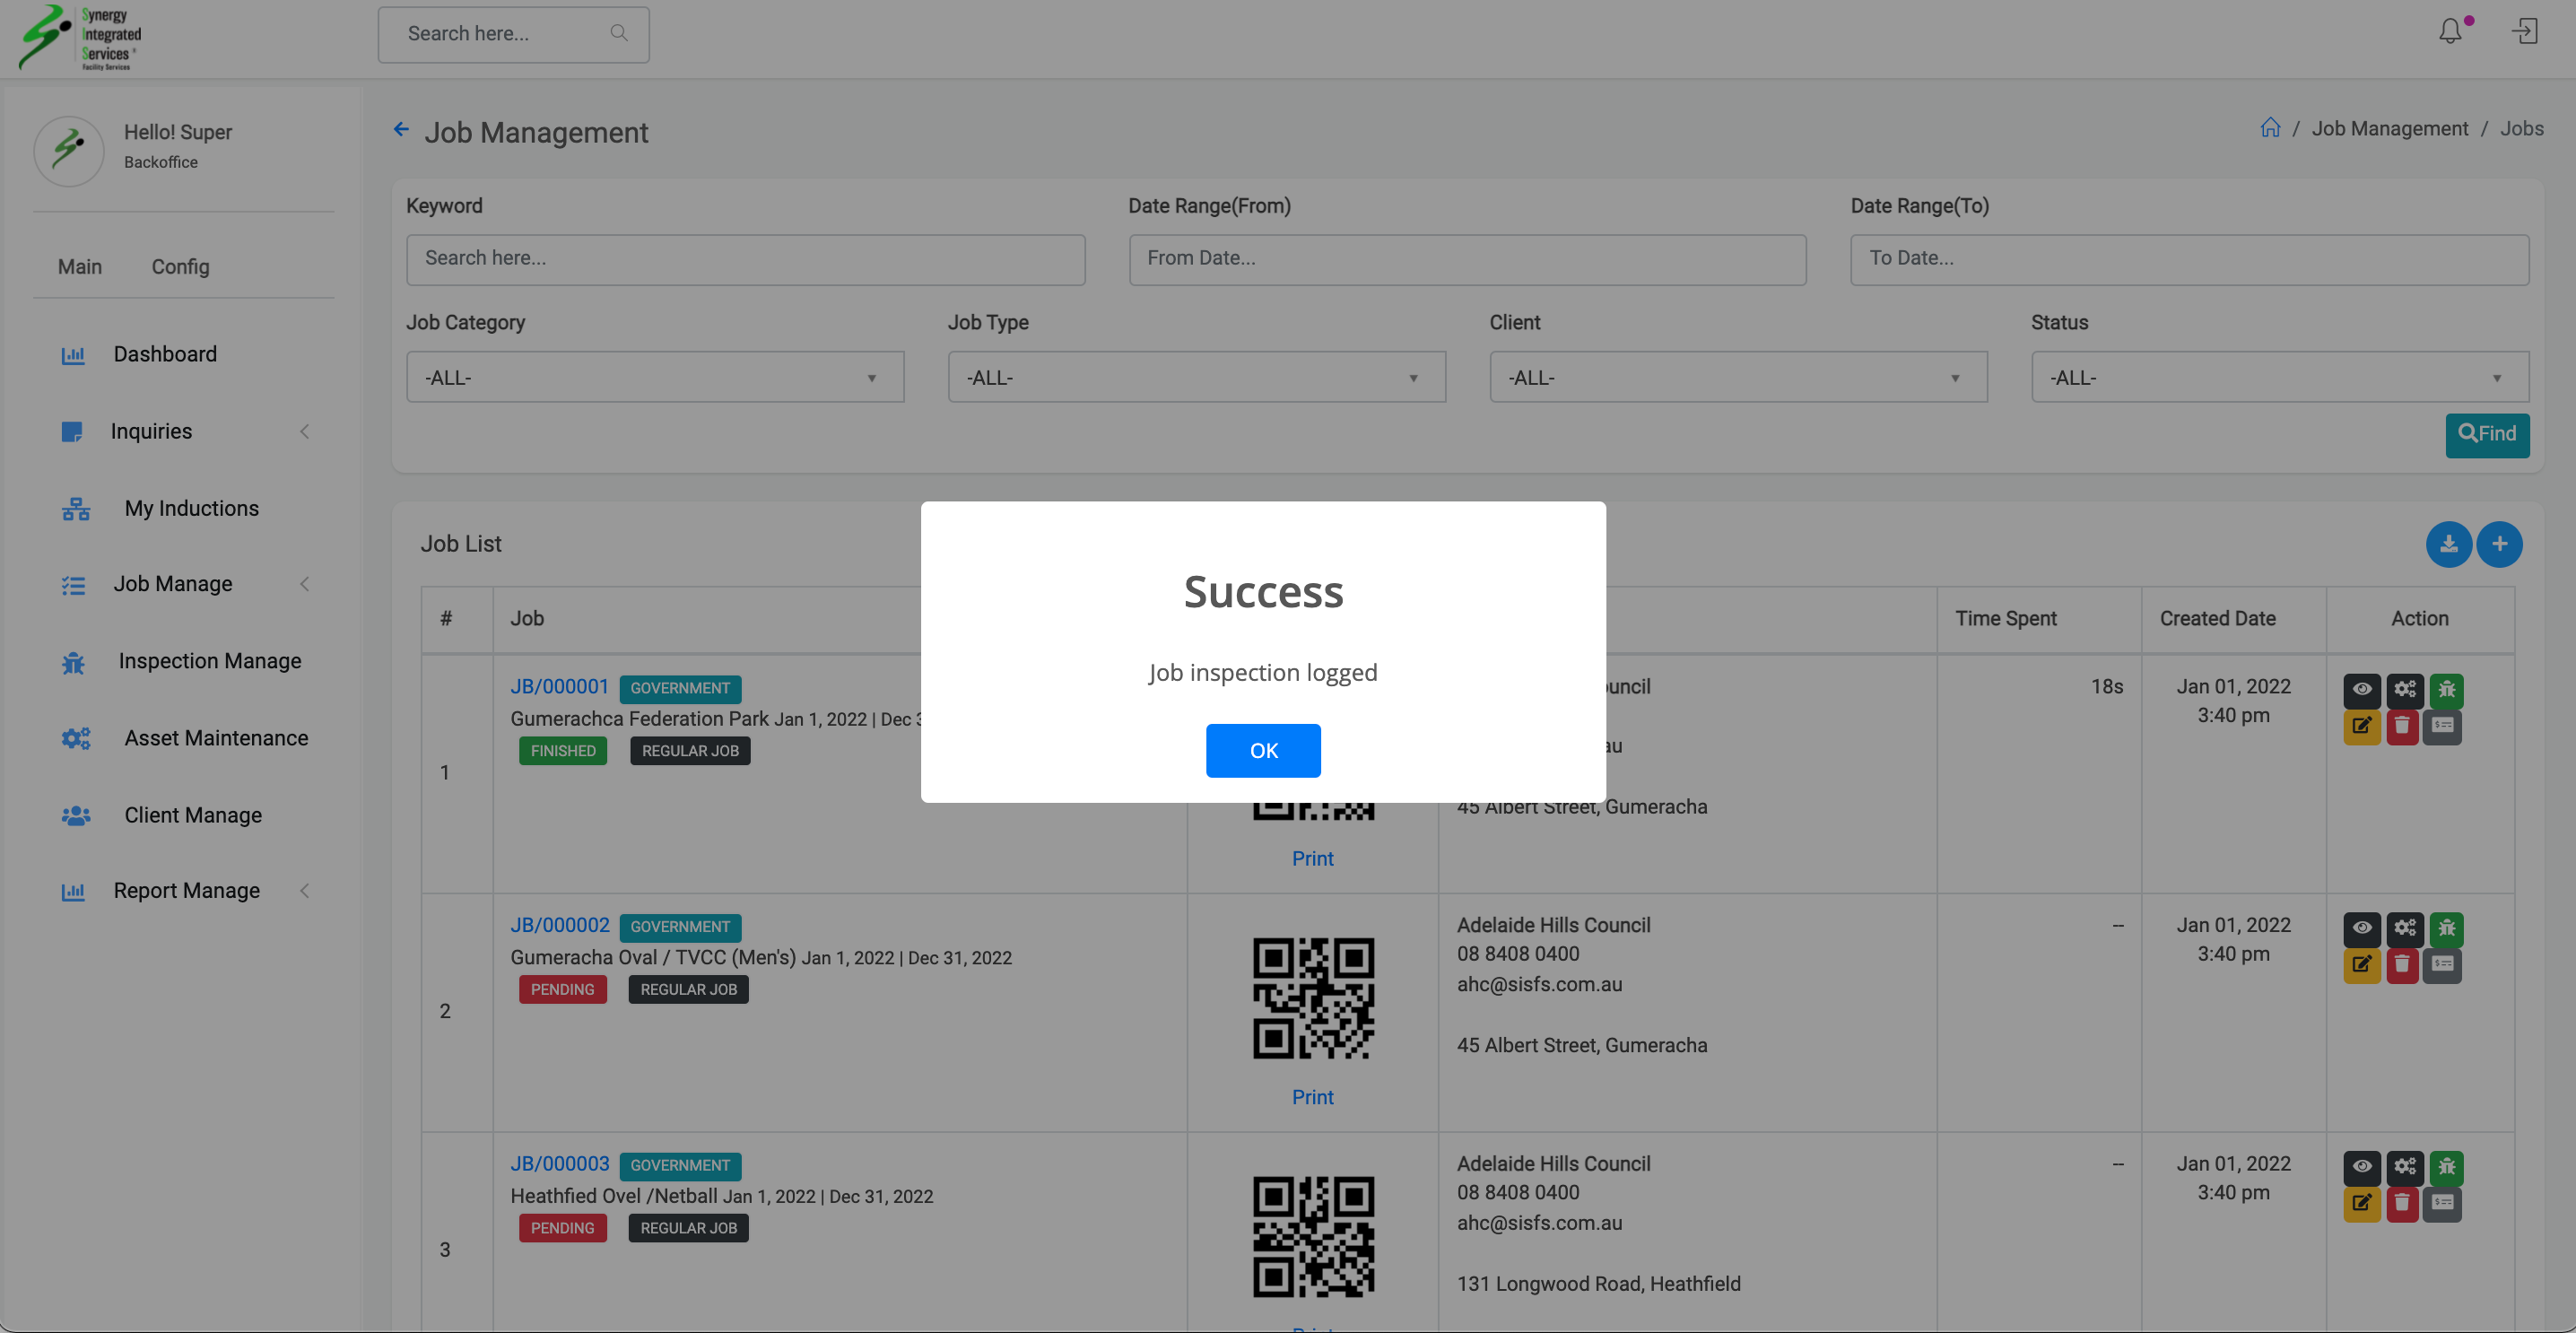
7. Click save button
Step 1
Step 2
Step 3
Step 4
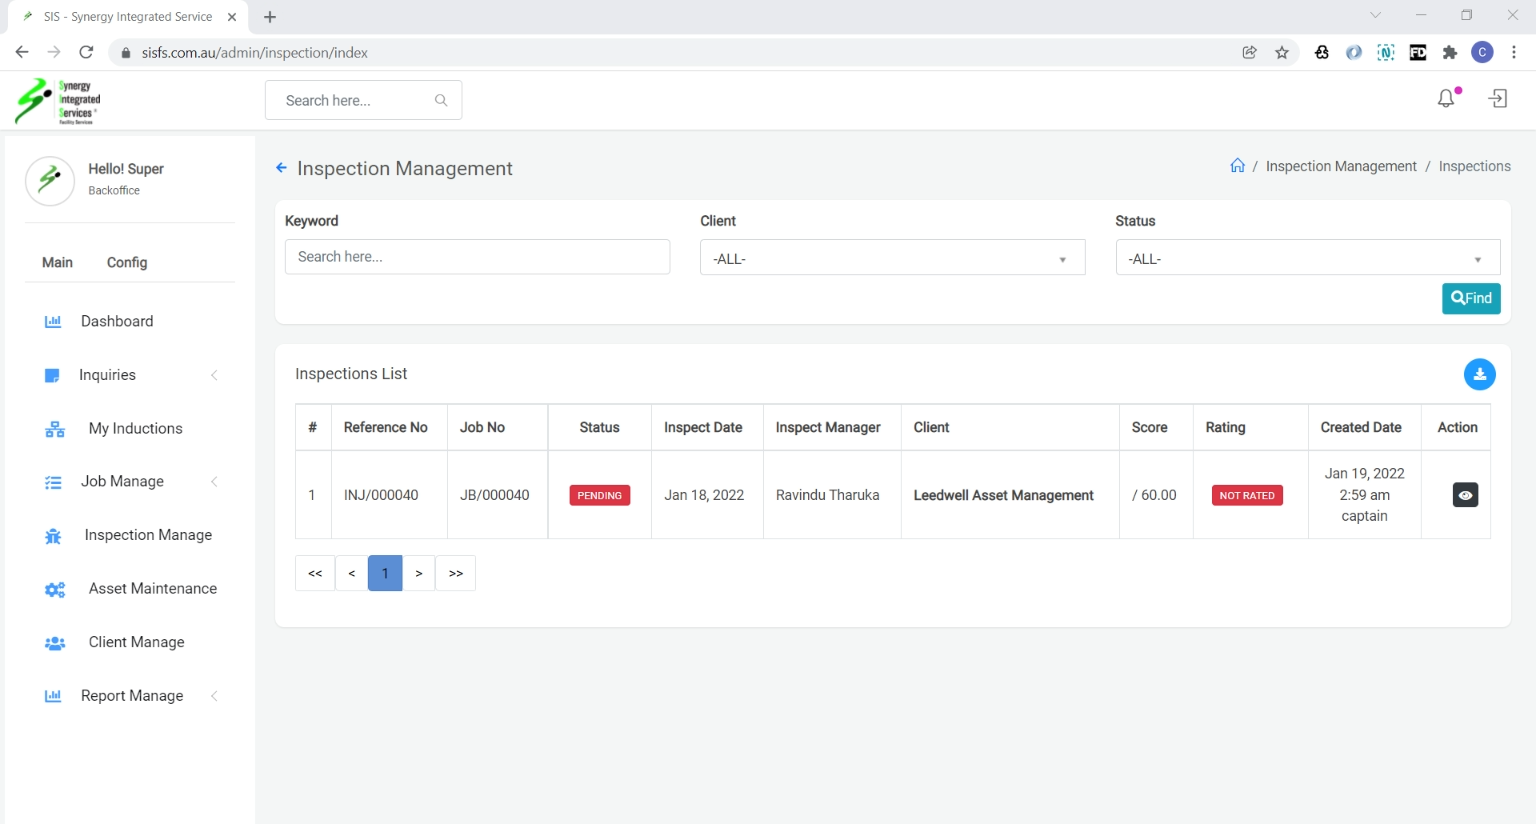
Create New Inspection
1. Open any web browser
Go to sisfs.com.au/admin
2. Log into the System
3. Navigate to Main > Inspection Manage
View Inspection Report
1. Open any web browser
Go to sisfs.com.au/admin
2. Log into the System
3. Navigate to Main > Inspection Manage
4. Click the view icon - (eye)
5. Click the print icon to get pdf
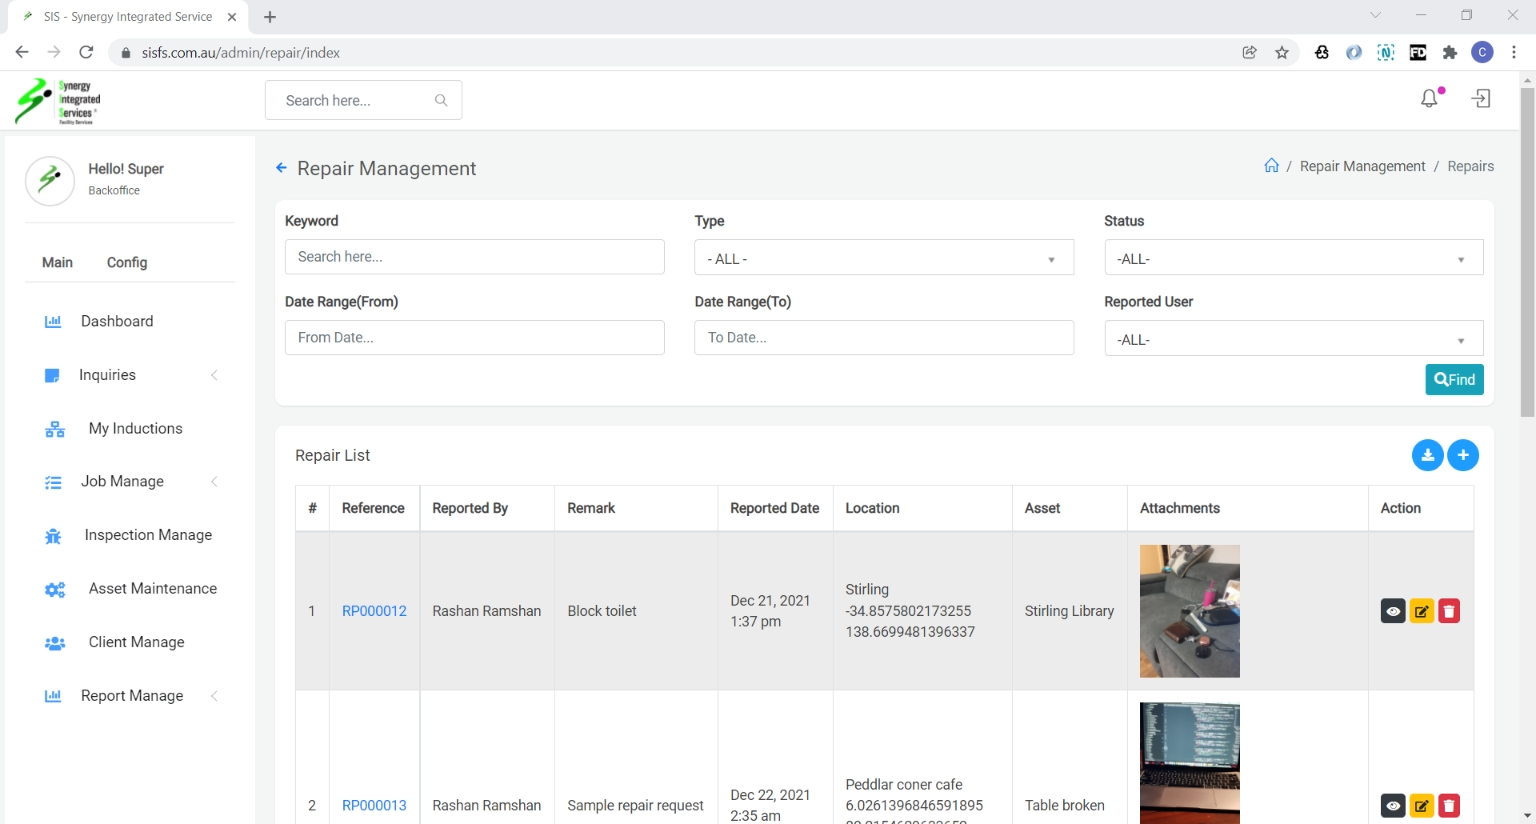
Asset Maintainance List
1. Open any web browser
Go to sisfs.com.au/admin
2. Log into the System
3. Navigate to Main > Asset Maintainance
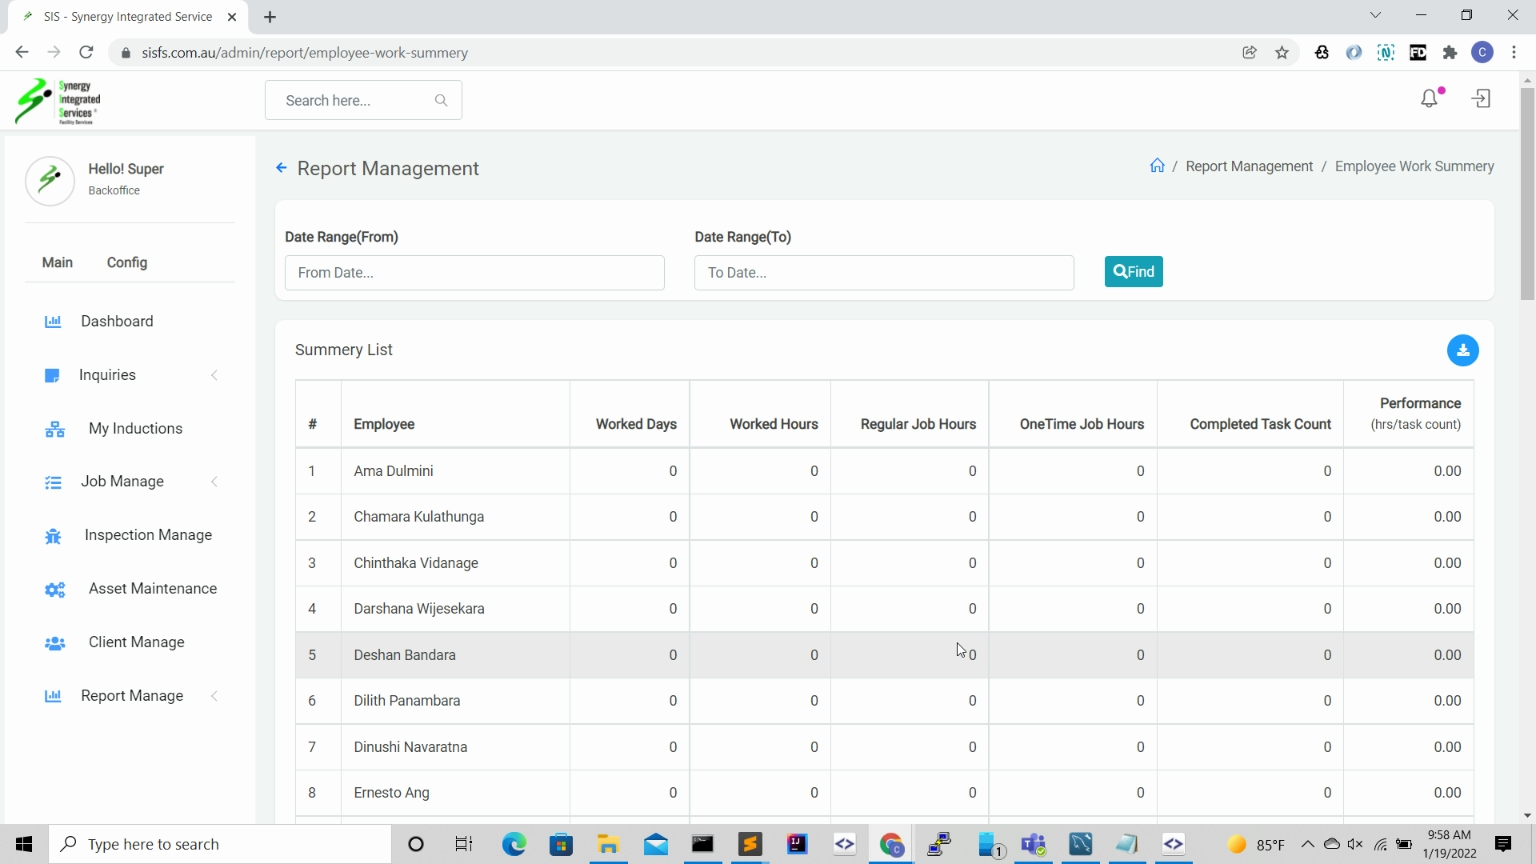
Employye work summery
1. Open any web browser
Go to sisfs.com.au/admin
2. Log into the System
3. Navigate to Main > Report Manage > Work Summery
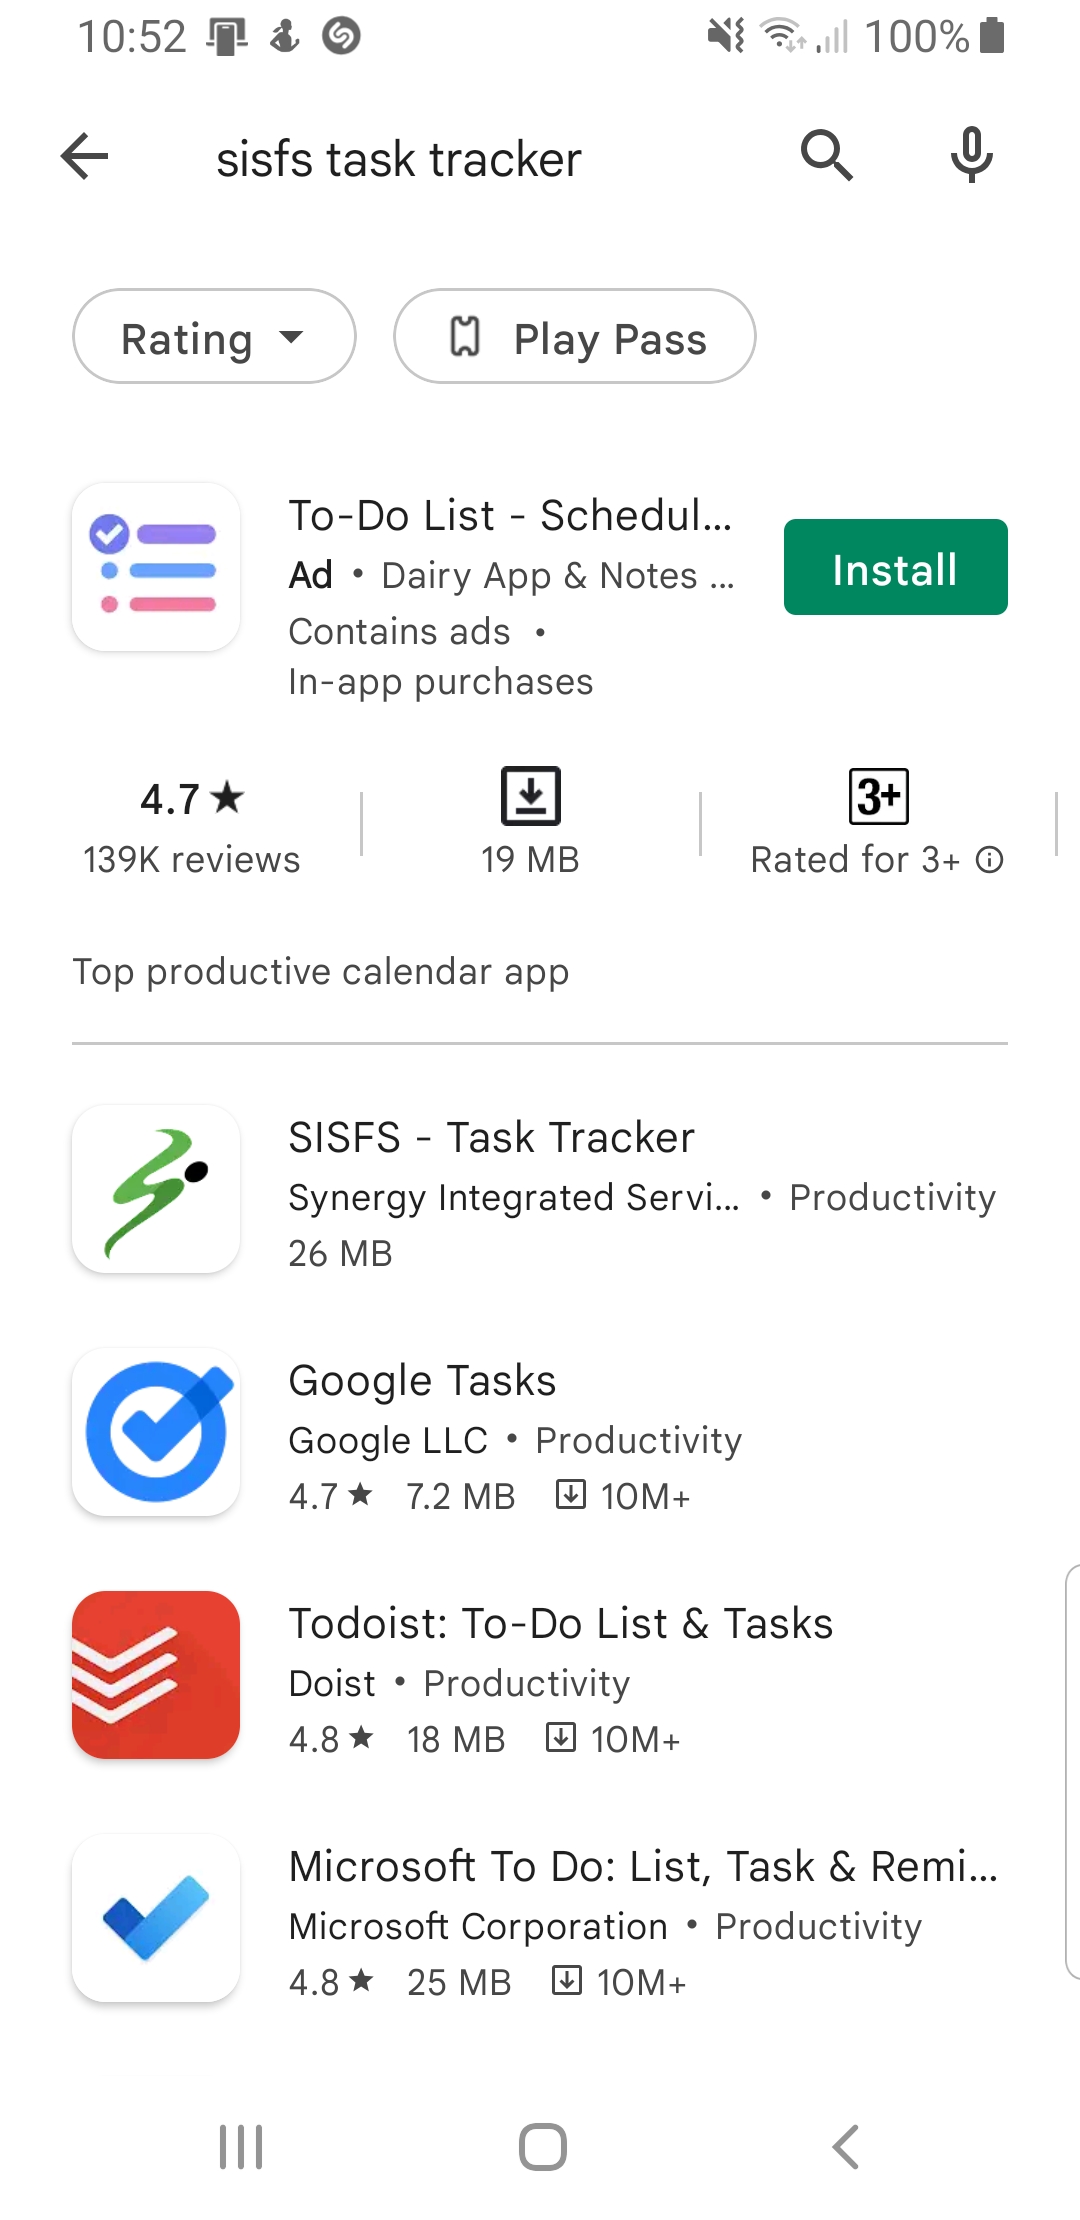
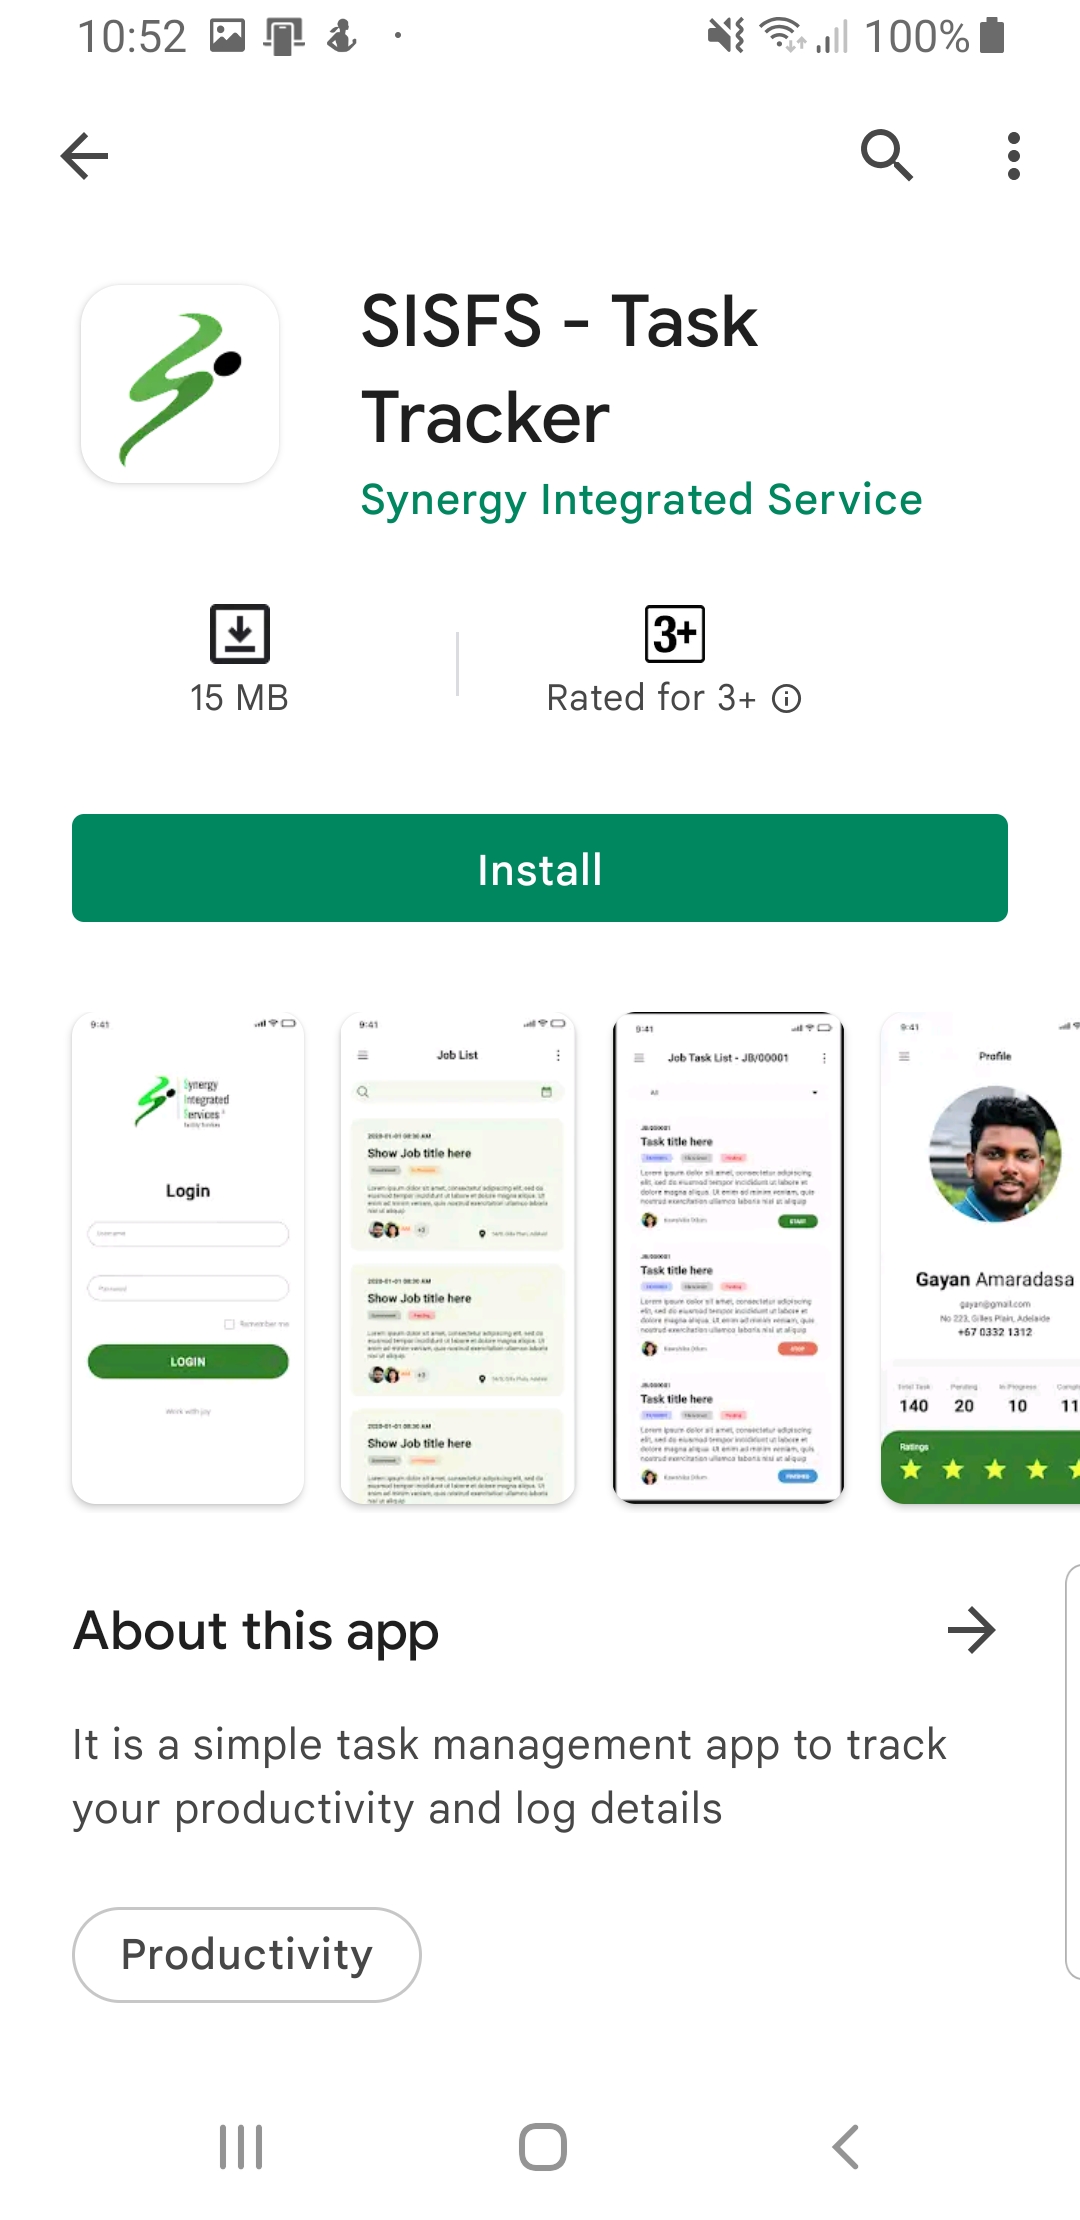
Download Mobile App
1. Open Google Playstore App (App Link)
2. Search for synery task tracker app
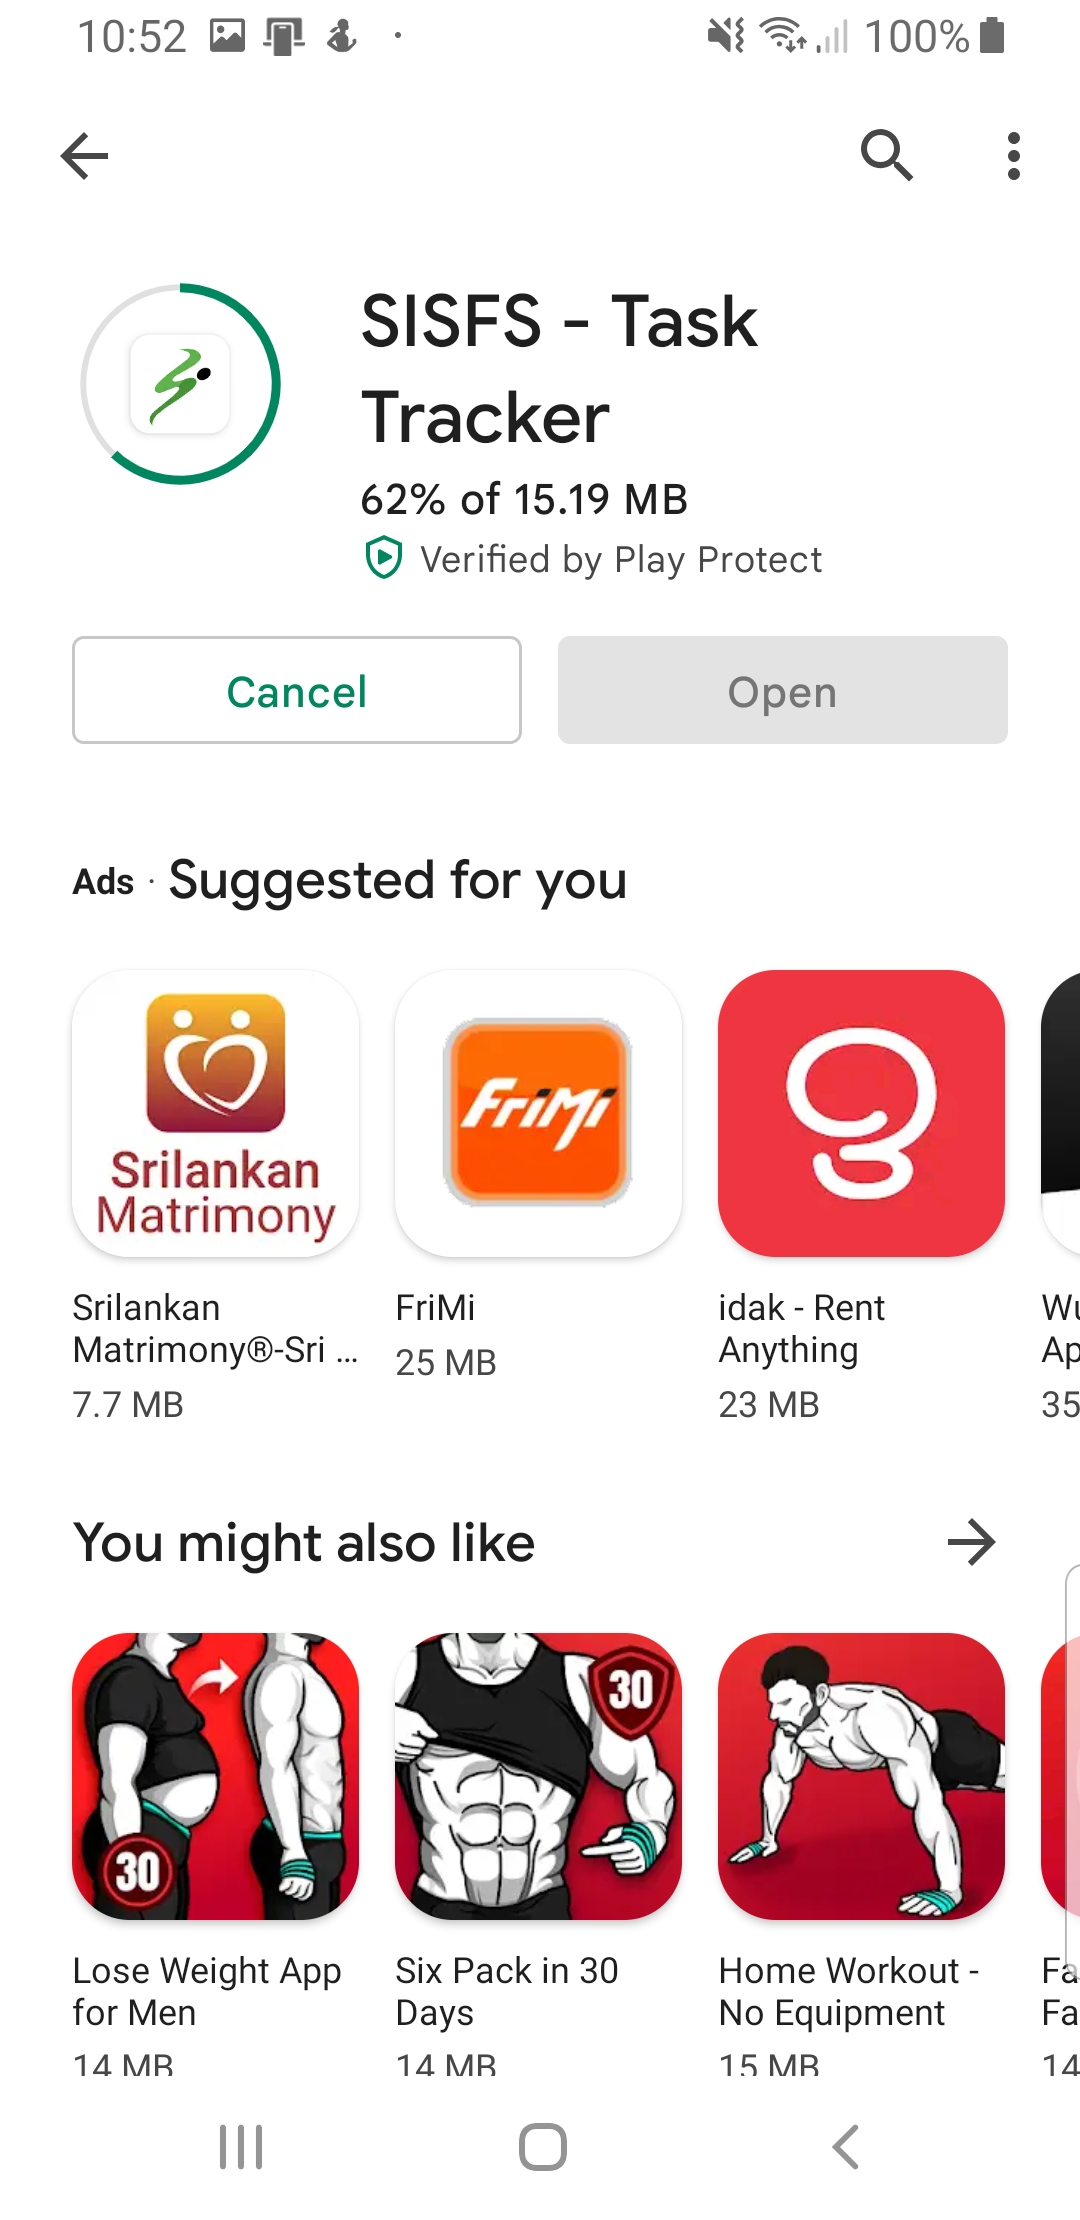
3. Dowload the Synergy Task Tracker app
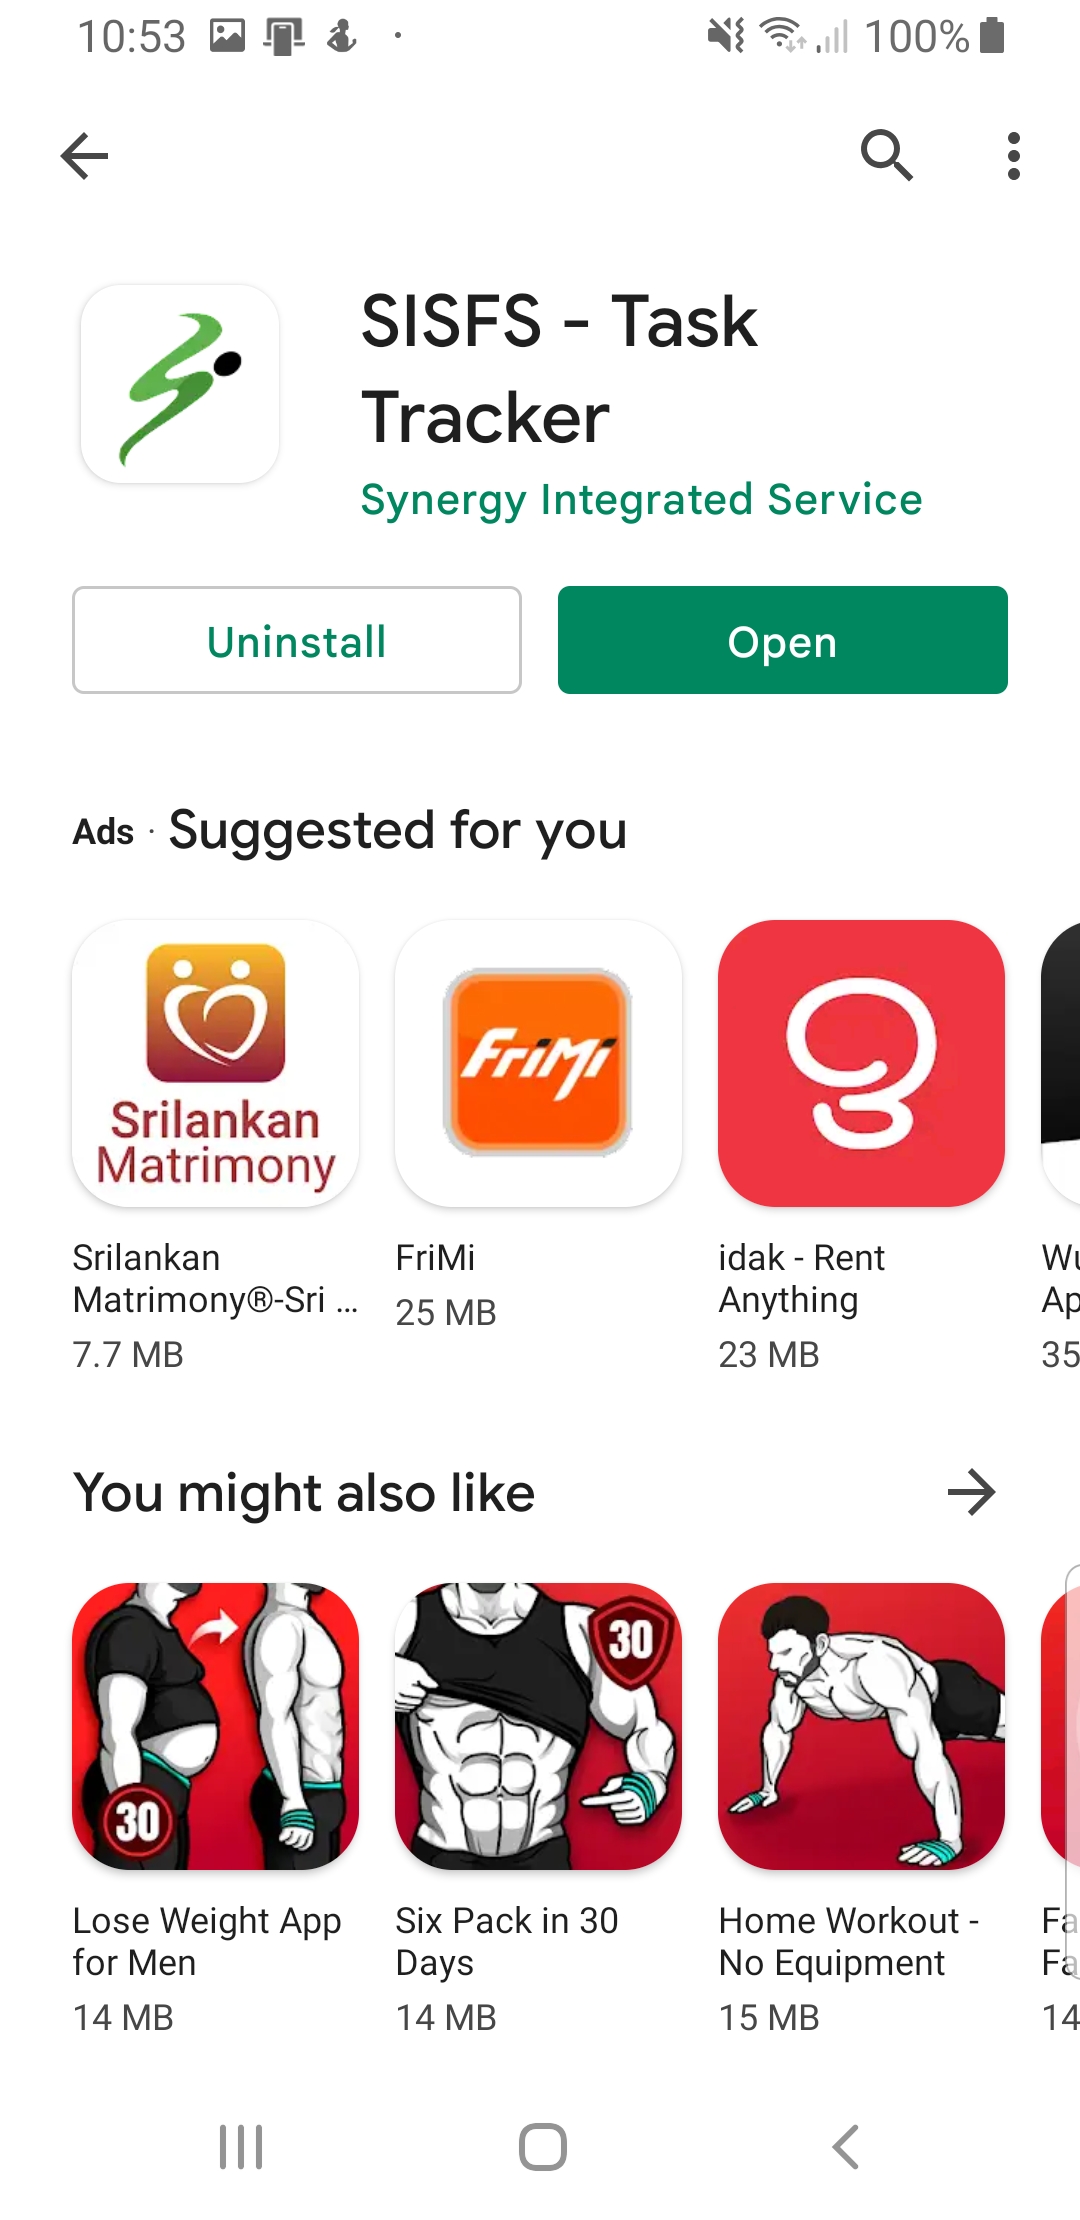
4. Install App
Step 1
Step 2
Step 3
Step 4
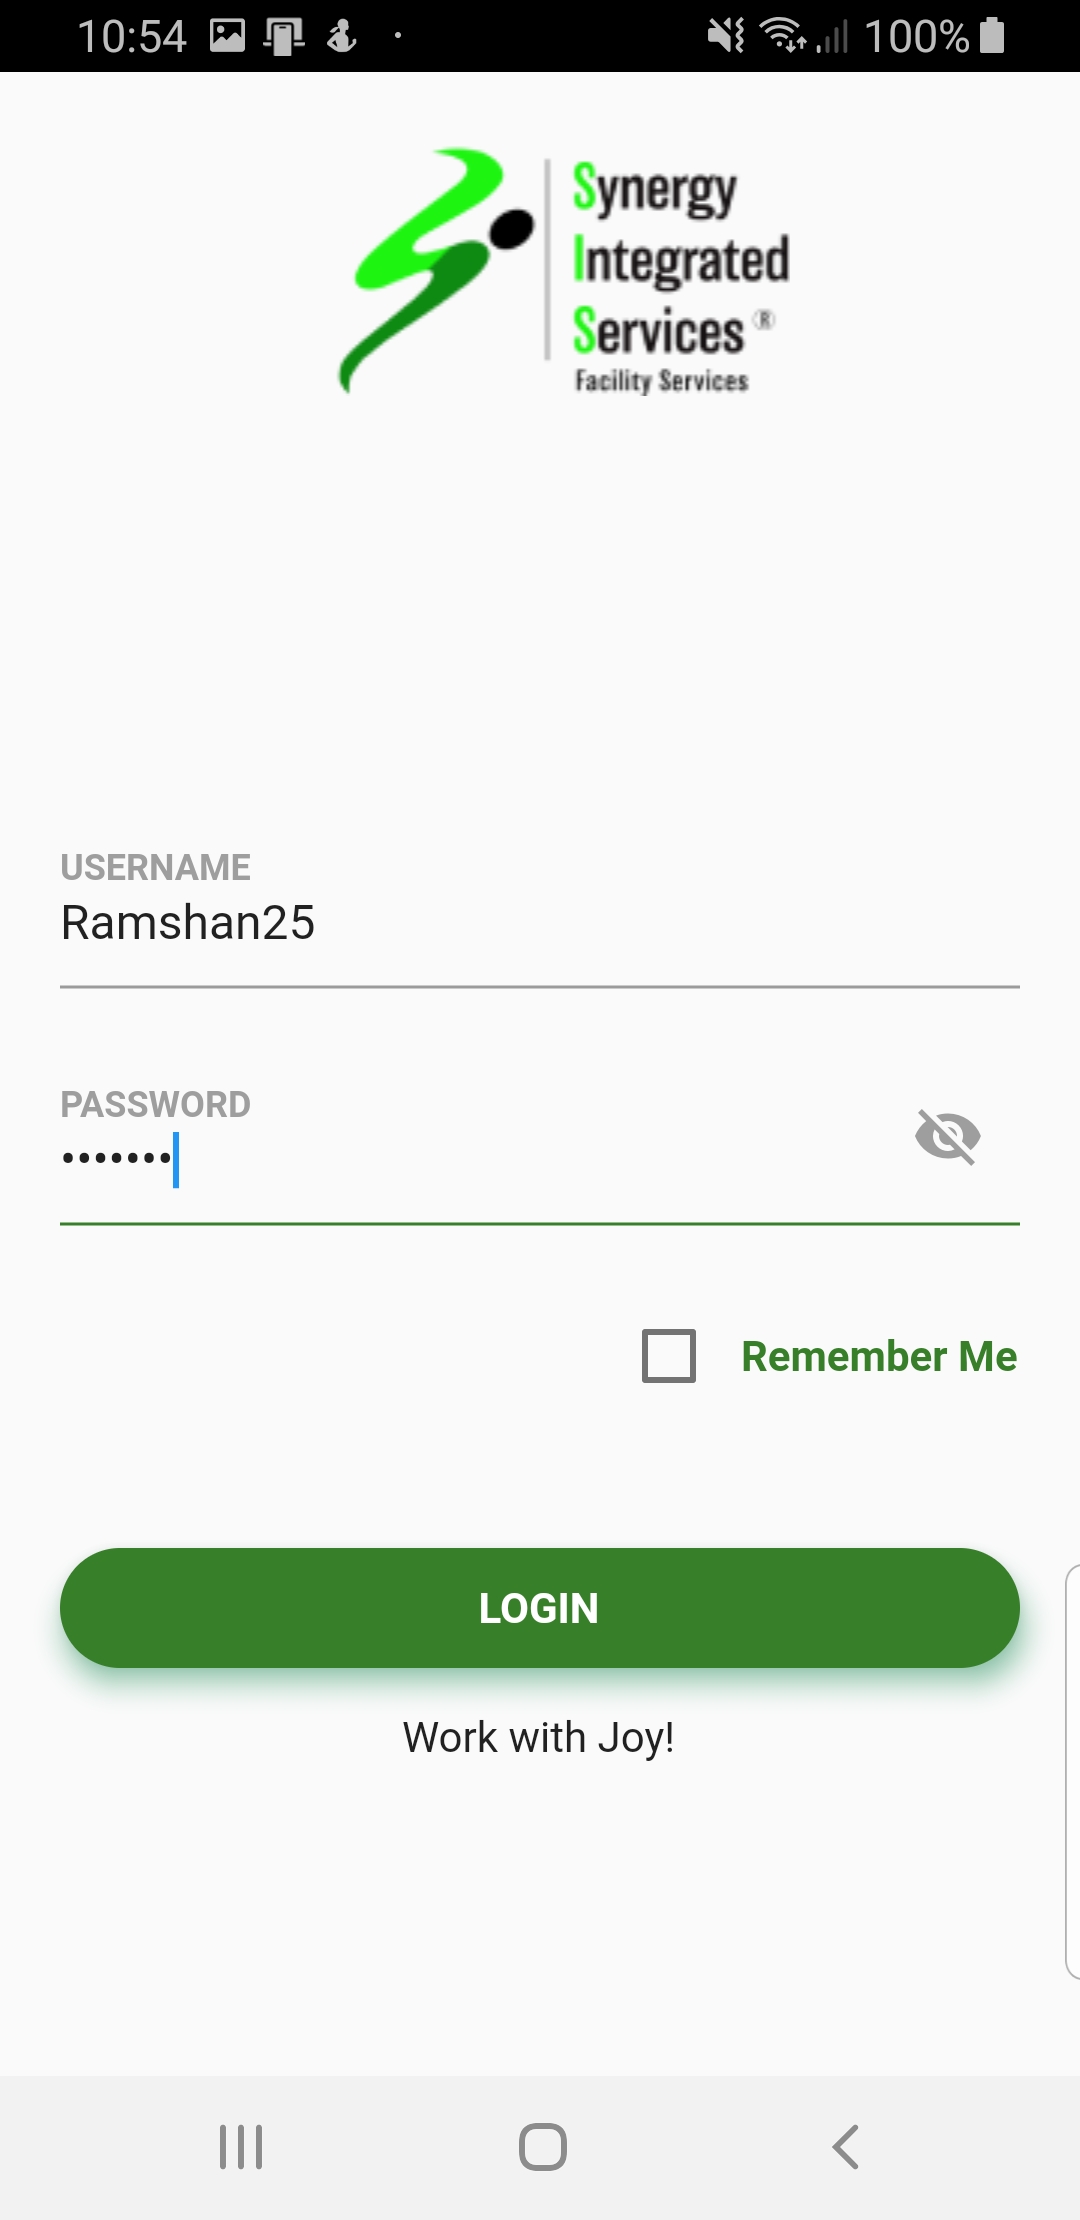
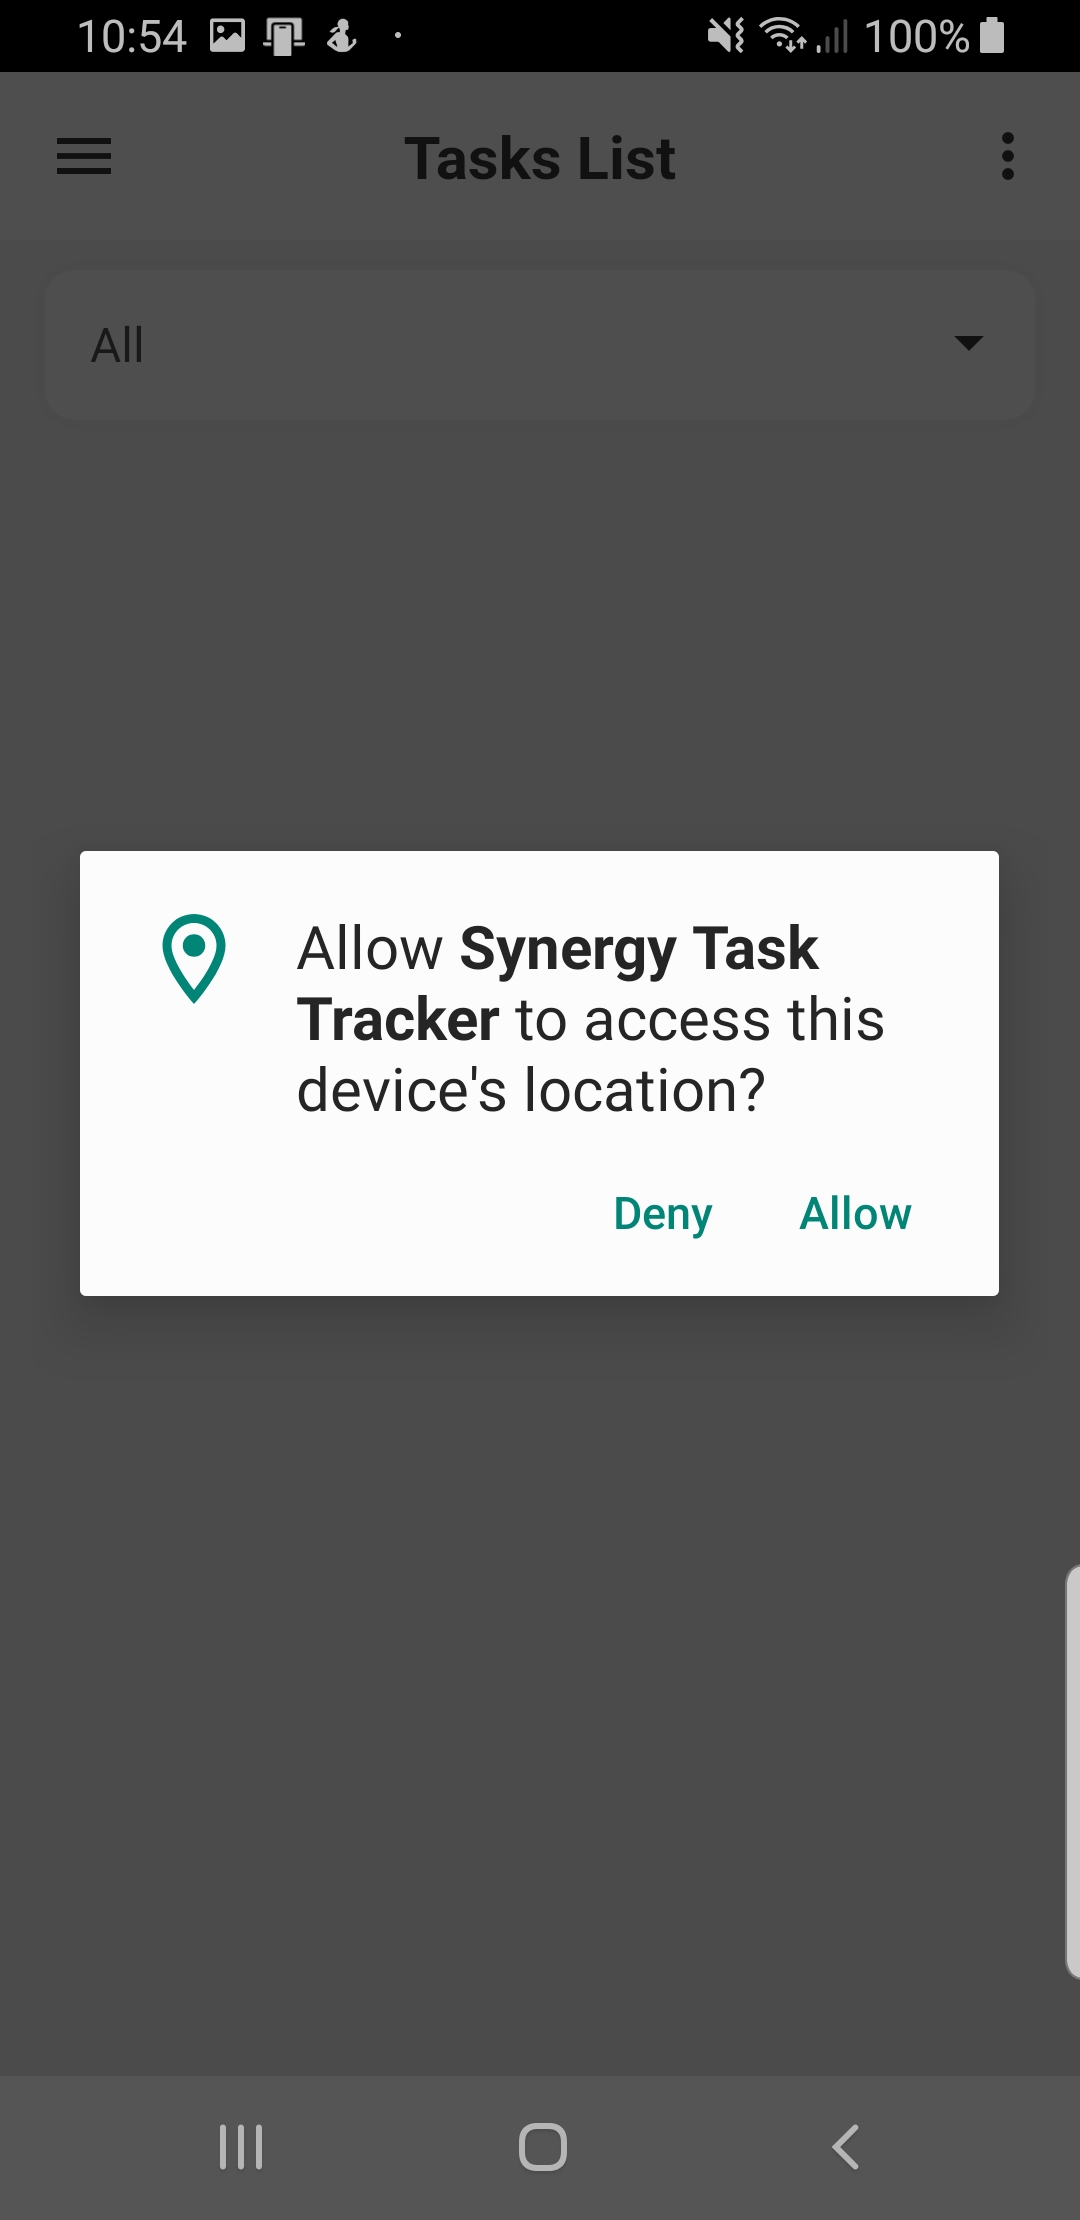
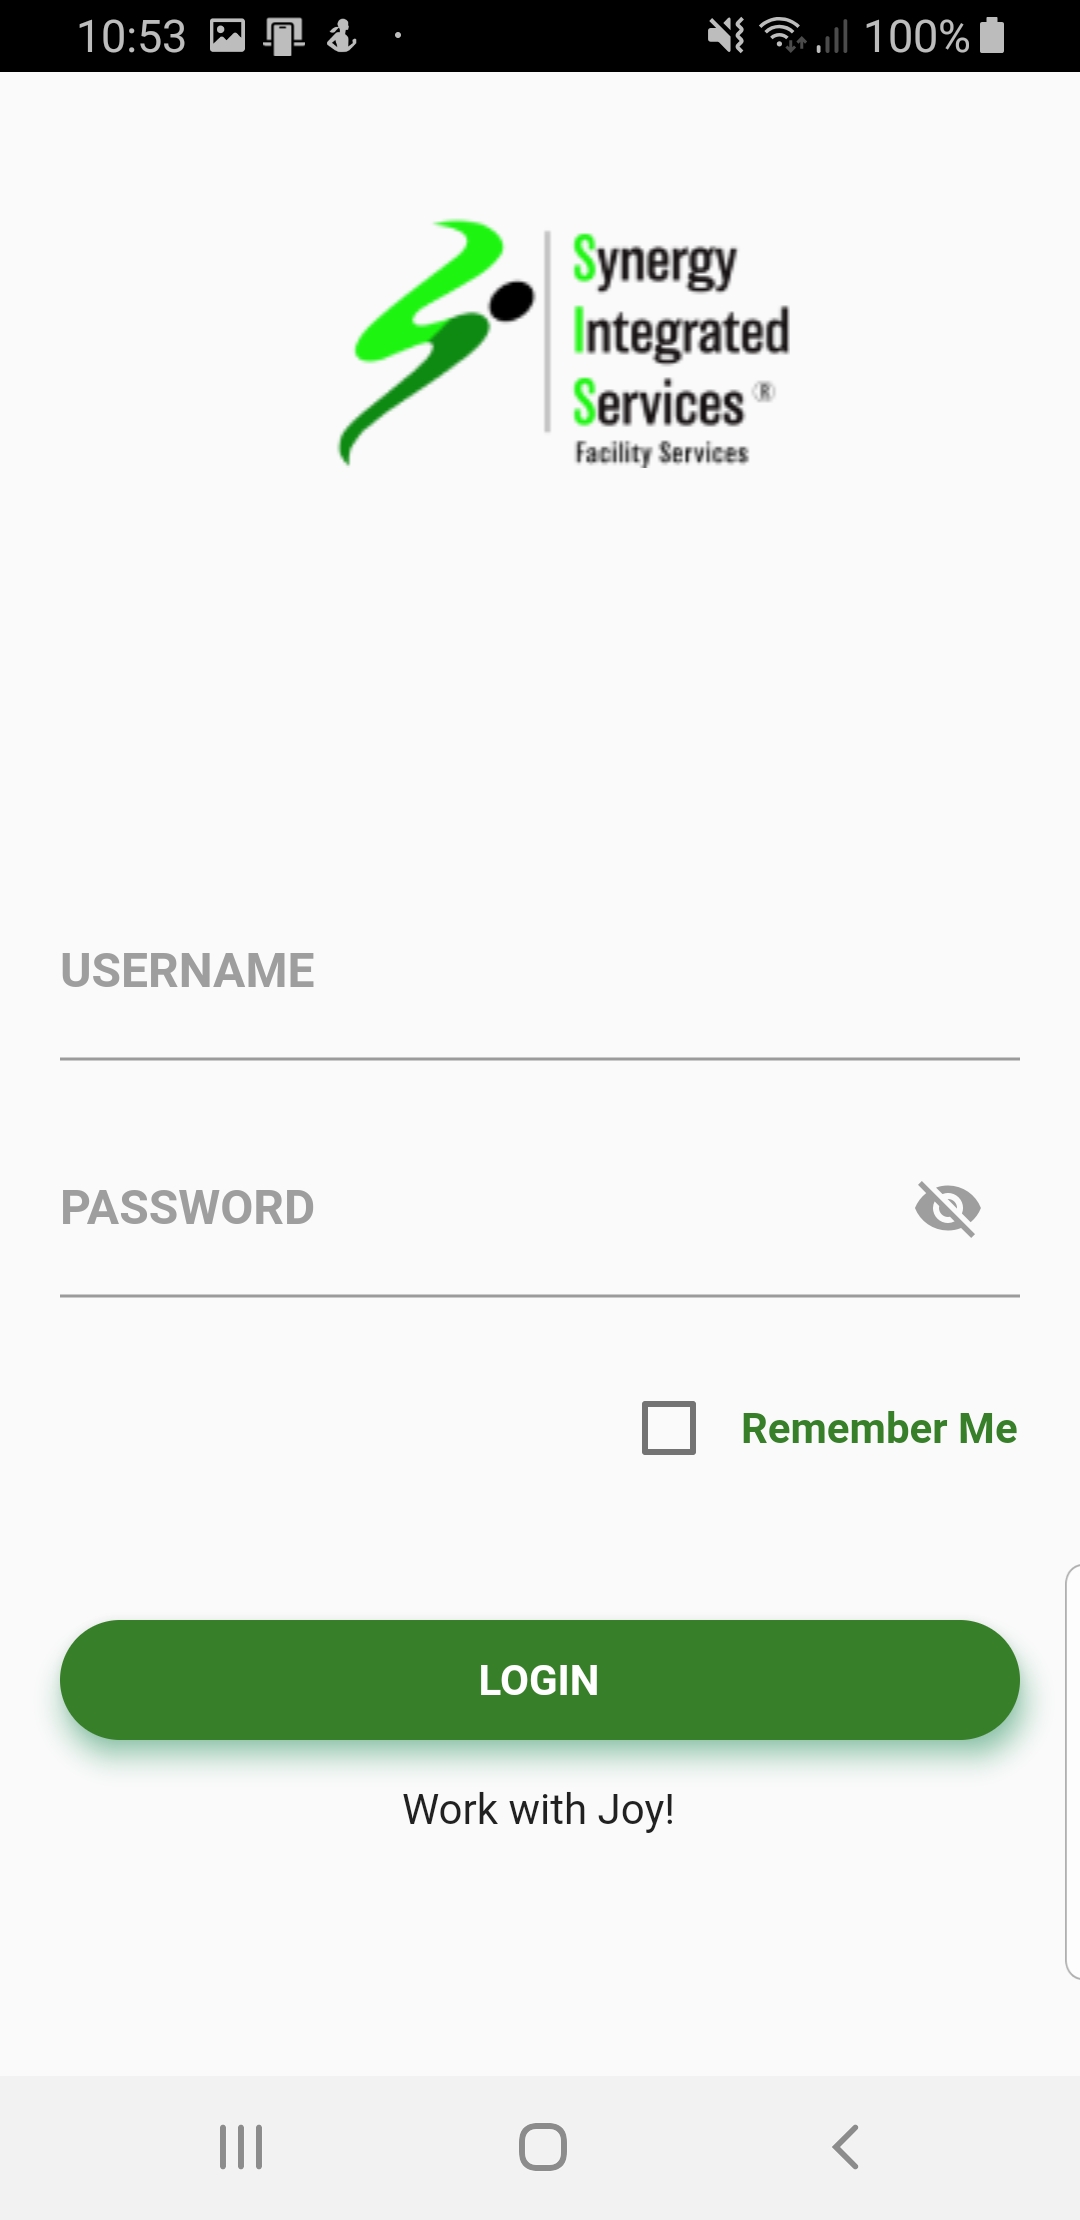
How to log in to app
1. Open sisfs task tracker. (If not installed Download here)
2. Enter user name and password
3. Click log in button
4. Allow permission for device location
Step 1

Step 2
Step 3
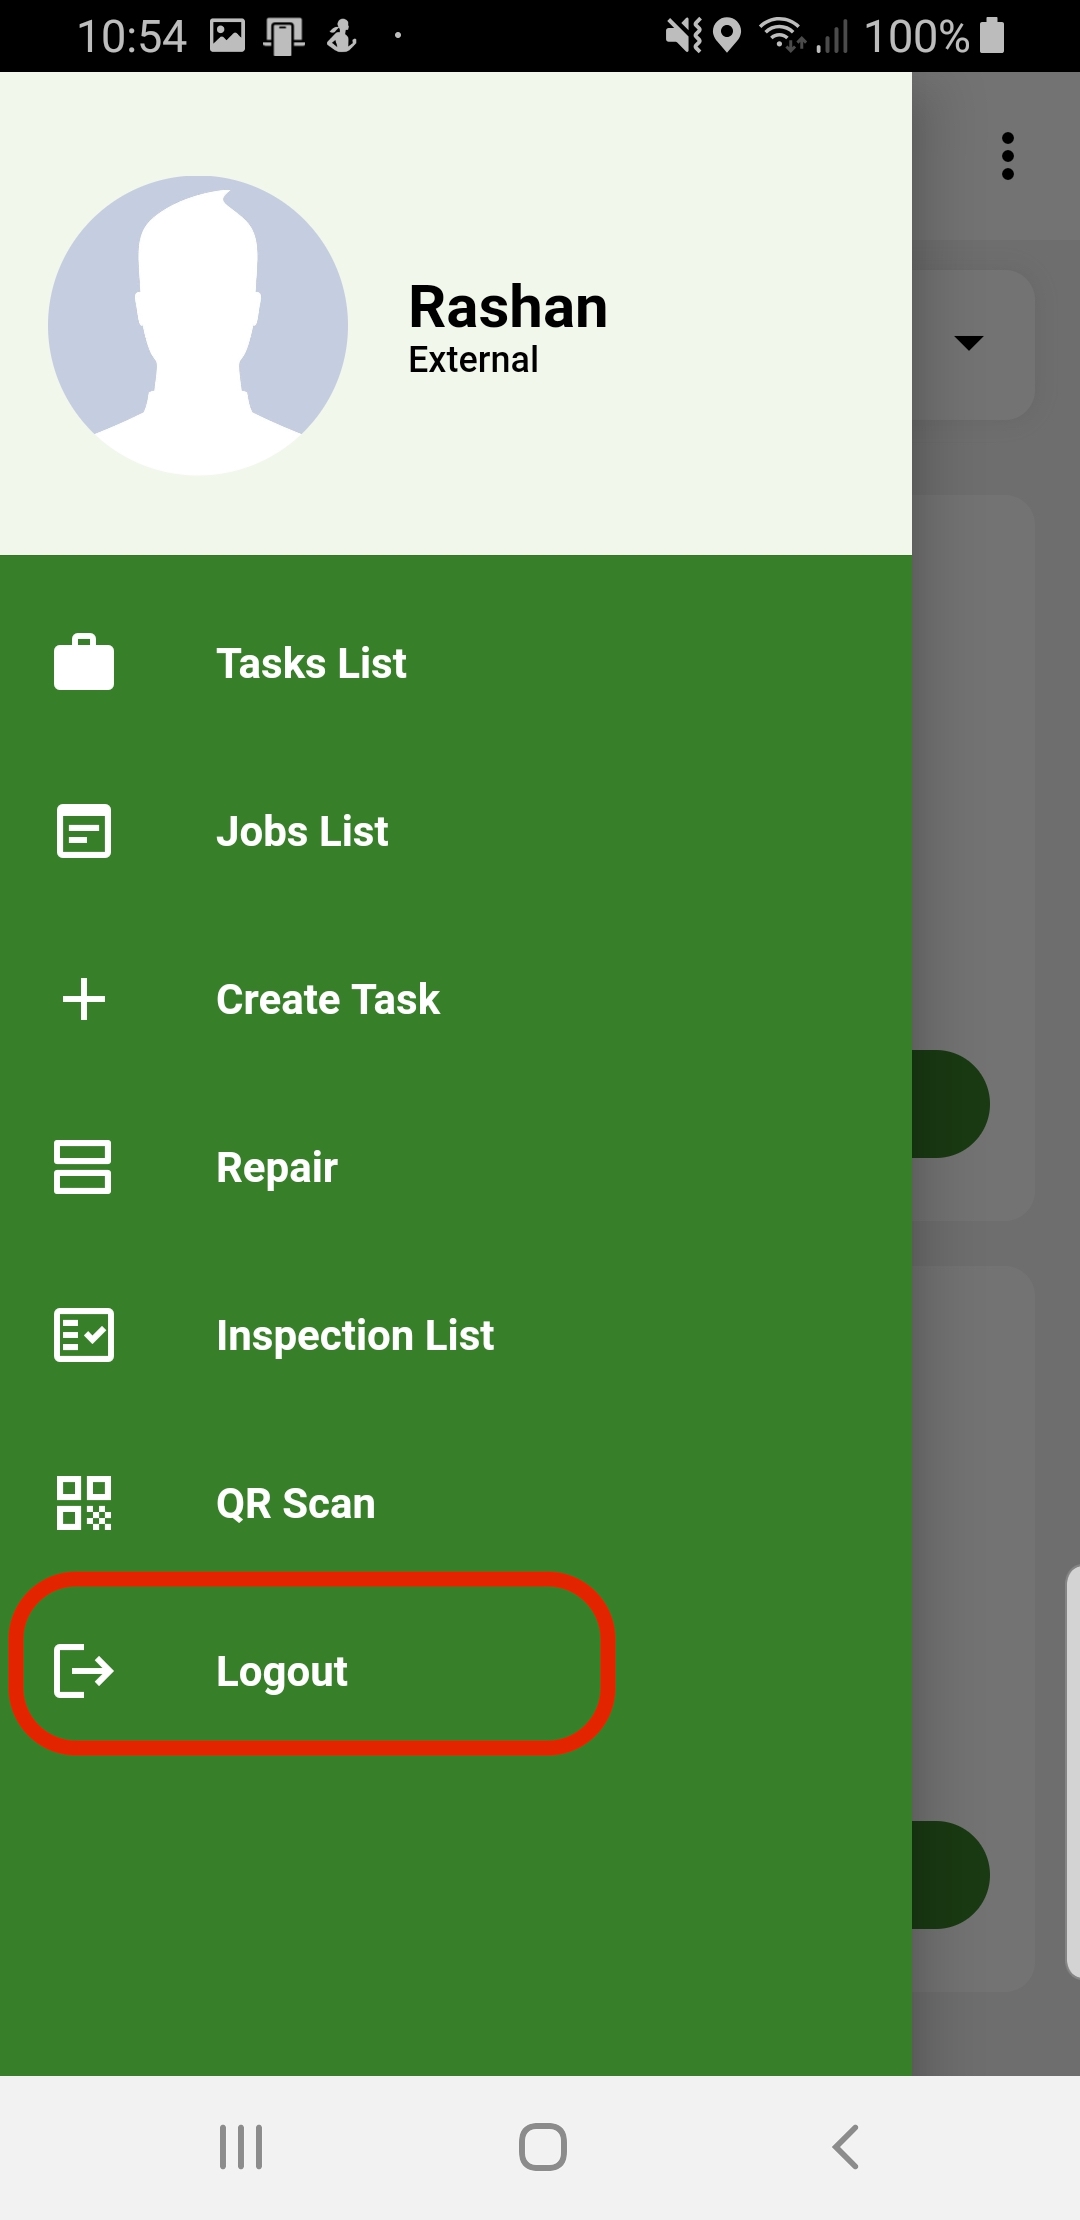
How to log out from app
1. Click app side bar
2. Last side bar item is Log Out option.
3. Click on Logout menu. (App will redirect back to login page)
(App will redirect back to login page)
Step 1
Step 2
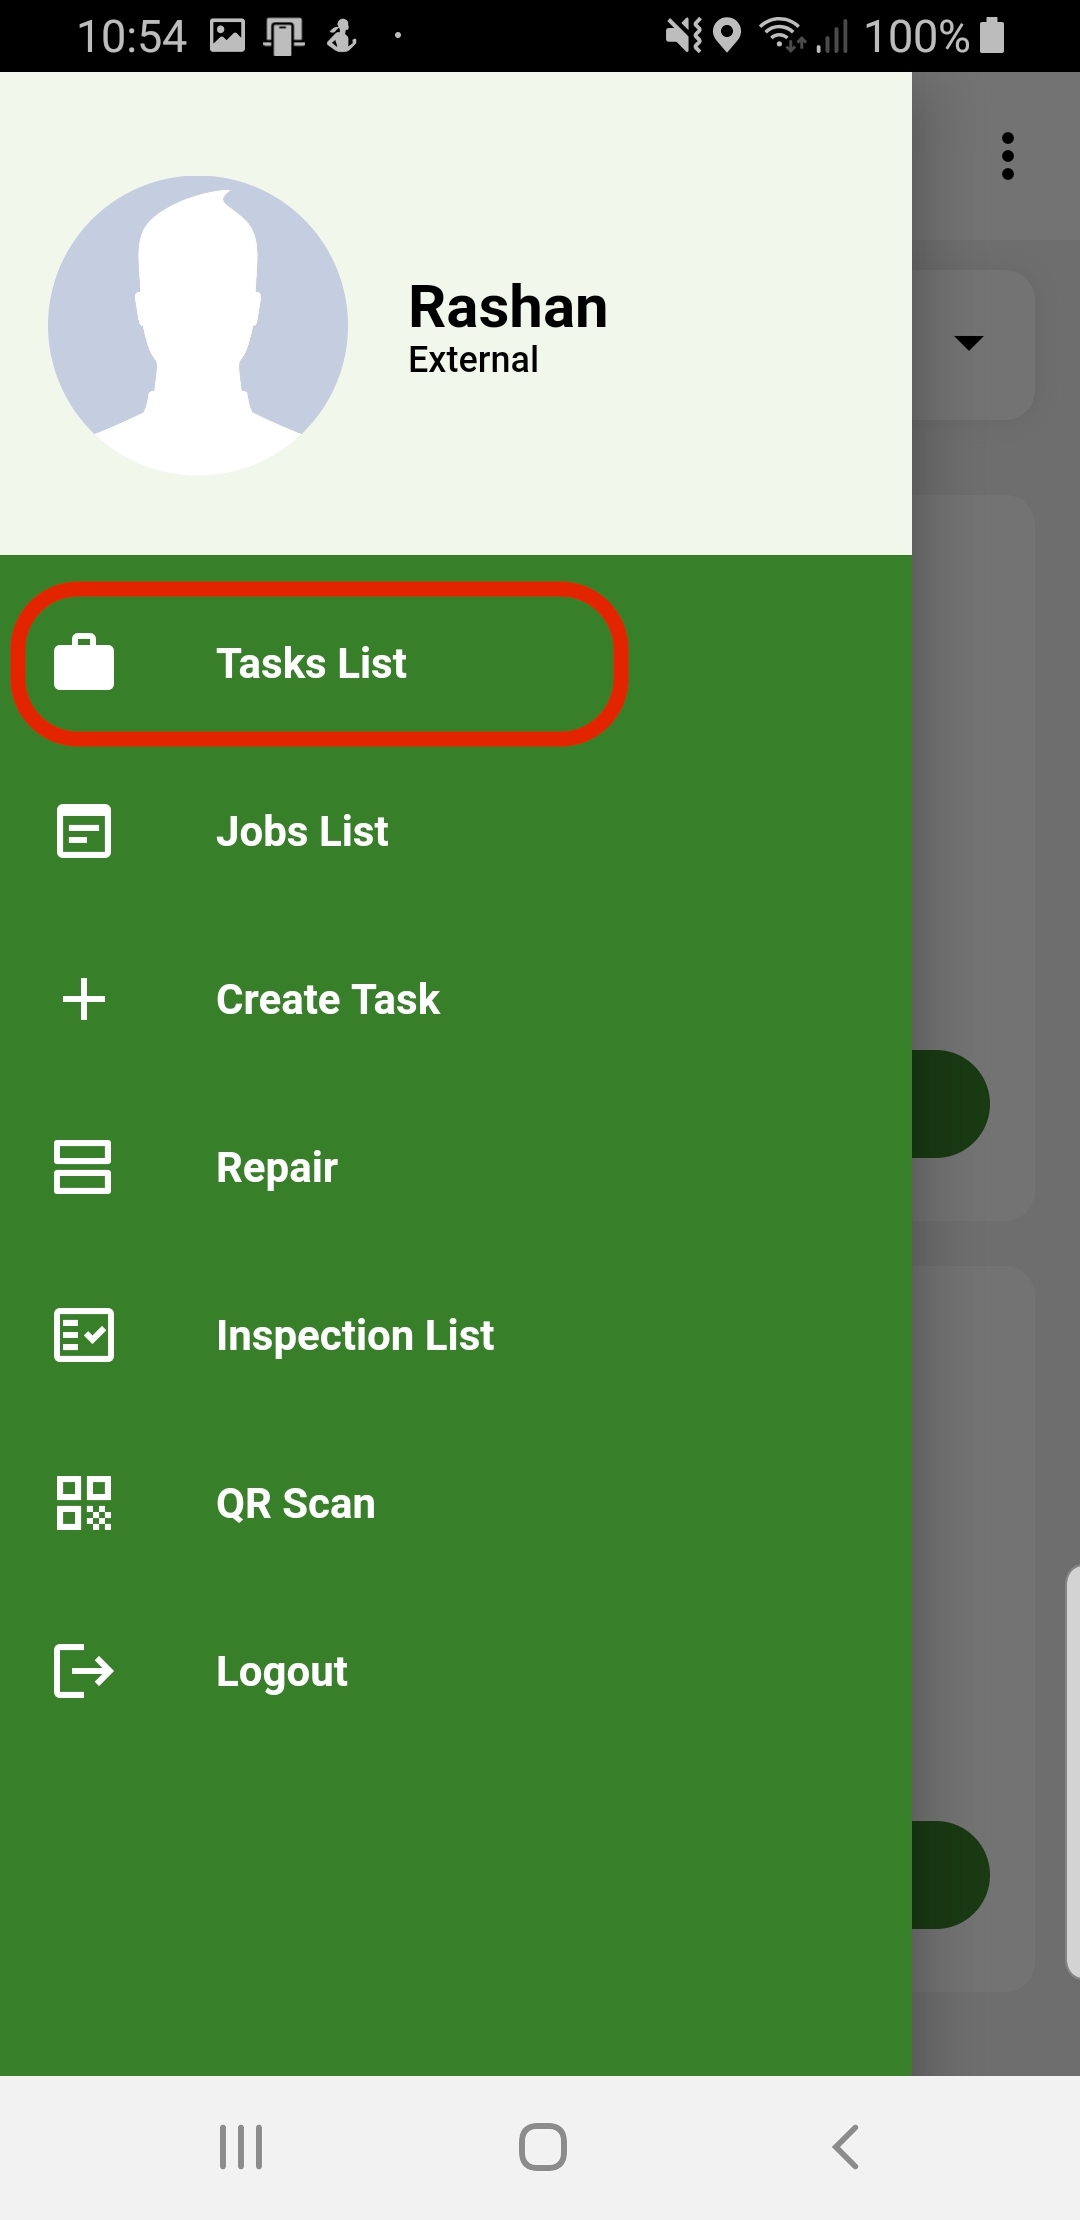
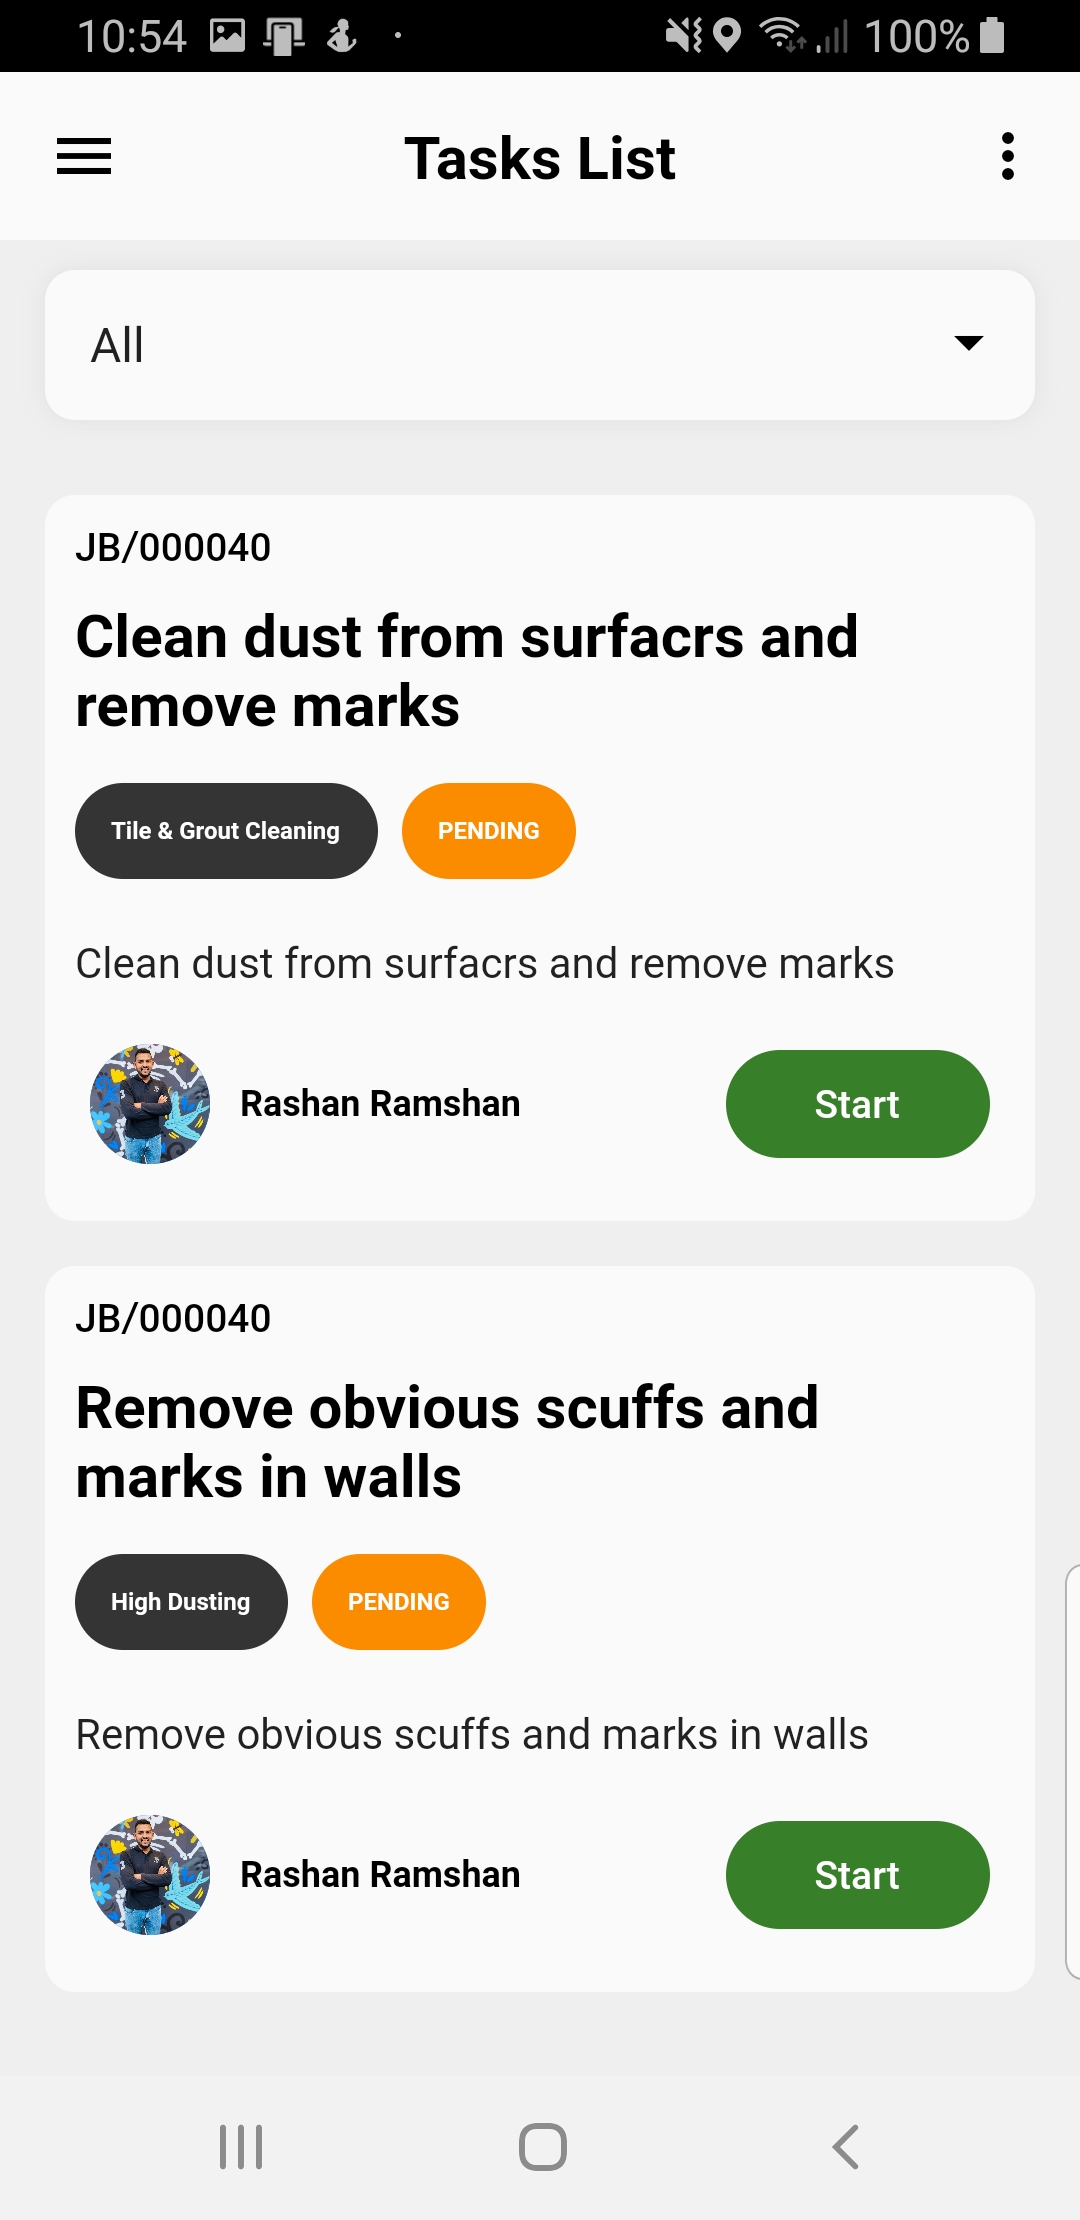
View Assigned Task
1. Log in to the mobile app if not logged already
2. Success login will redirect you directly in to Assigned Task View.
3. Other wise click on Task List in Side menu
(App will redirect back to assigned task view)
4. Use top drop down to filter assigned task by current status
Step 1
Step 2
Step 3

Step 4
Step 5
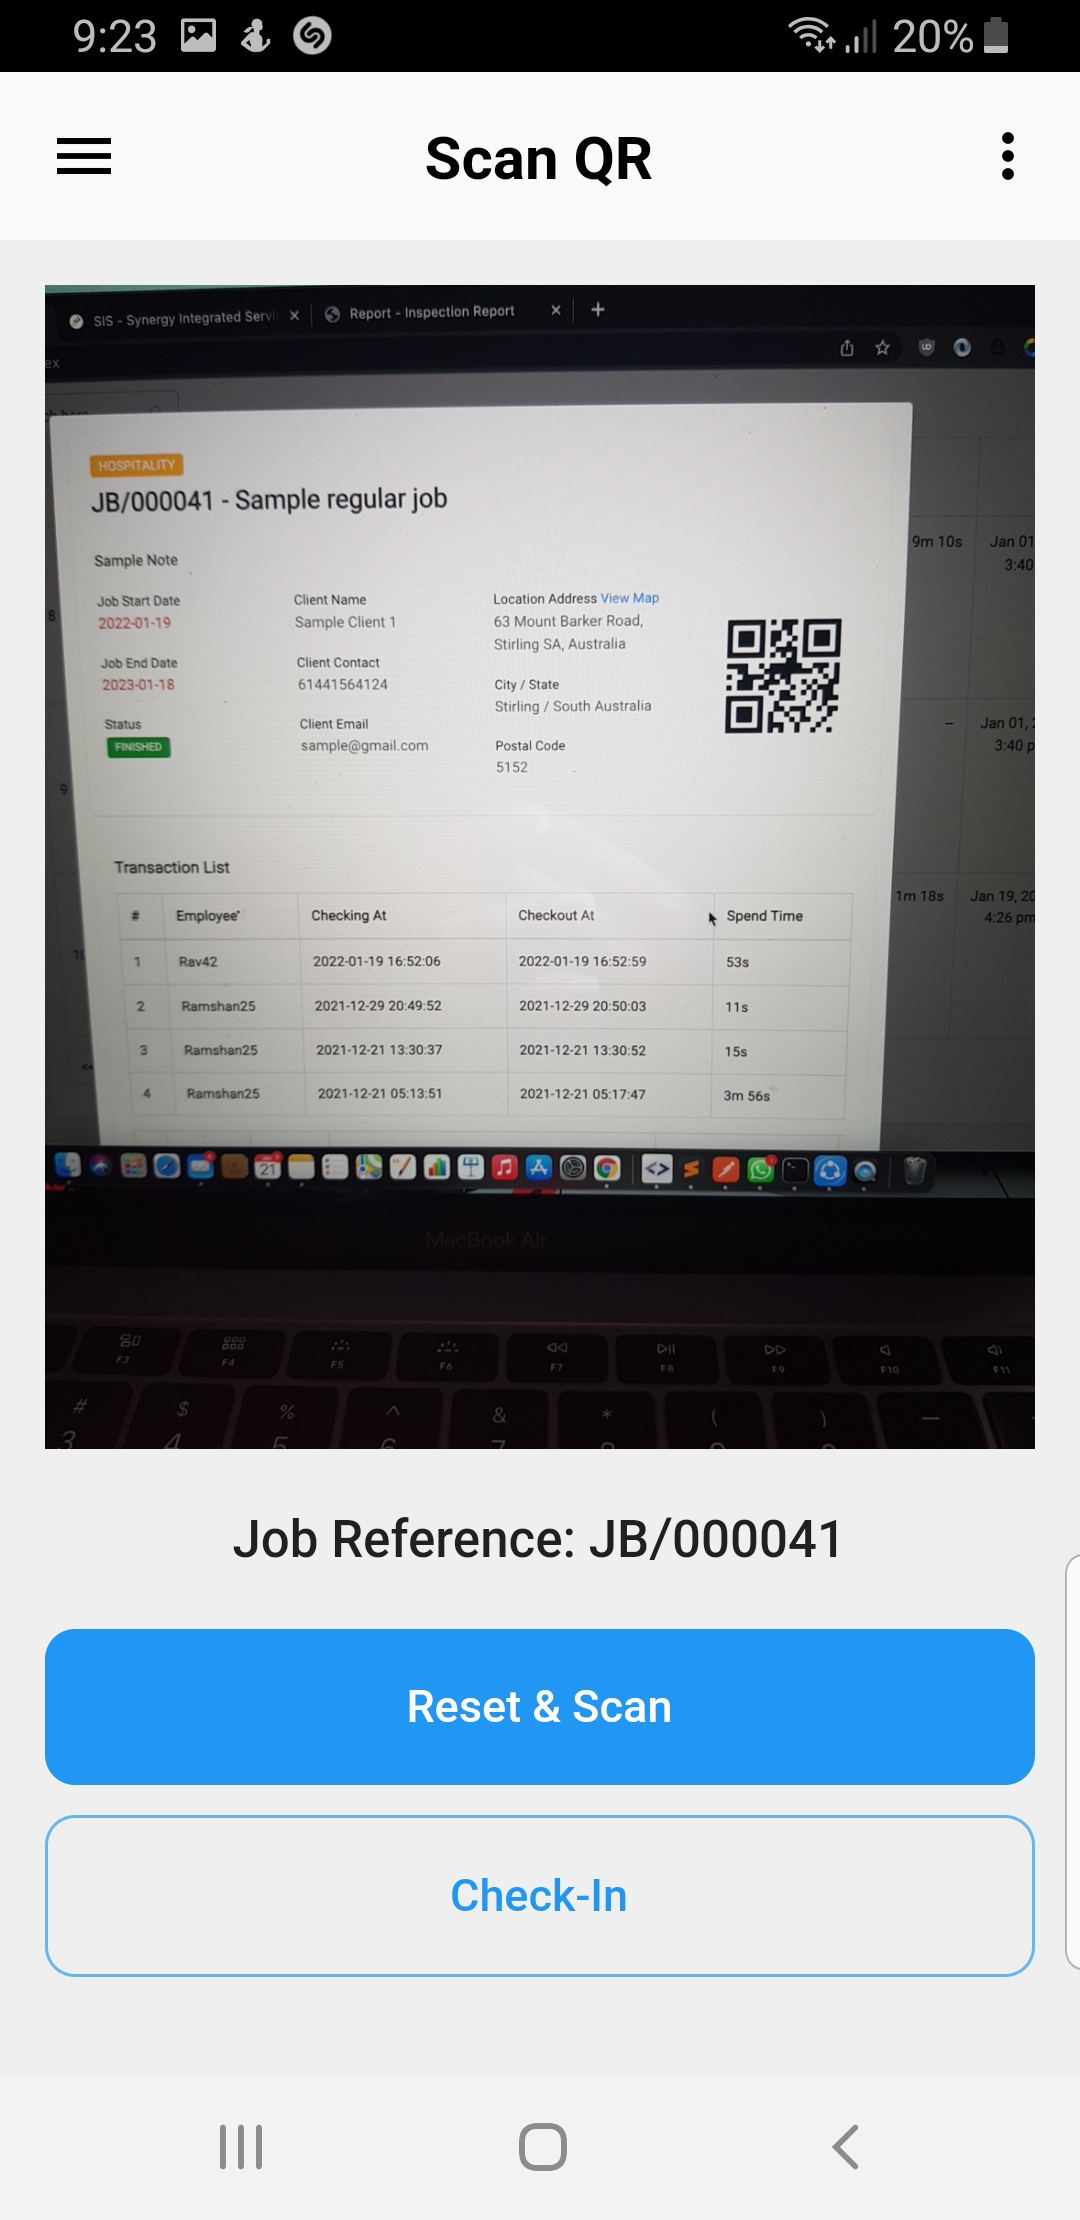
Check-In Regular Job
1. Log in to the mobile app if not logged already
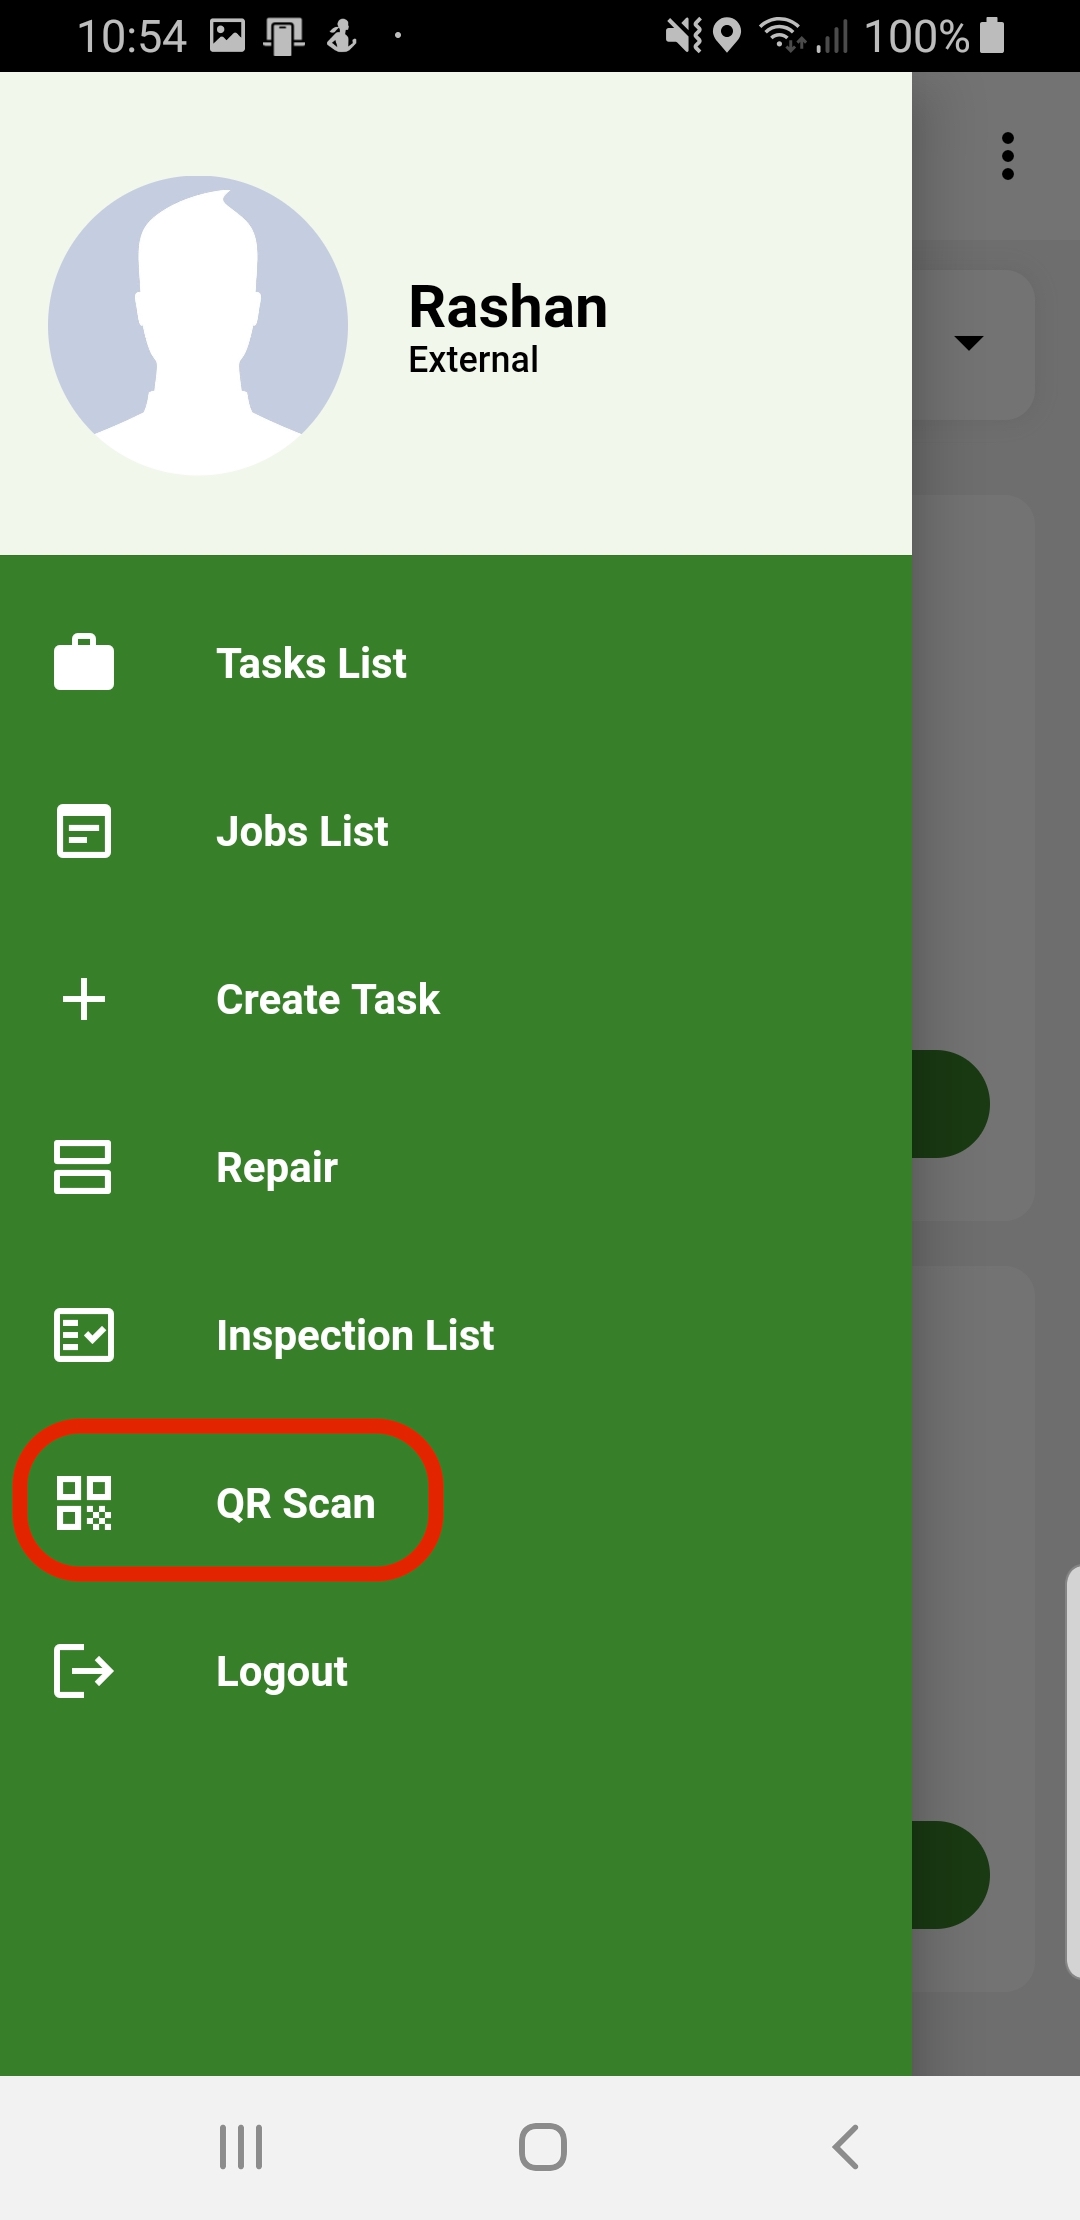
2. Open side menu
3. Select Sacn QR
(App will redirect to QR Code Scan view)
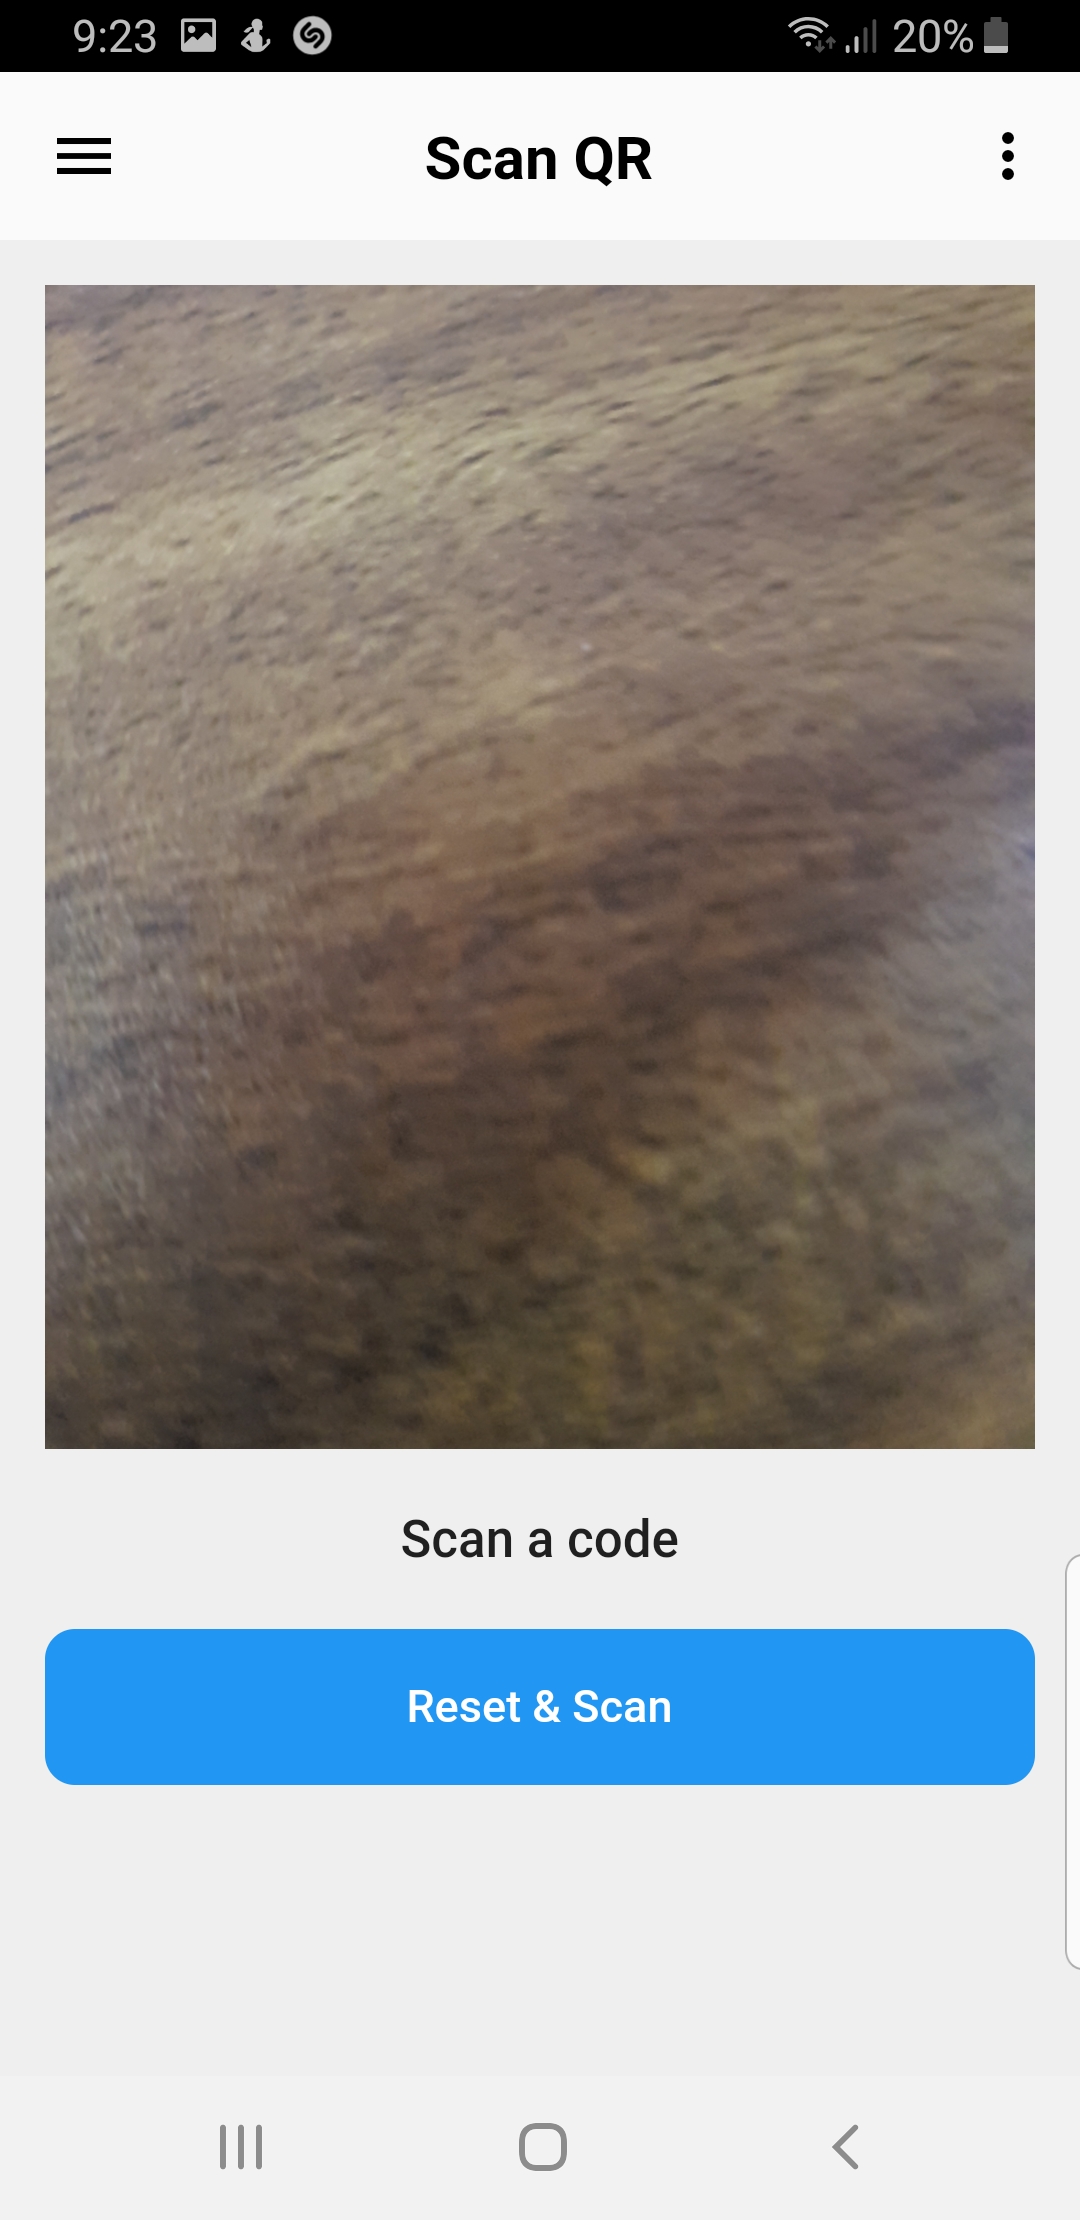
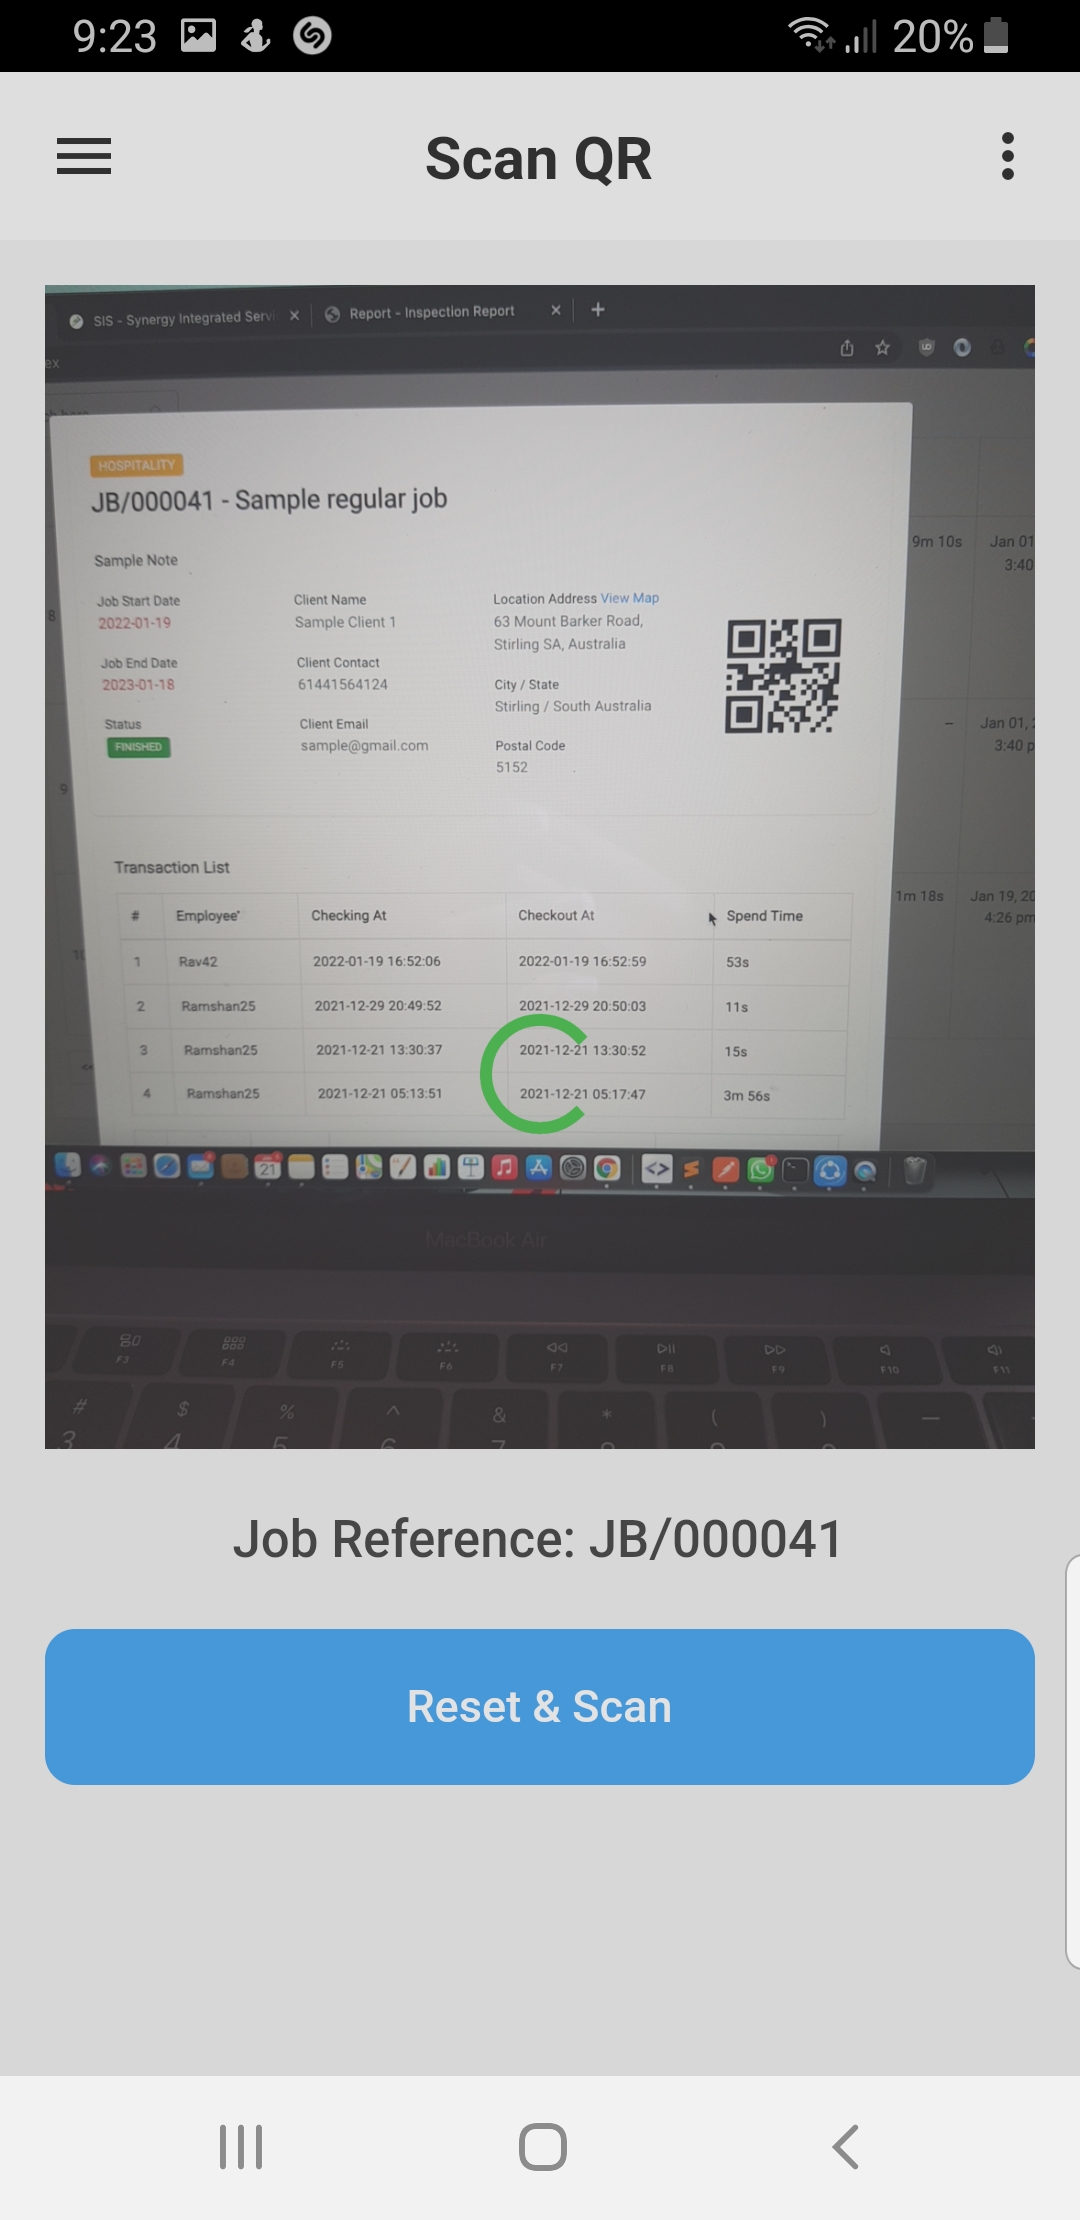
4. Scan QR
5. Click Check-In button
Step 1

Step 2

Step 3

Step 4
Step 5
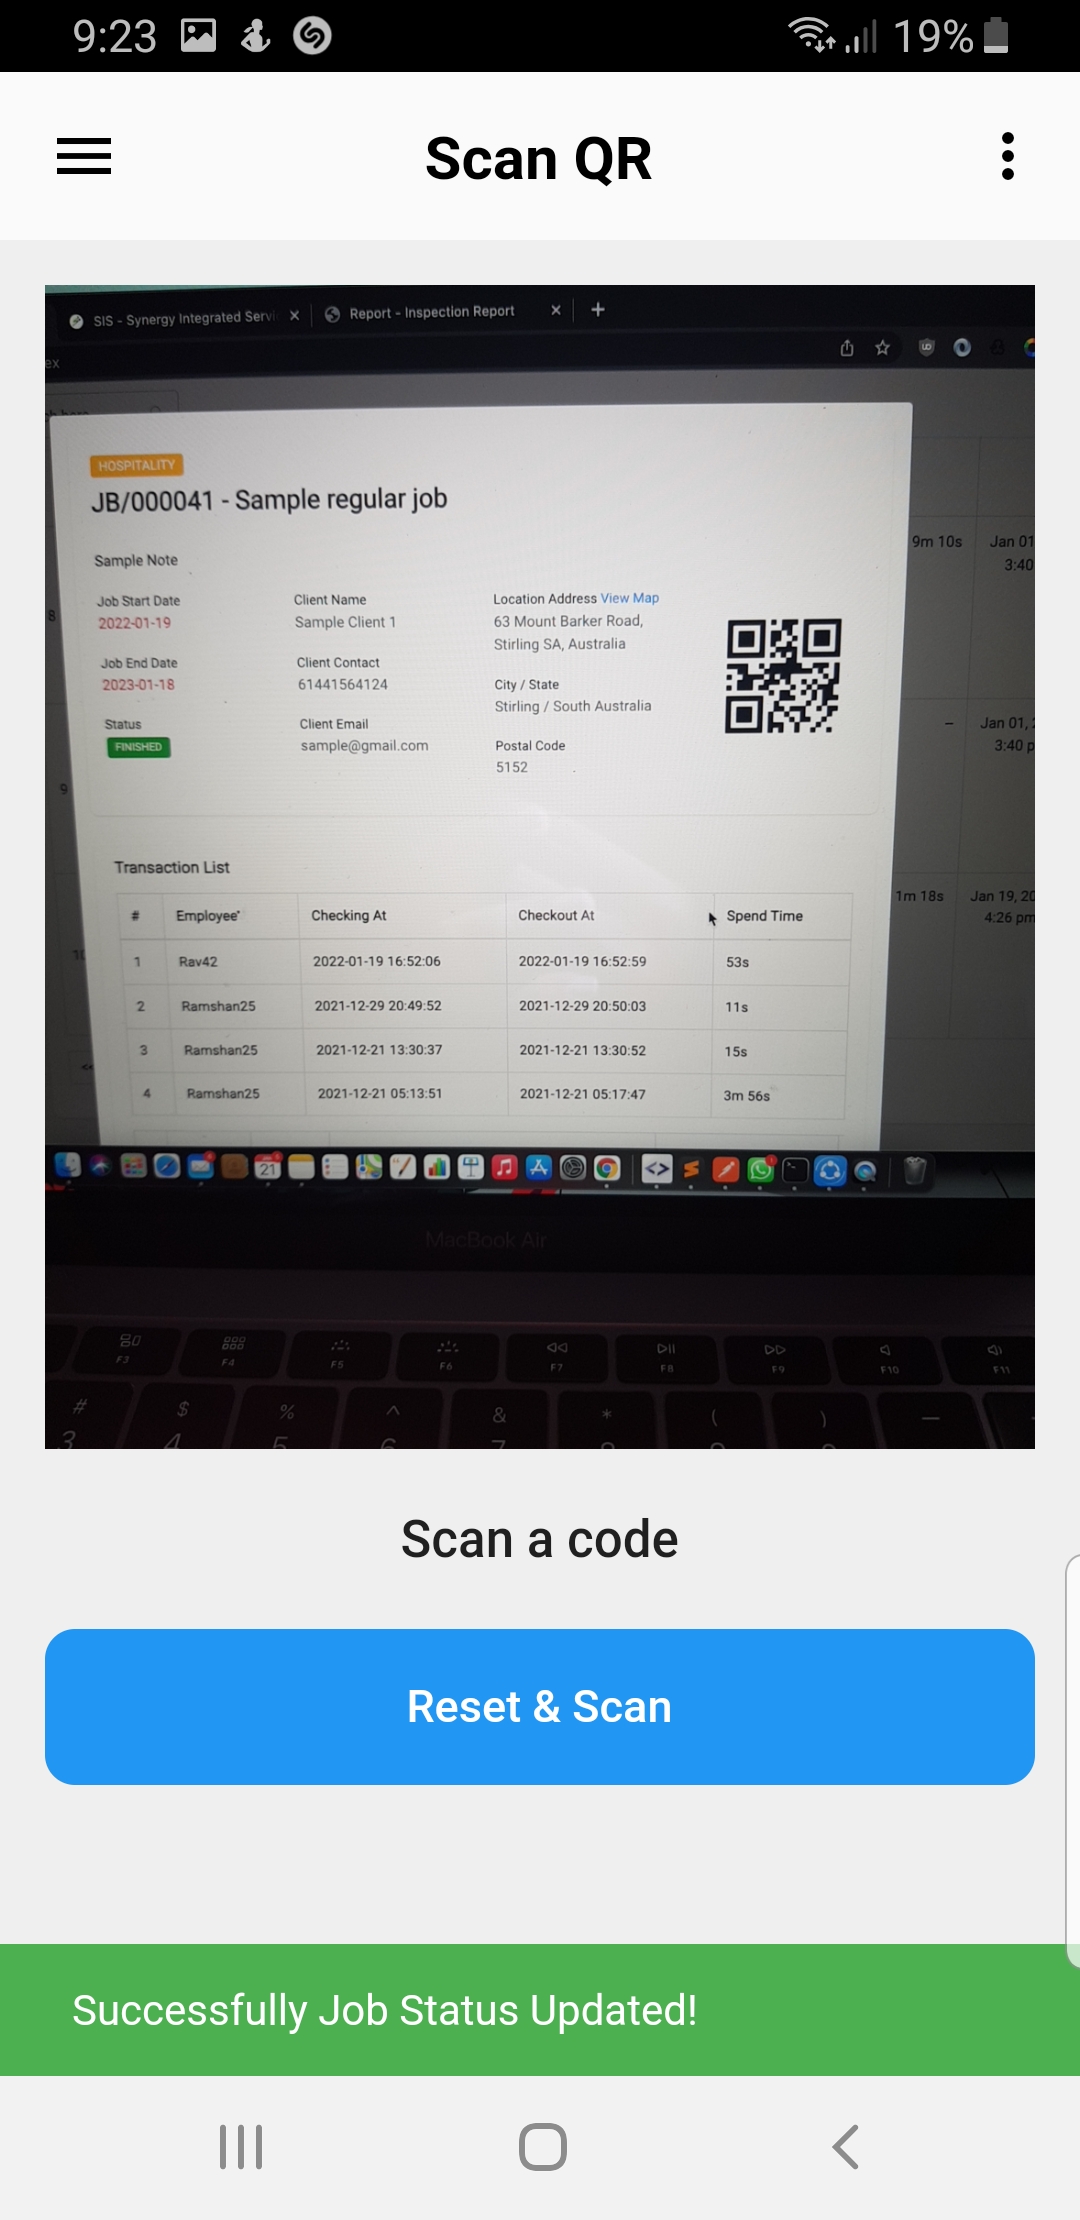
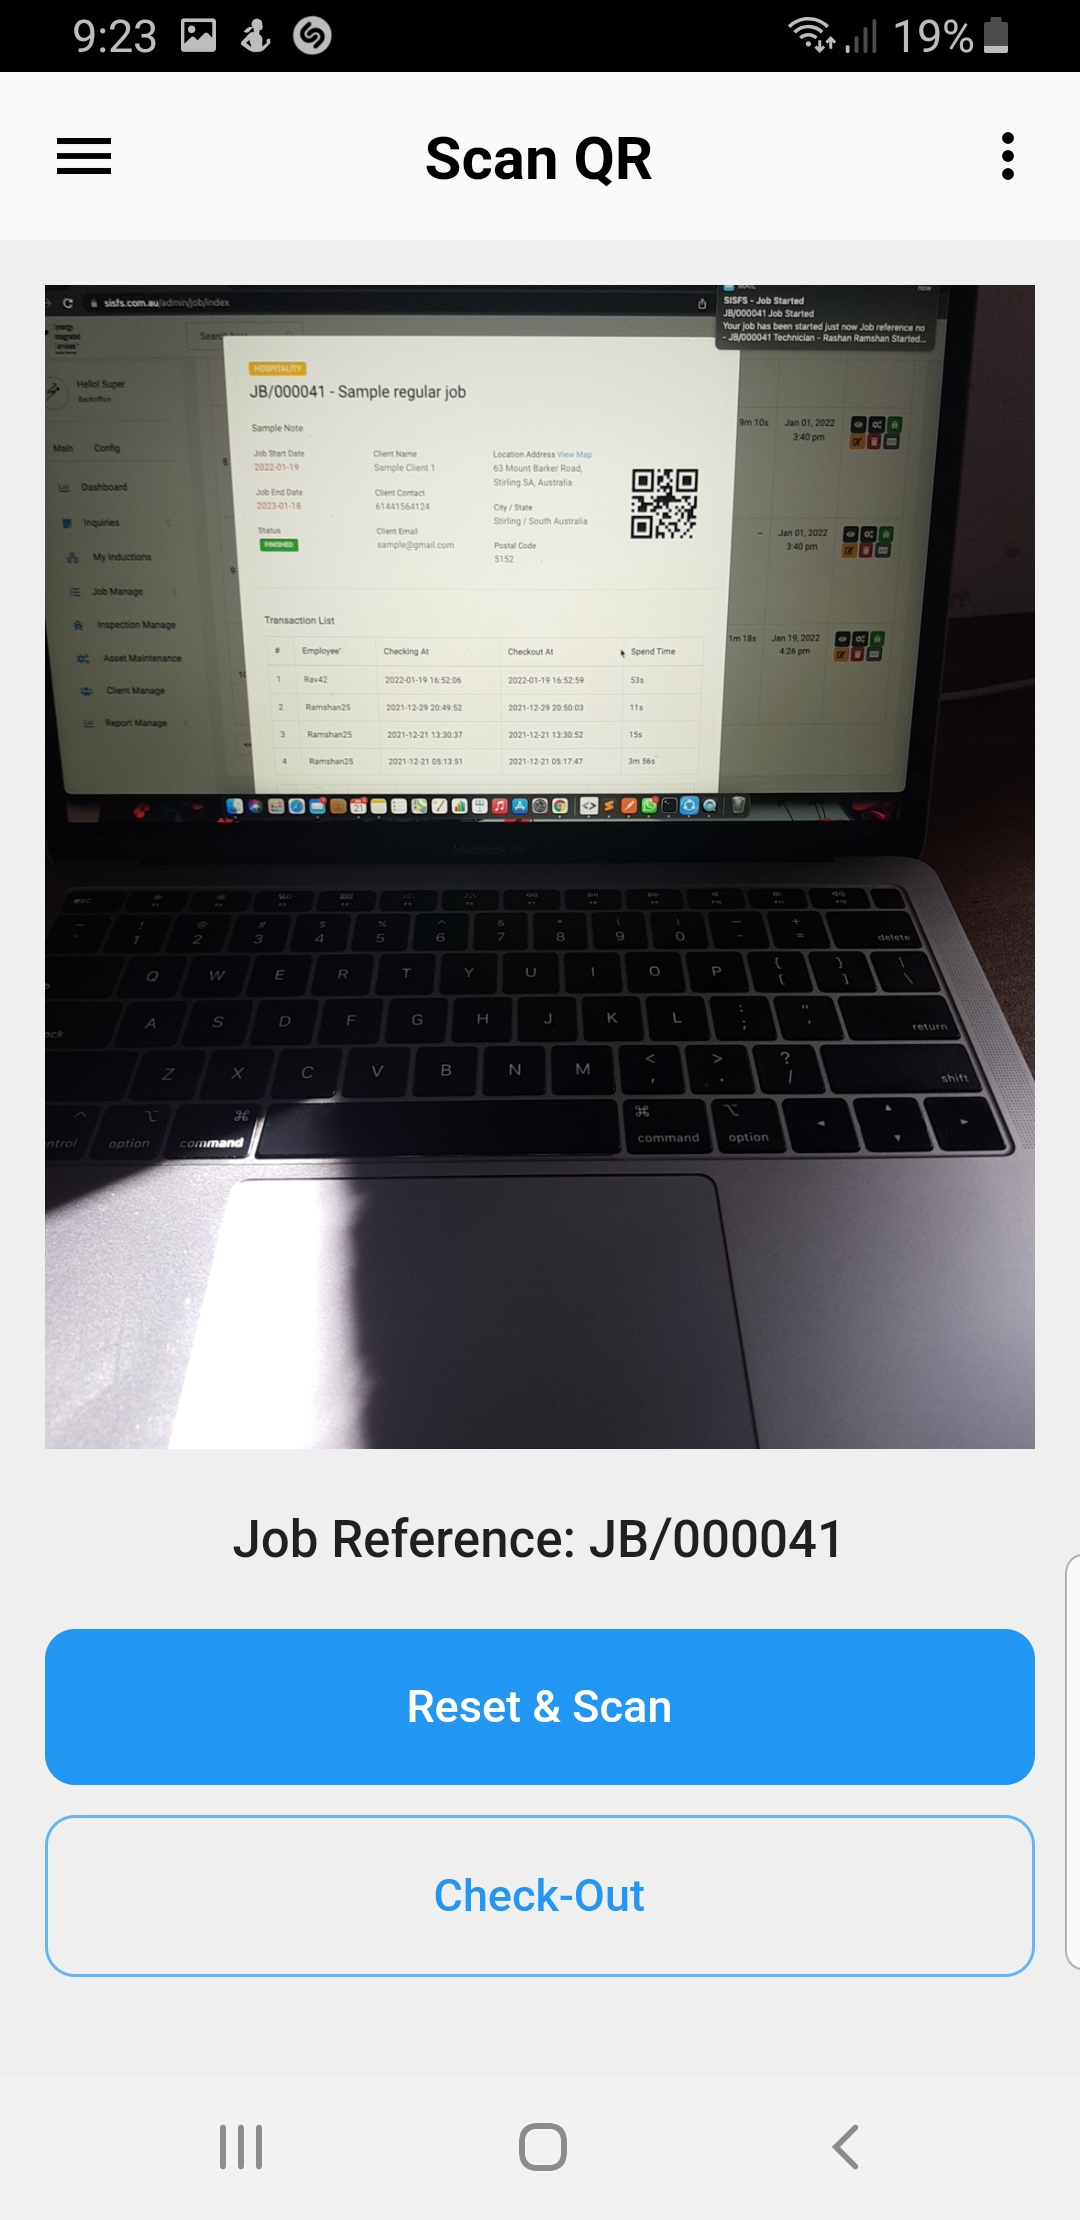
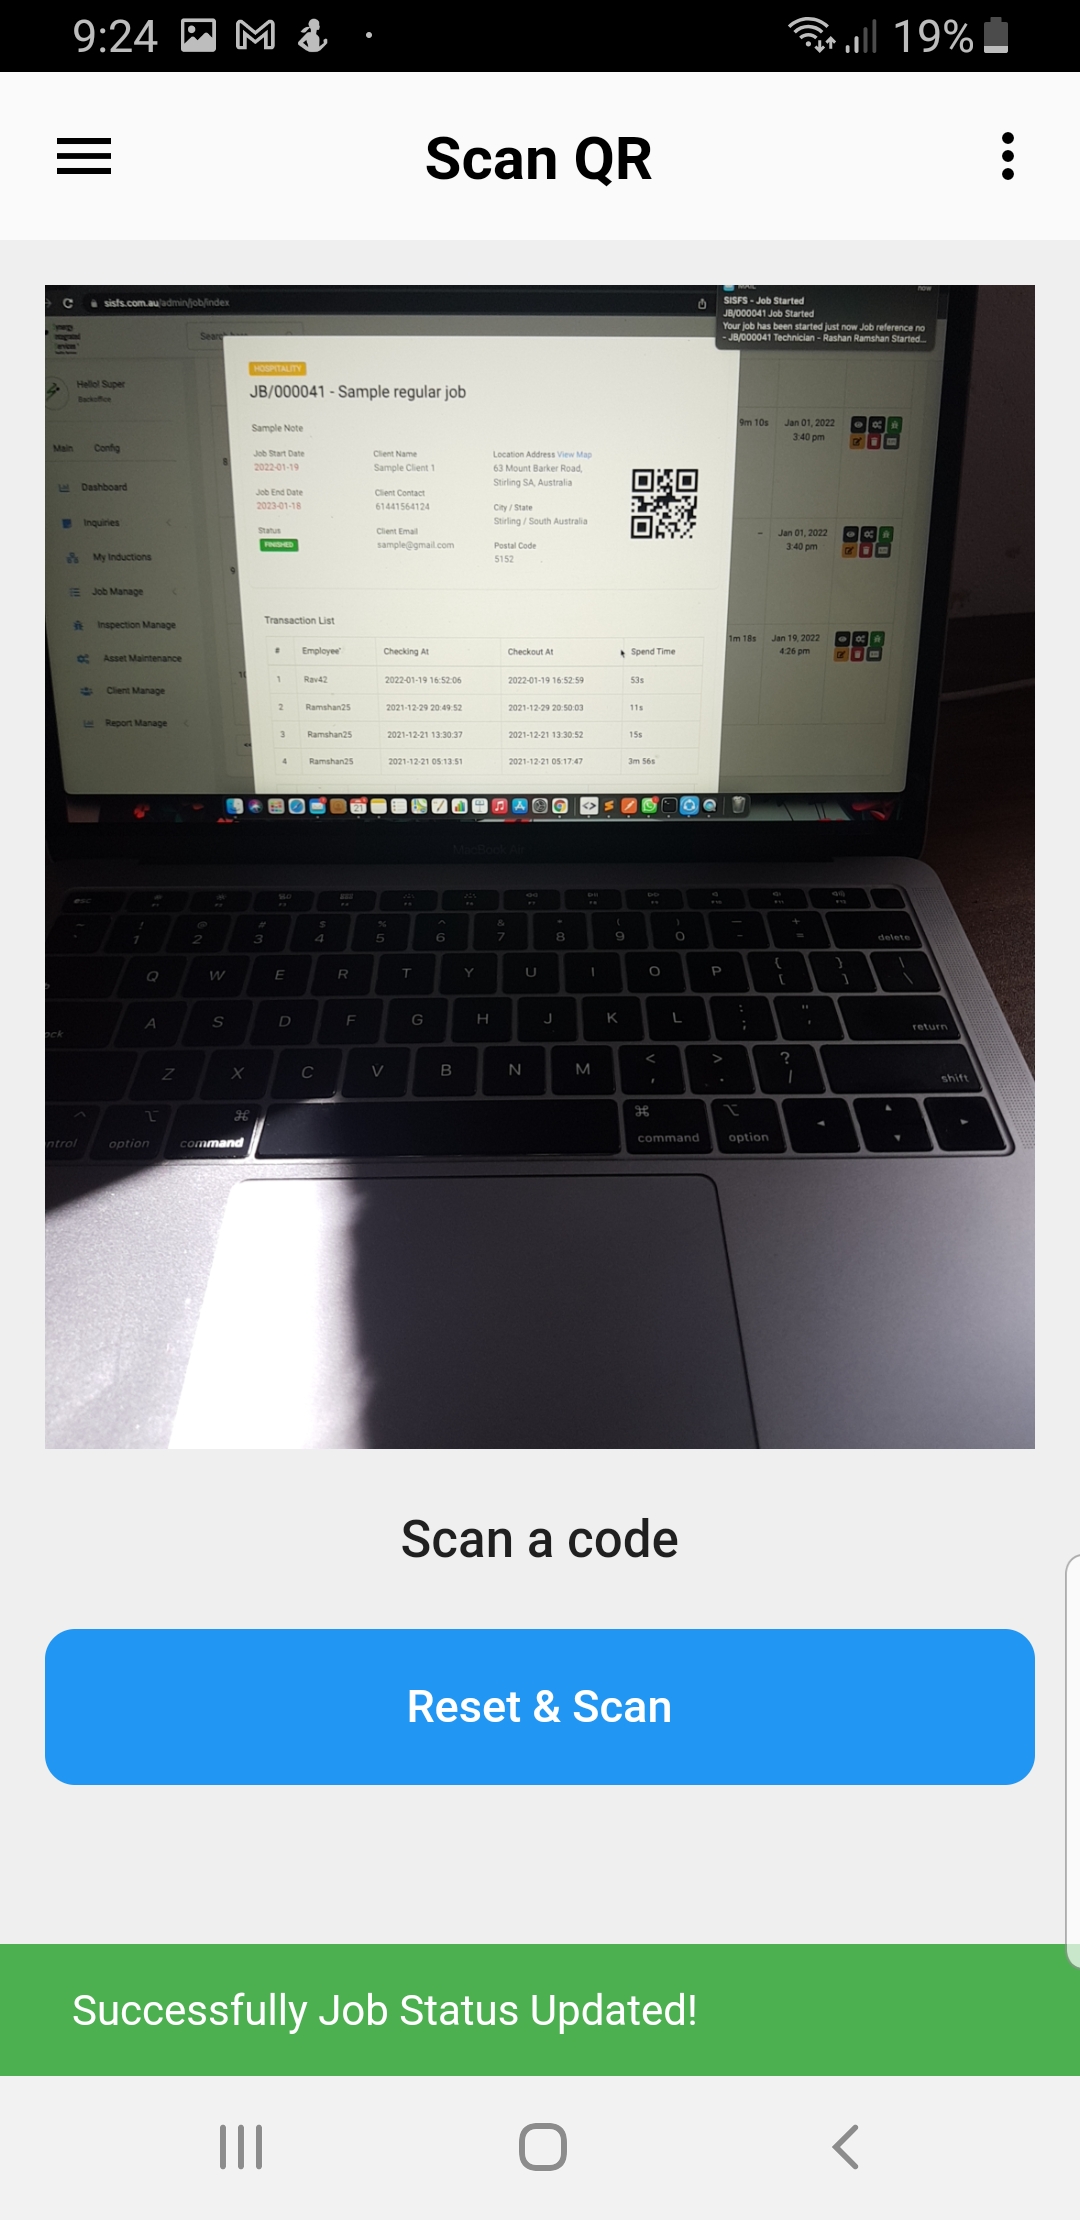
Check-Out Regular job
1. Log in to the mobile app if not logged already
2. Open side menu
3. Select Sacn QR
(App will redirect to QR Code Scan view)
4. Scan QR
5. Click Check-Out button
Step 1
Step 2
Step 3
Step 4
Step 5
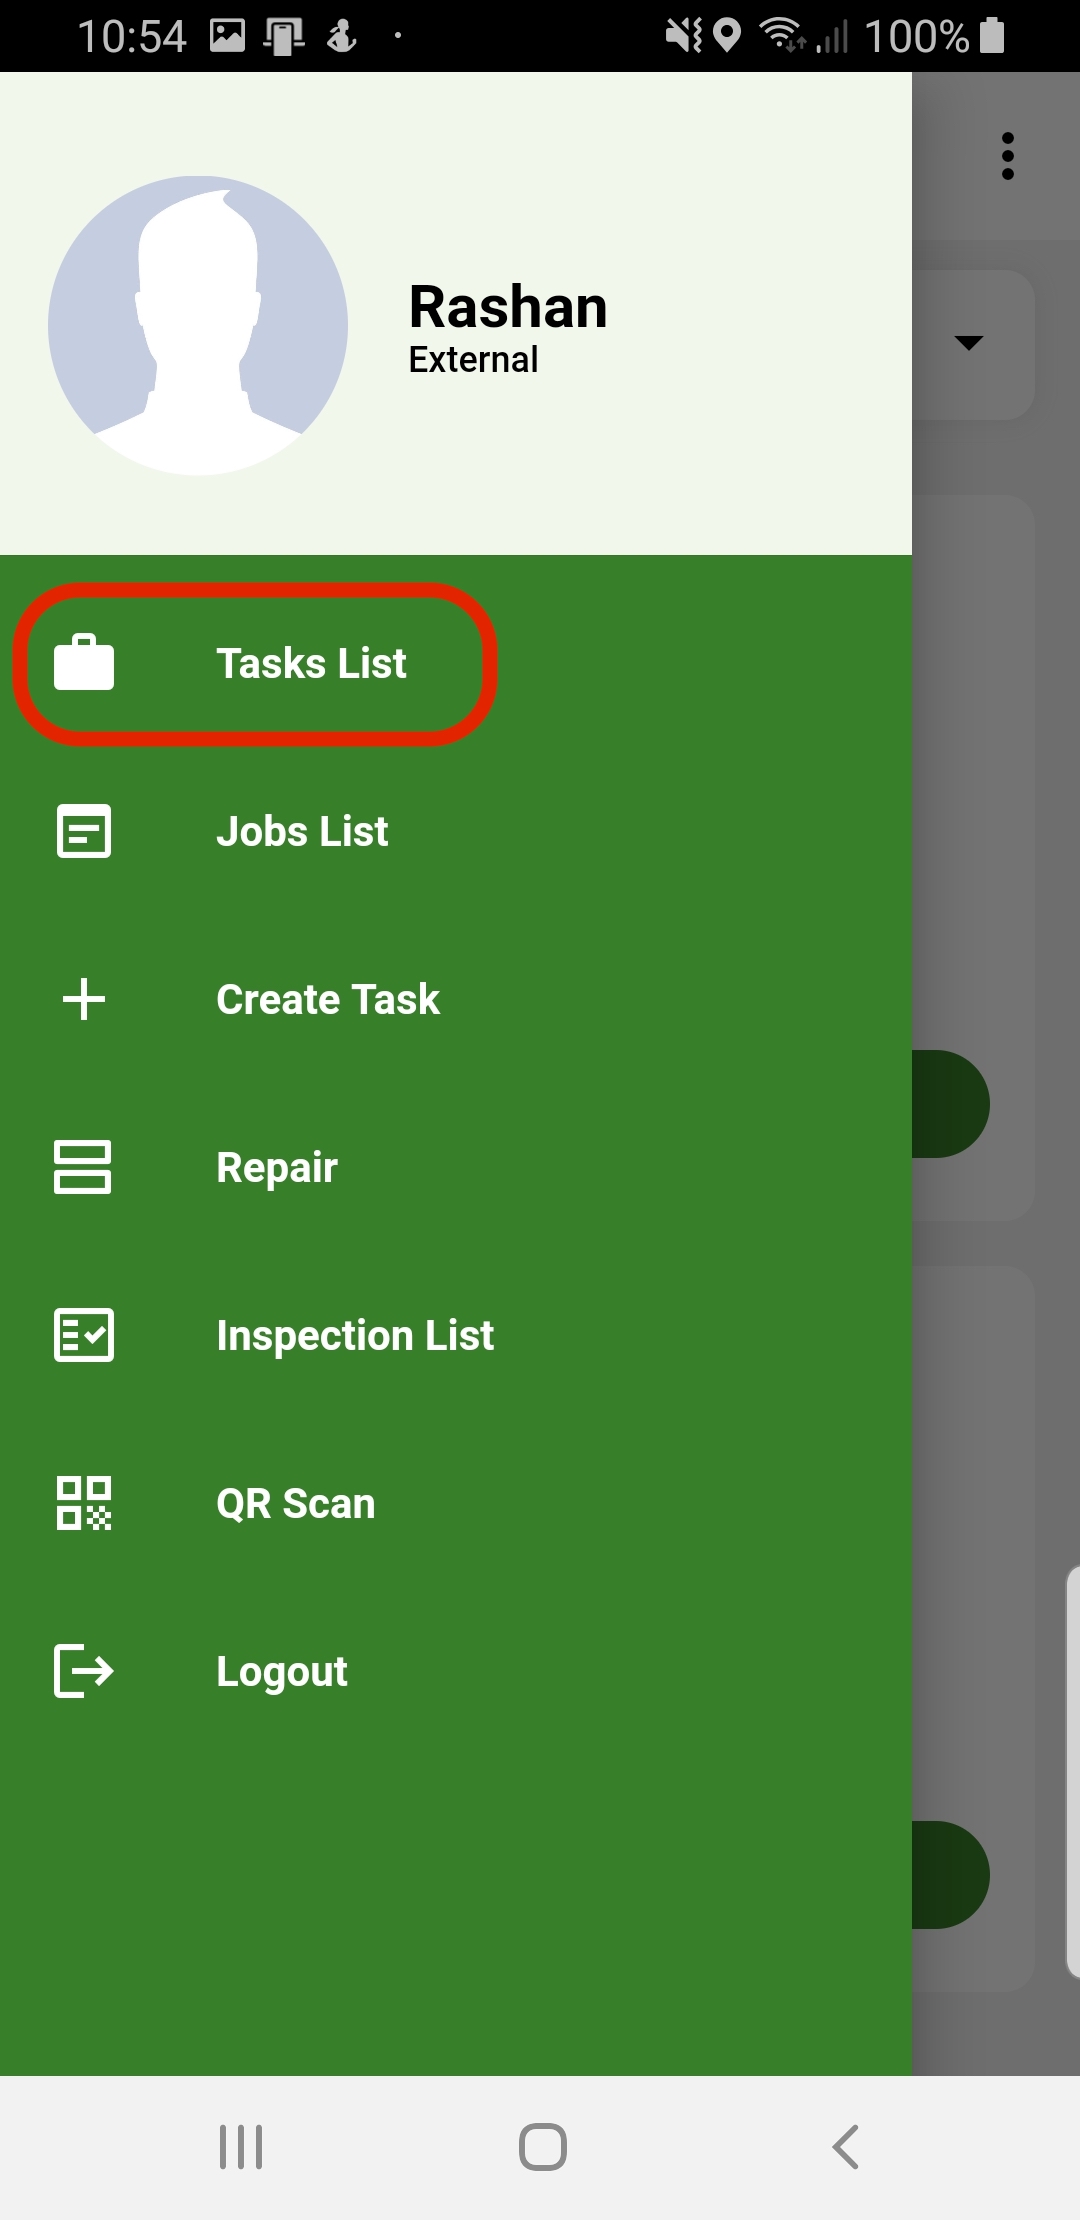
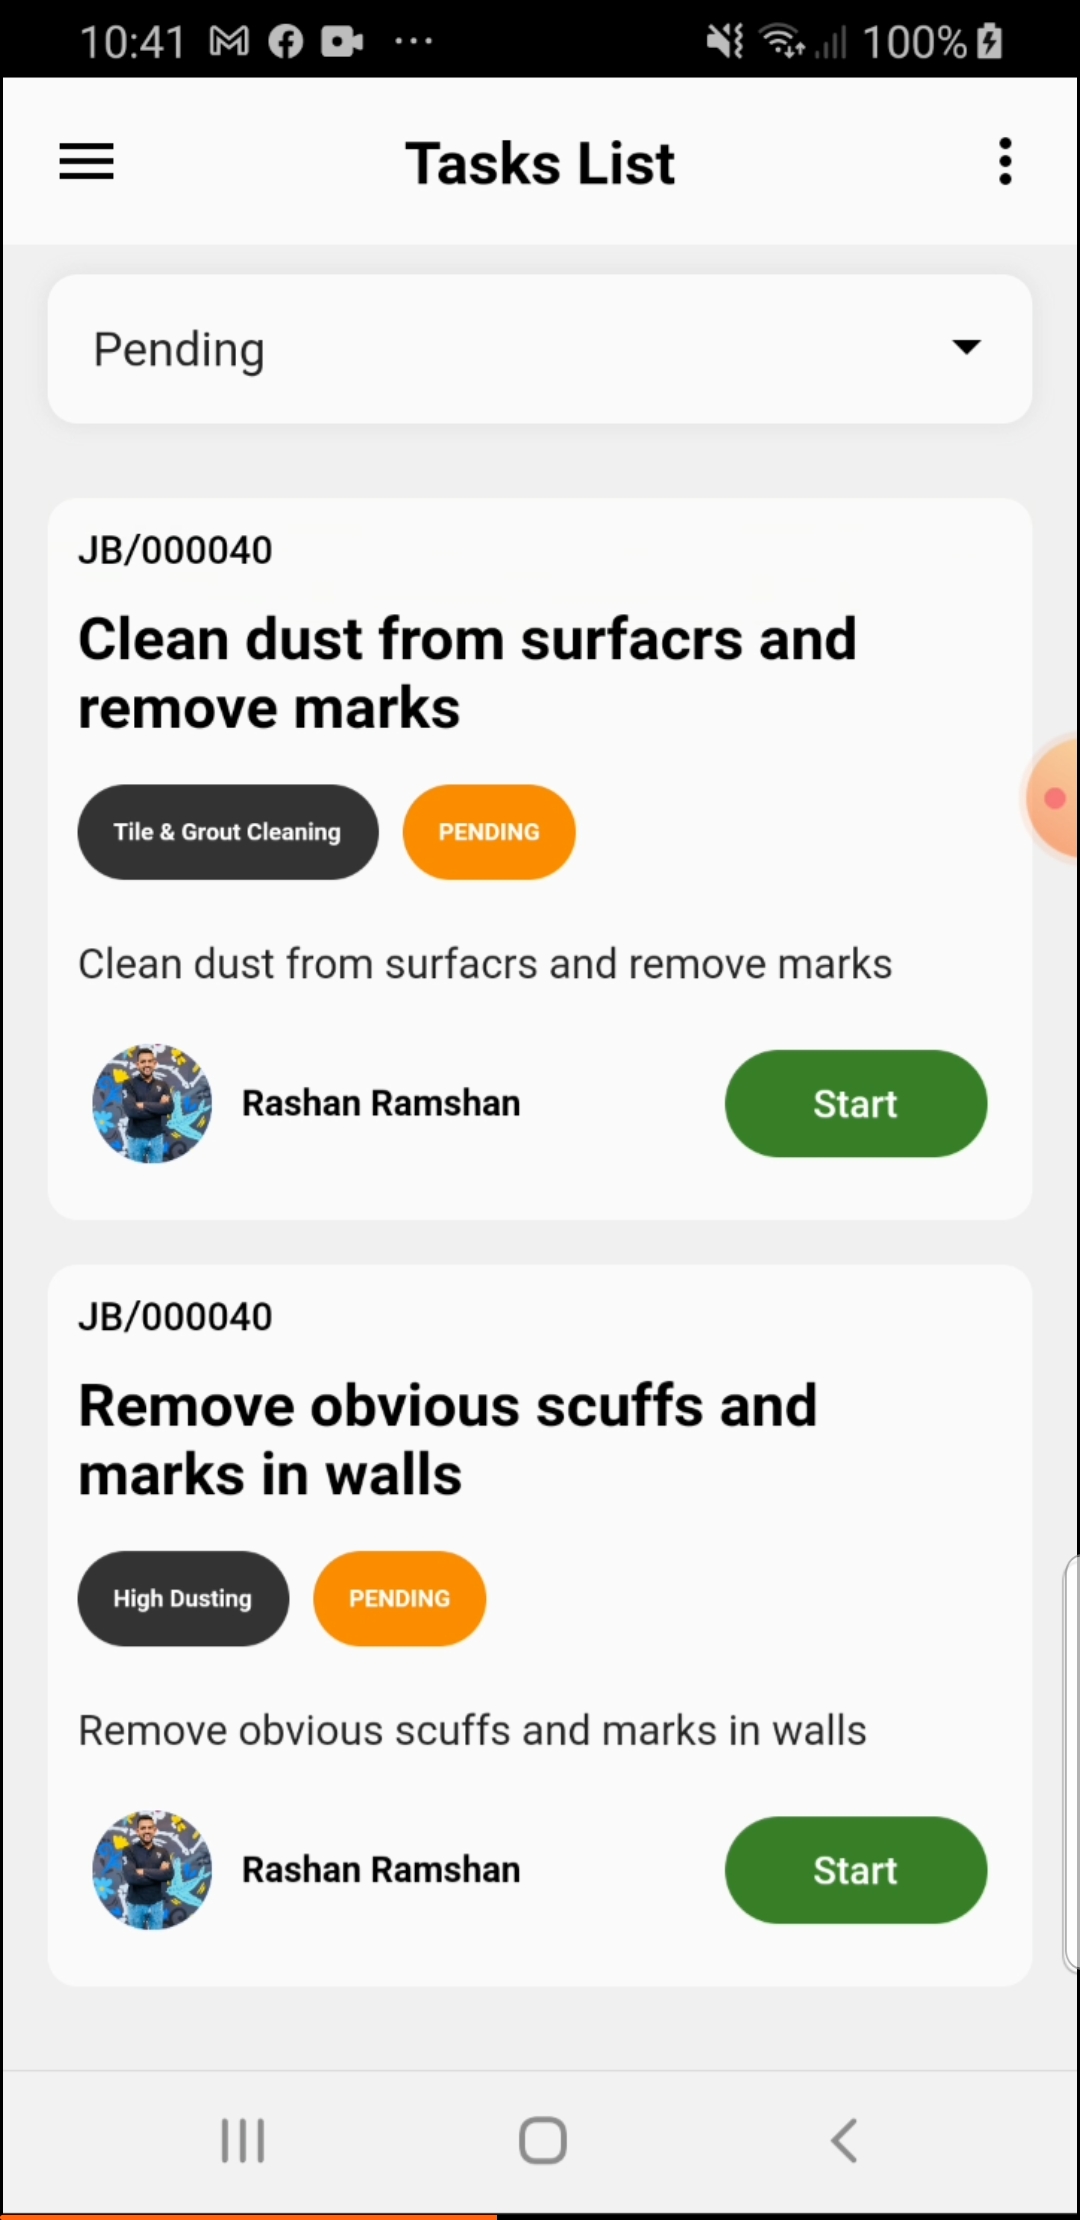
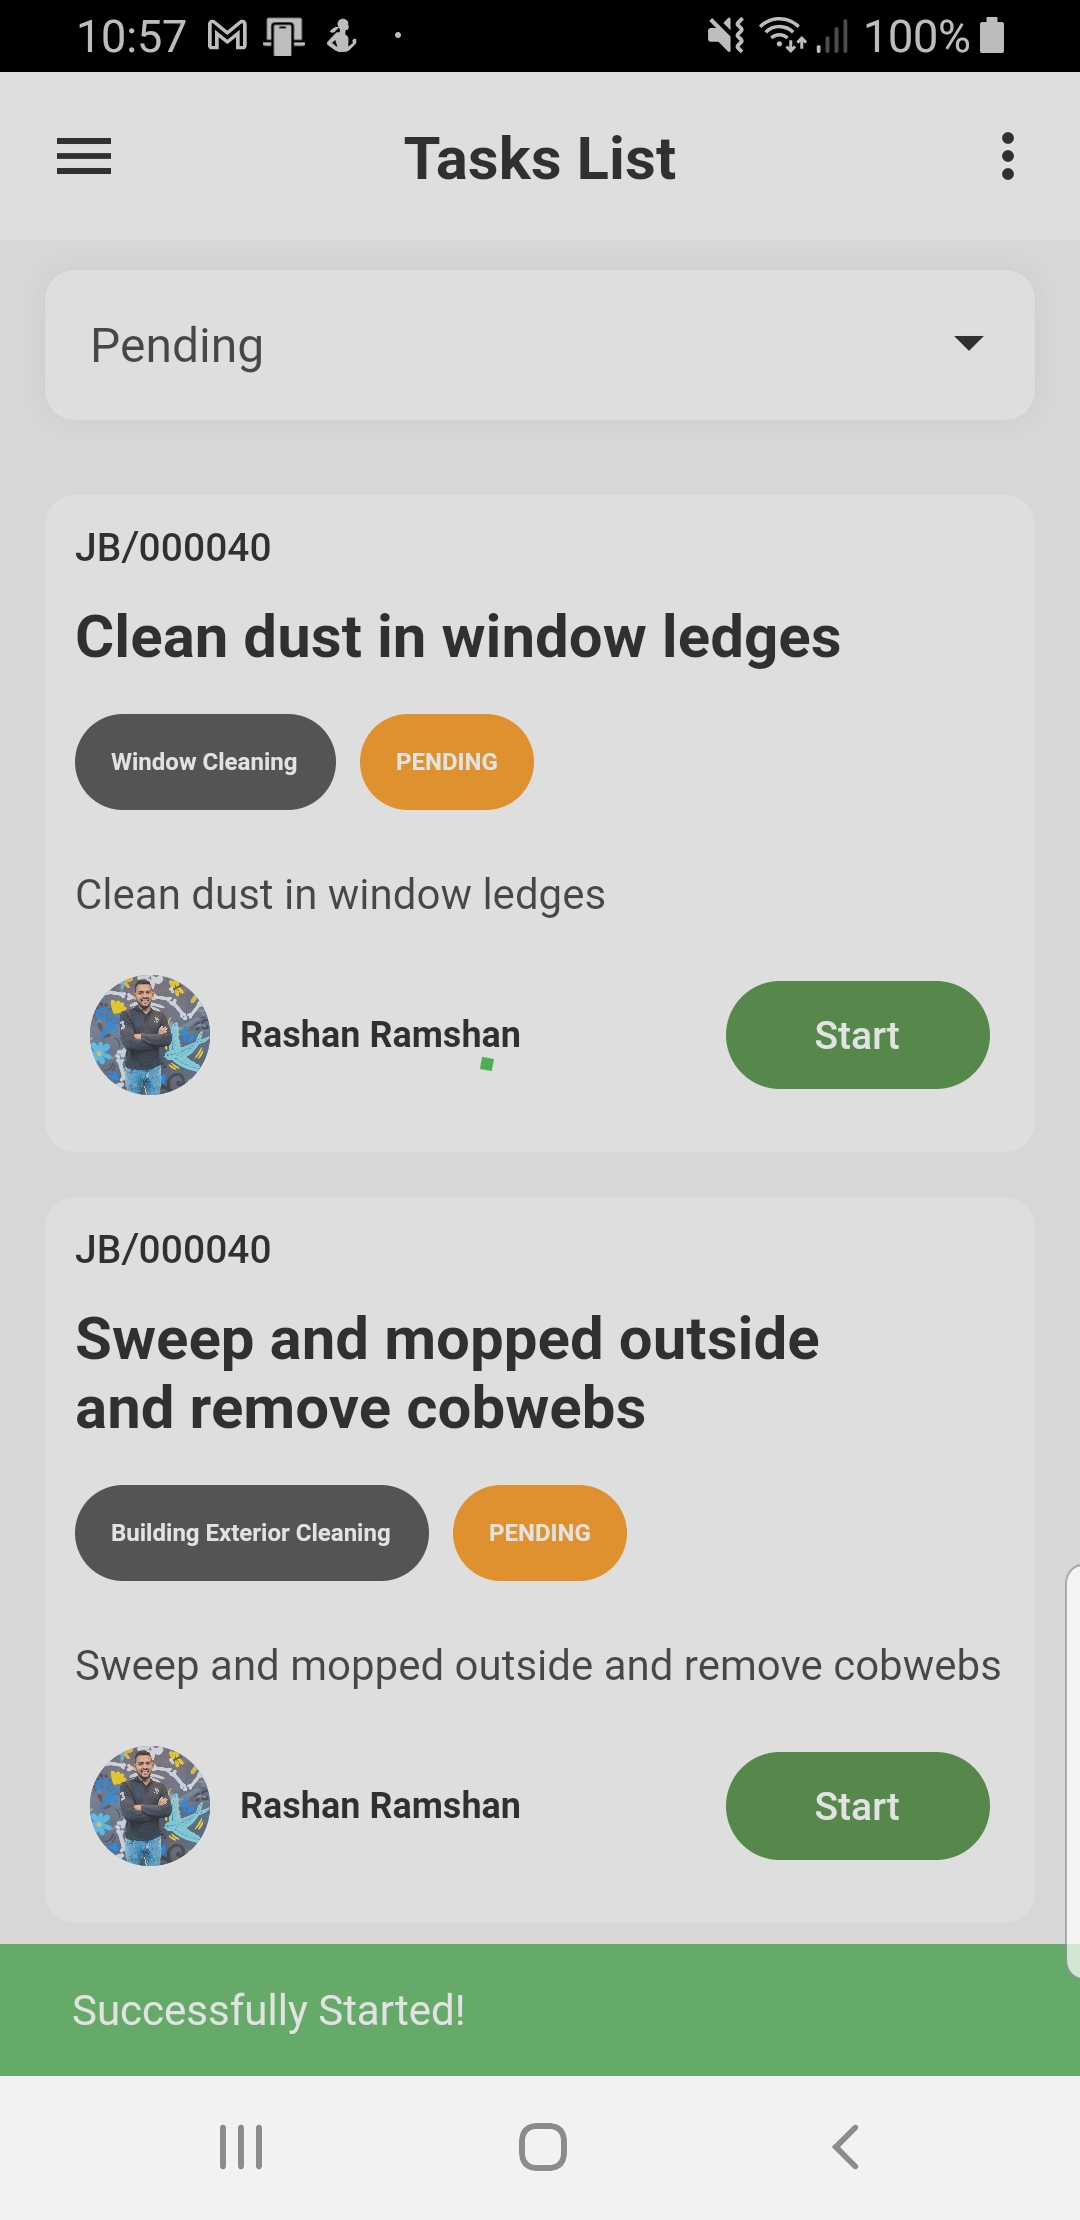
Start one time job task
1. Log in to the mobile app if not logged already
2. Open side menu
3. Select Task List
(App will redirect to Task List view)
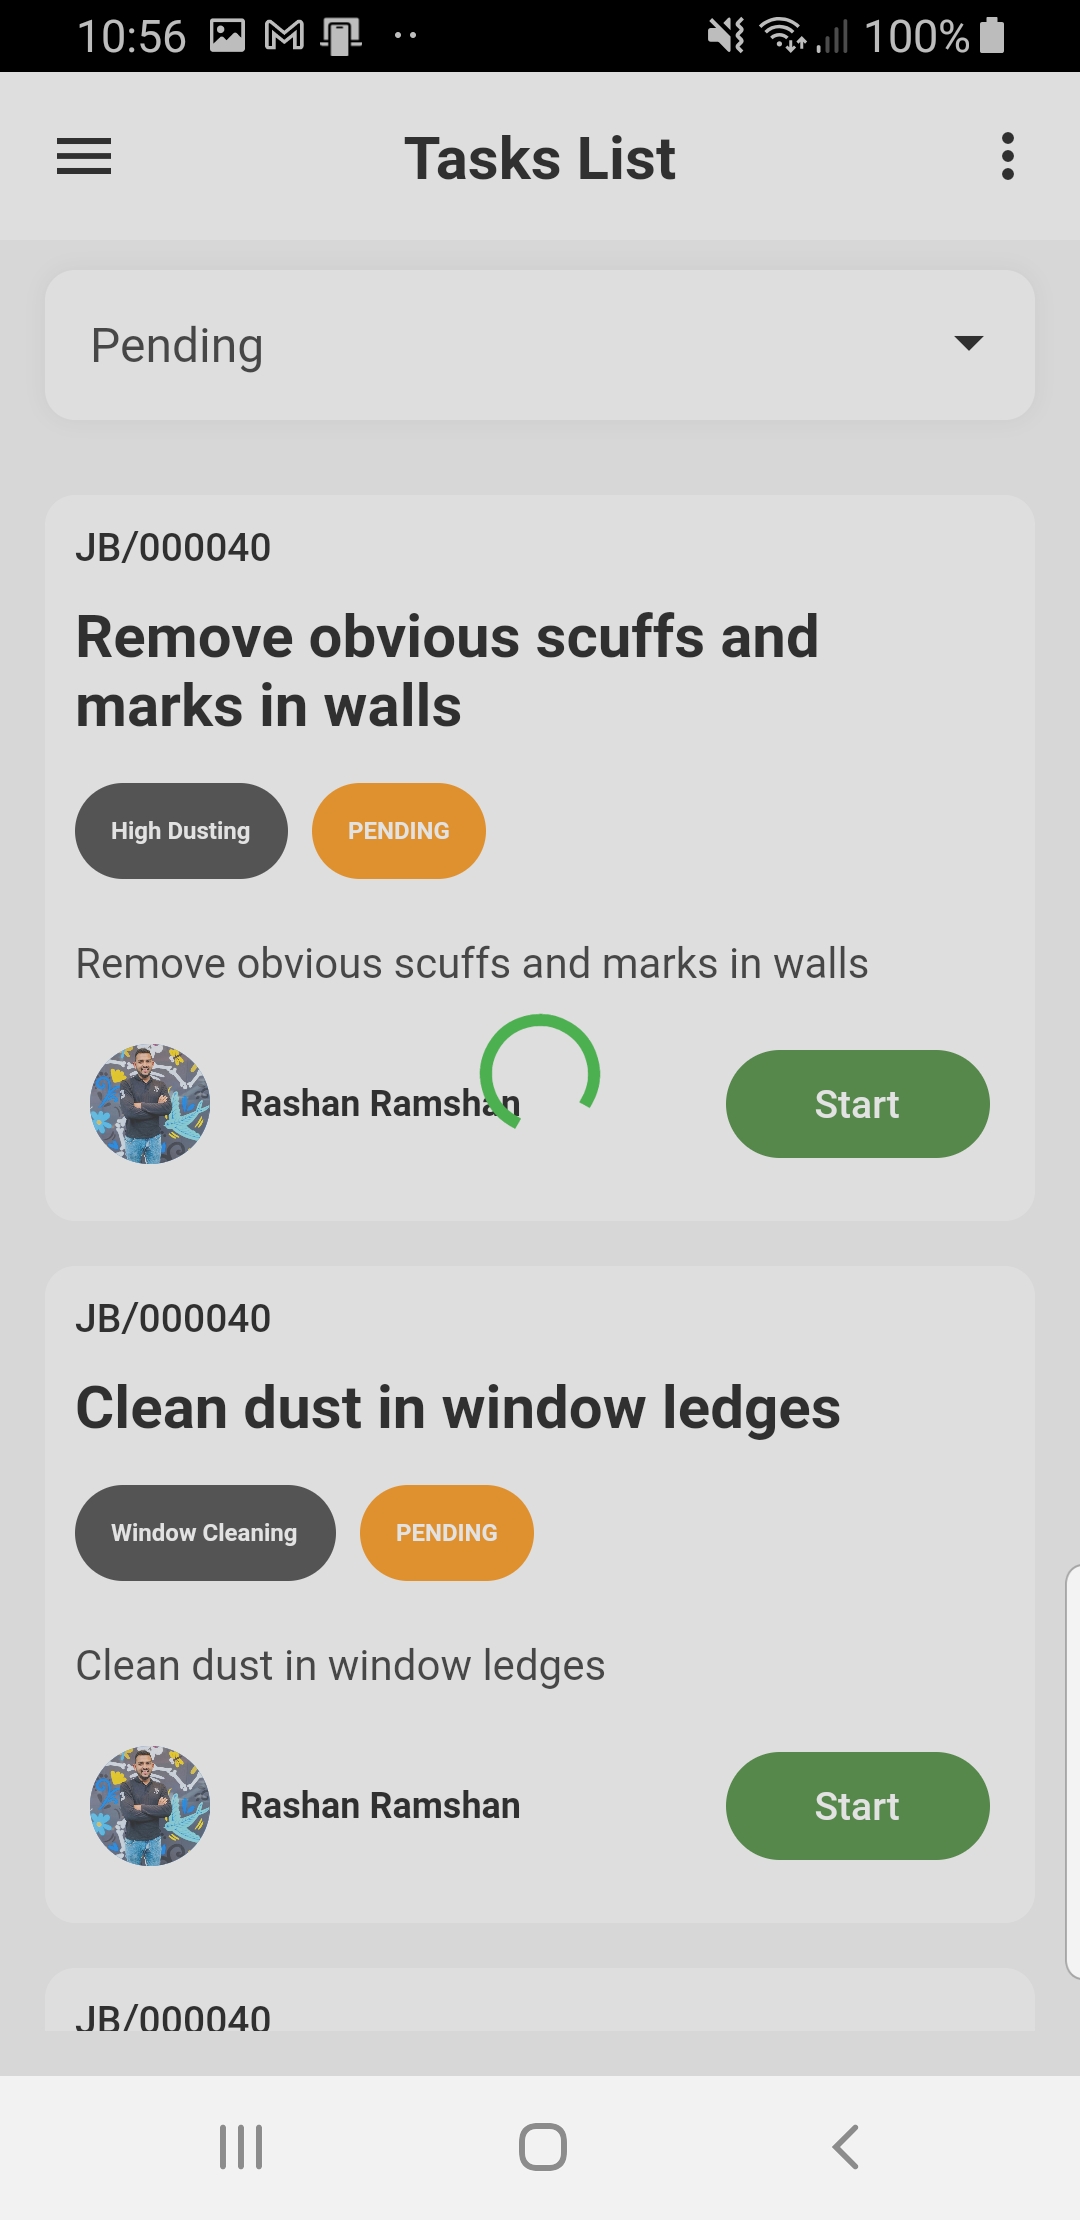
4. Select Pending Option in filter
(Only pending task will filter to the list)
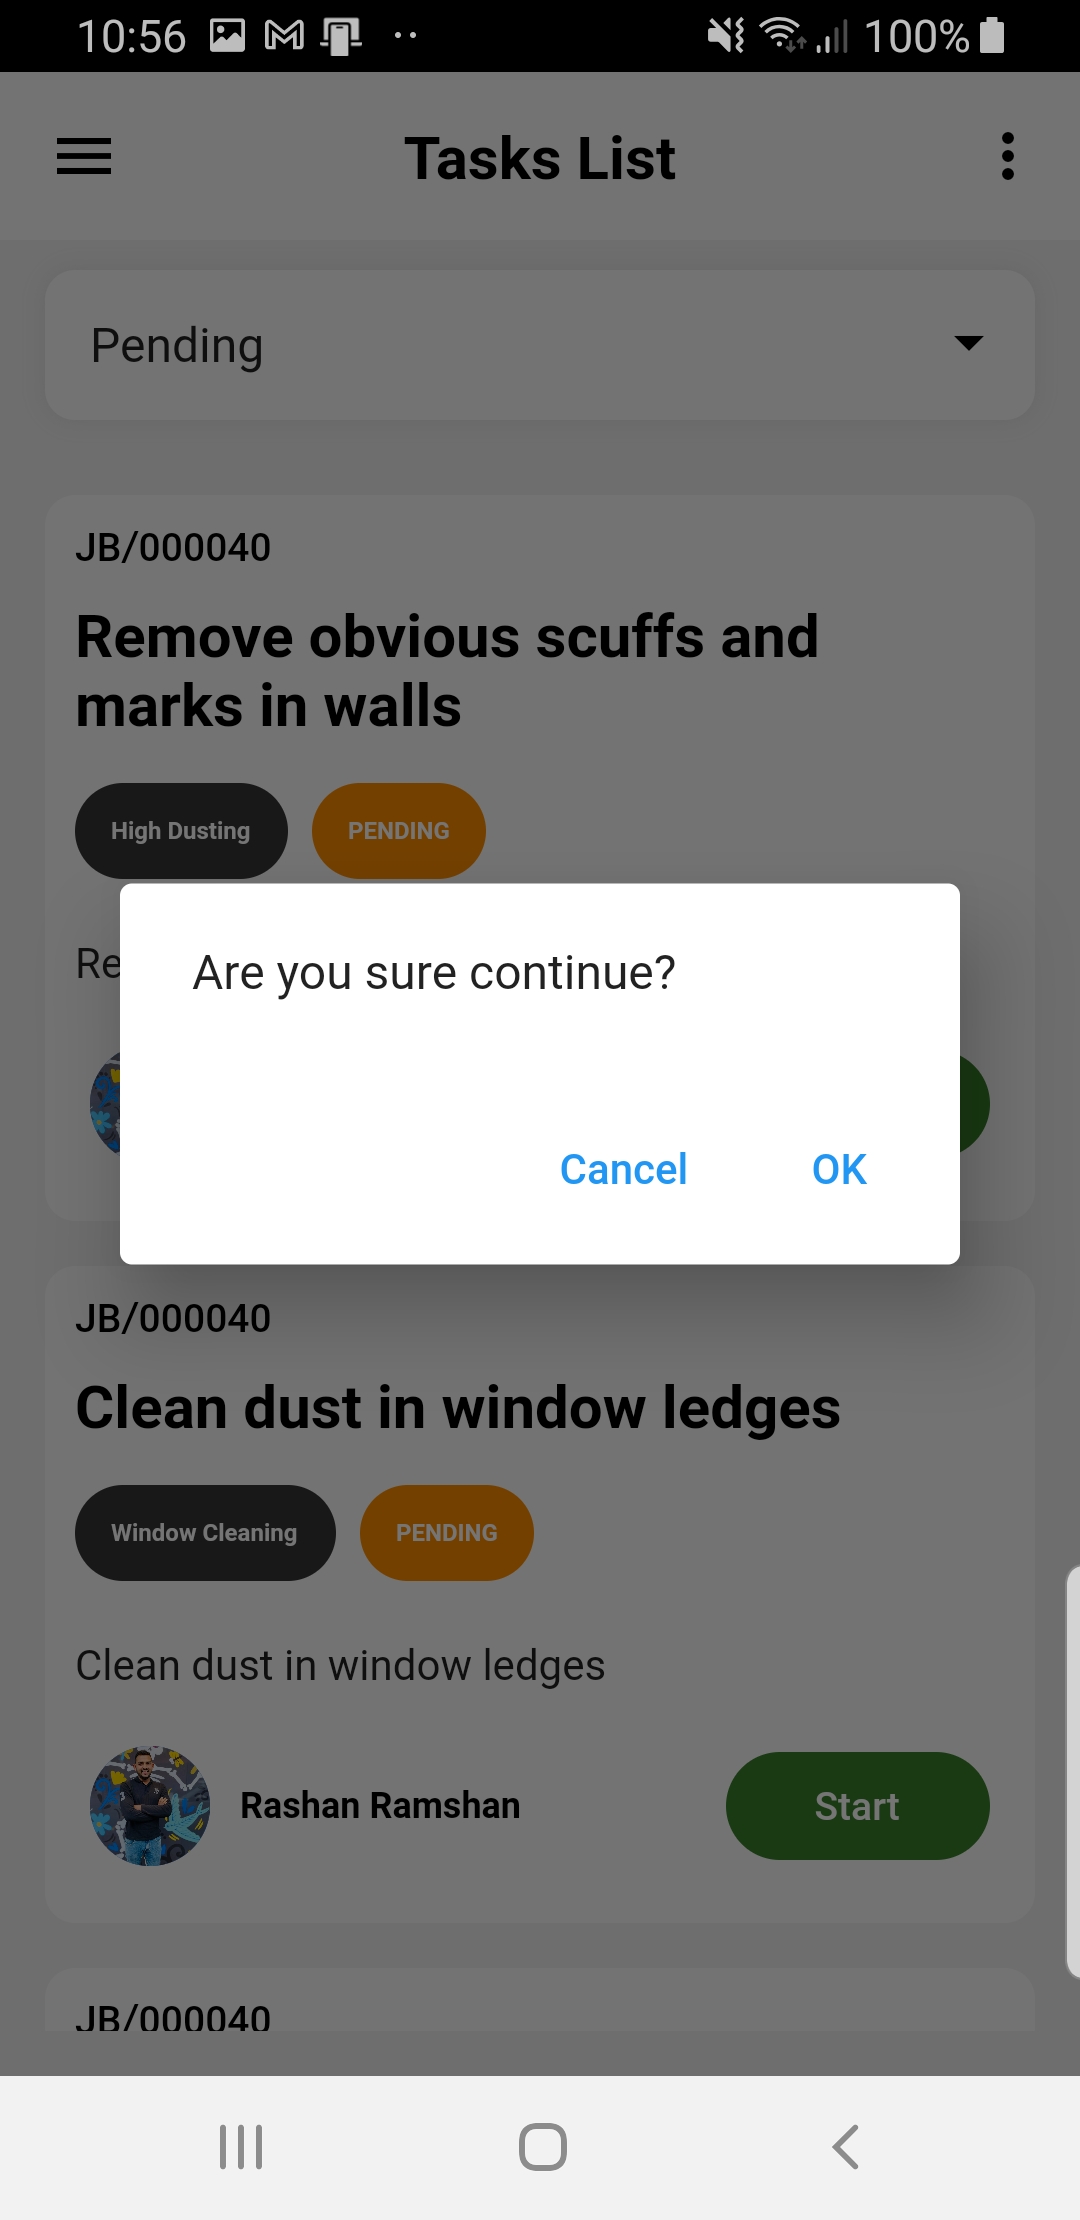
5. Click Start button to start task
6. Click ok to confirm action
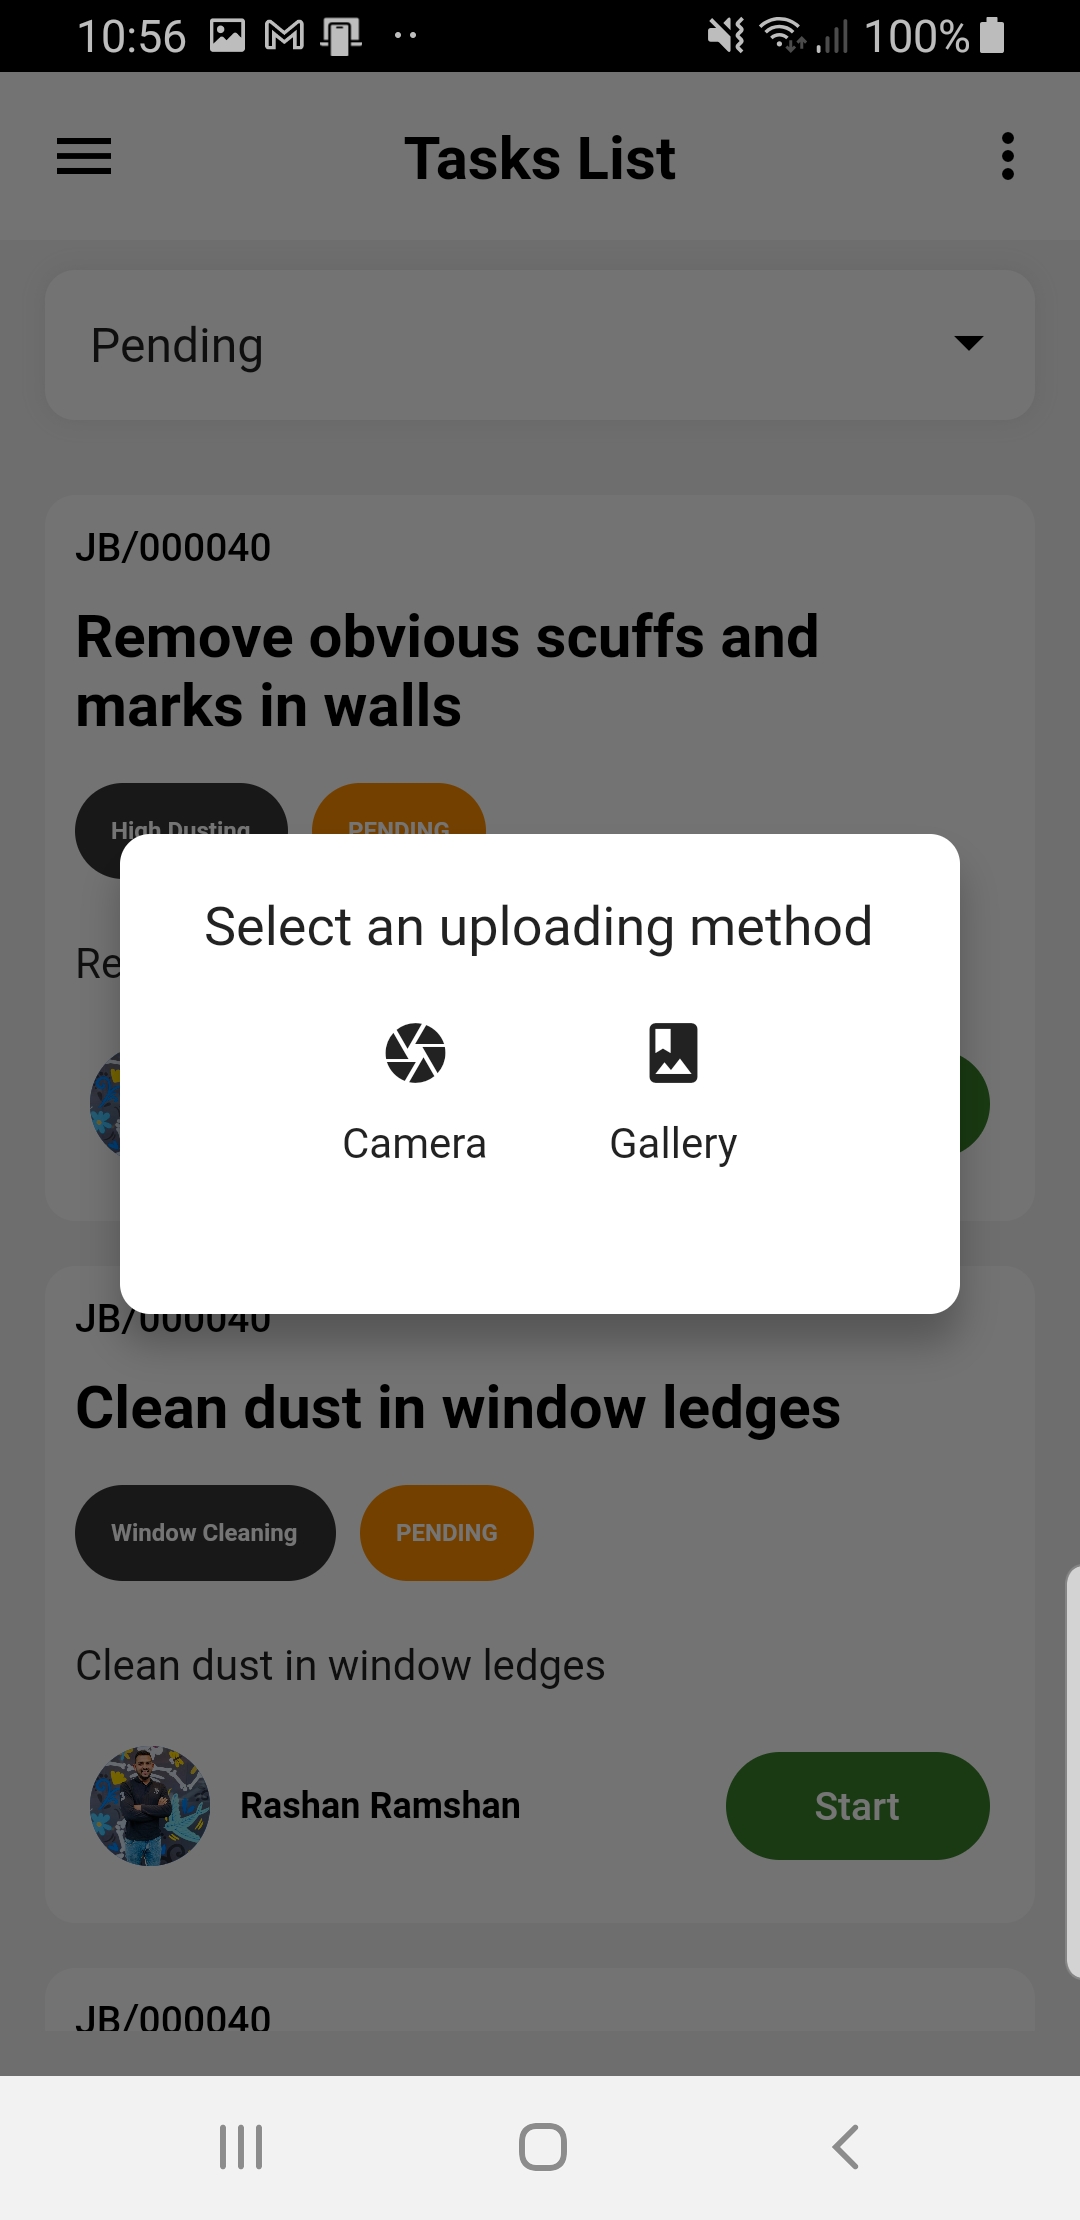
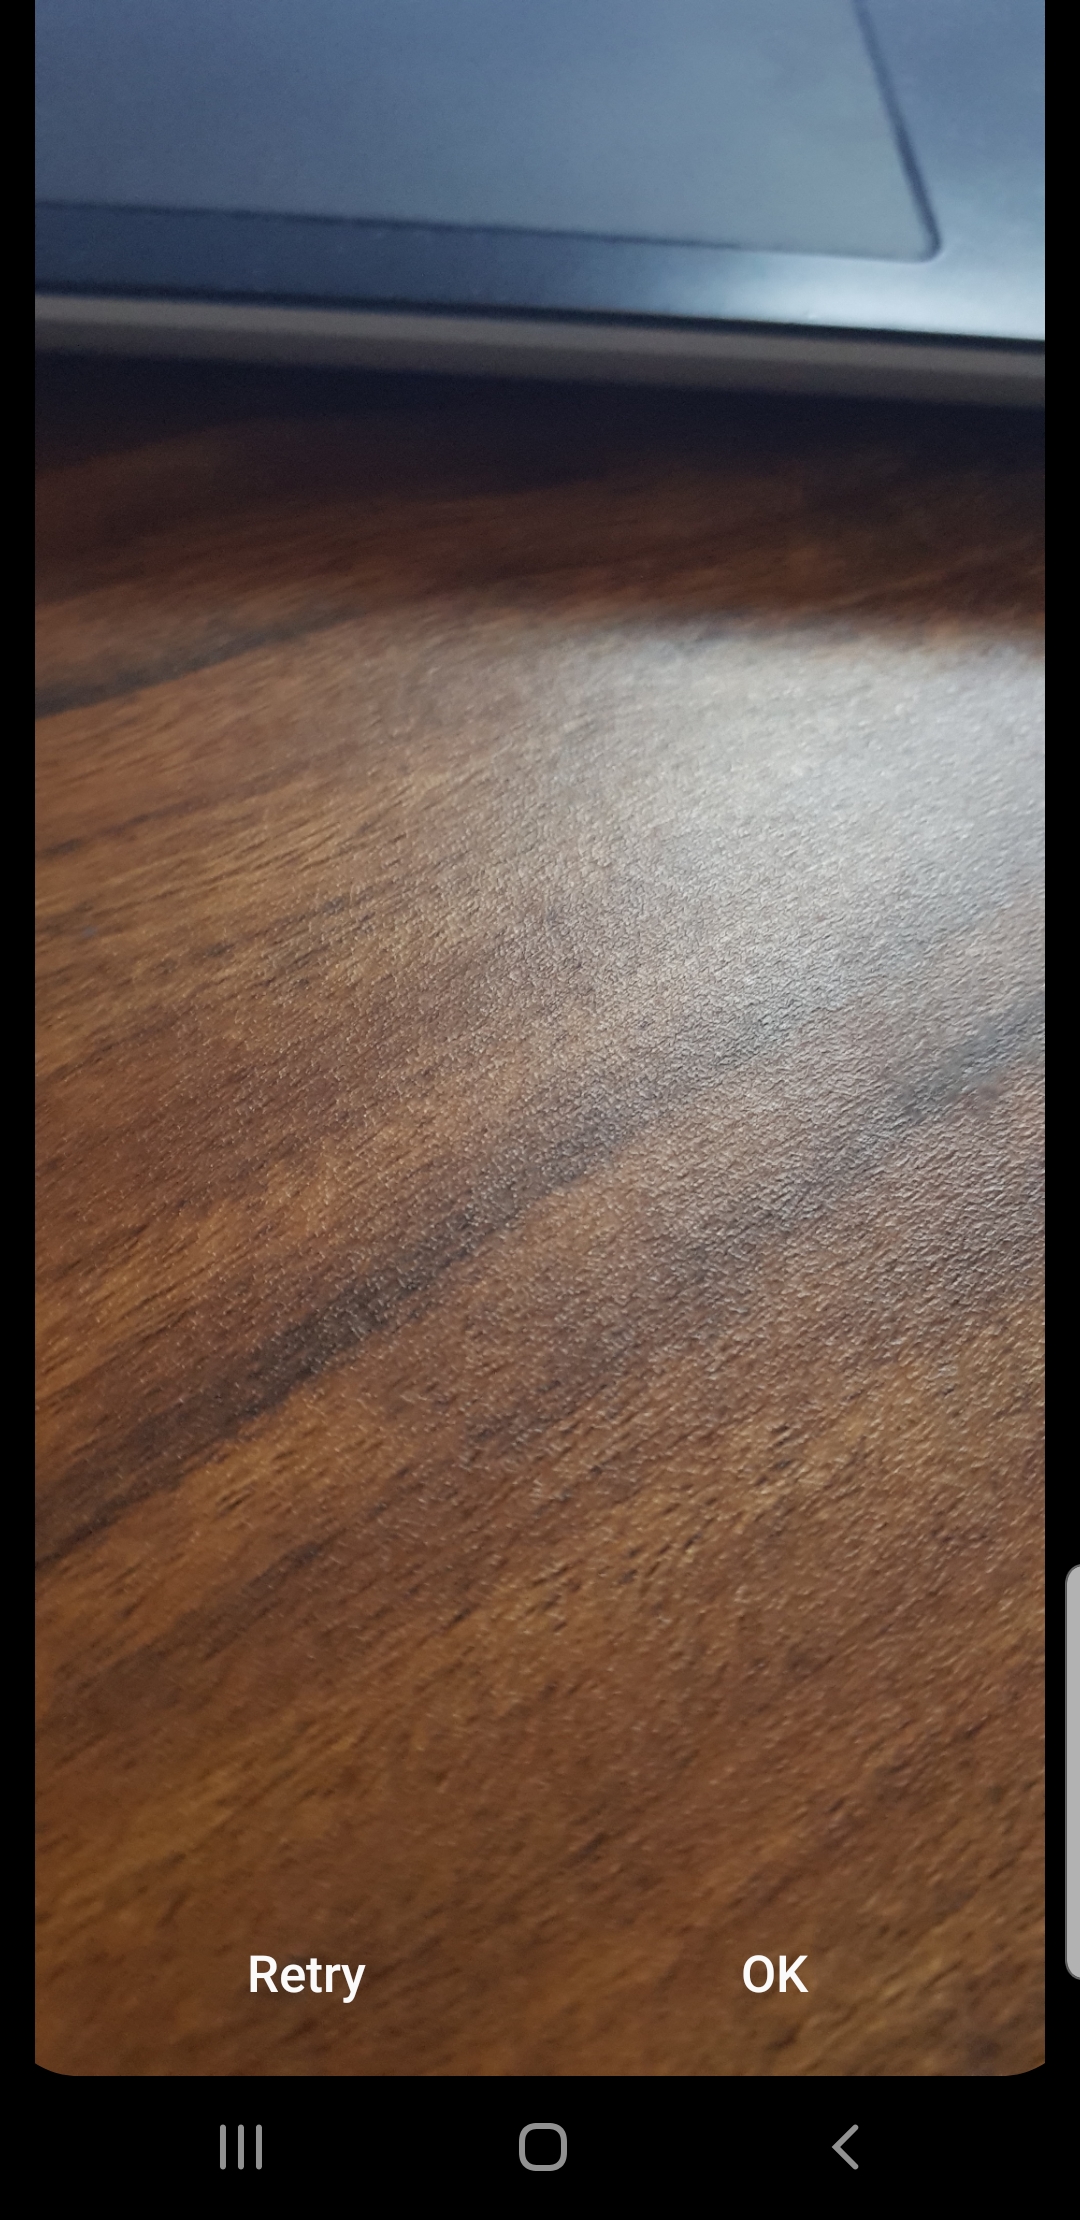
7. Capture image before starting task
Step 1
Step 2
Step 3
Step 4
Step 5
Step 6
Step 7
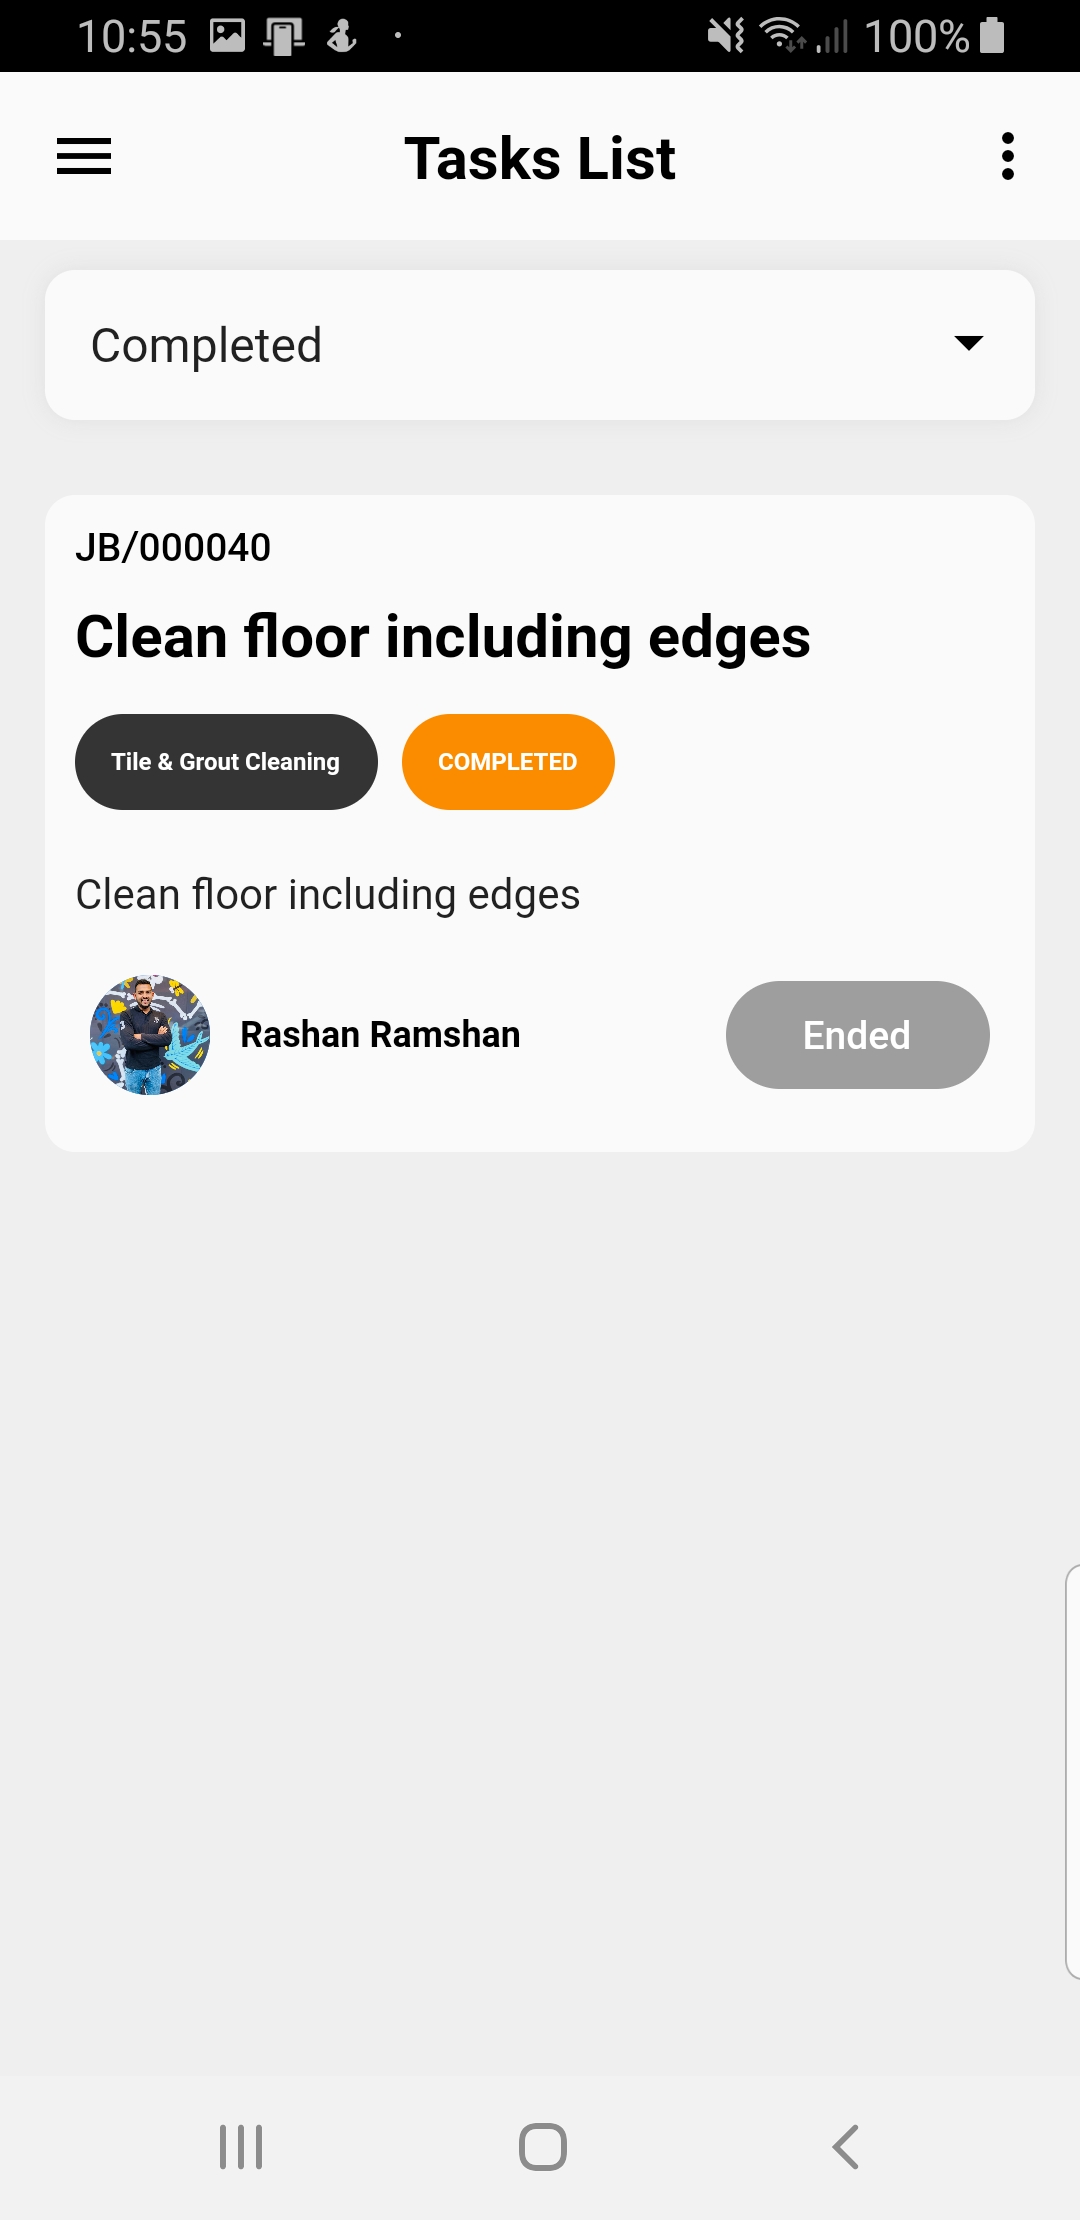
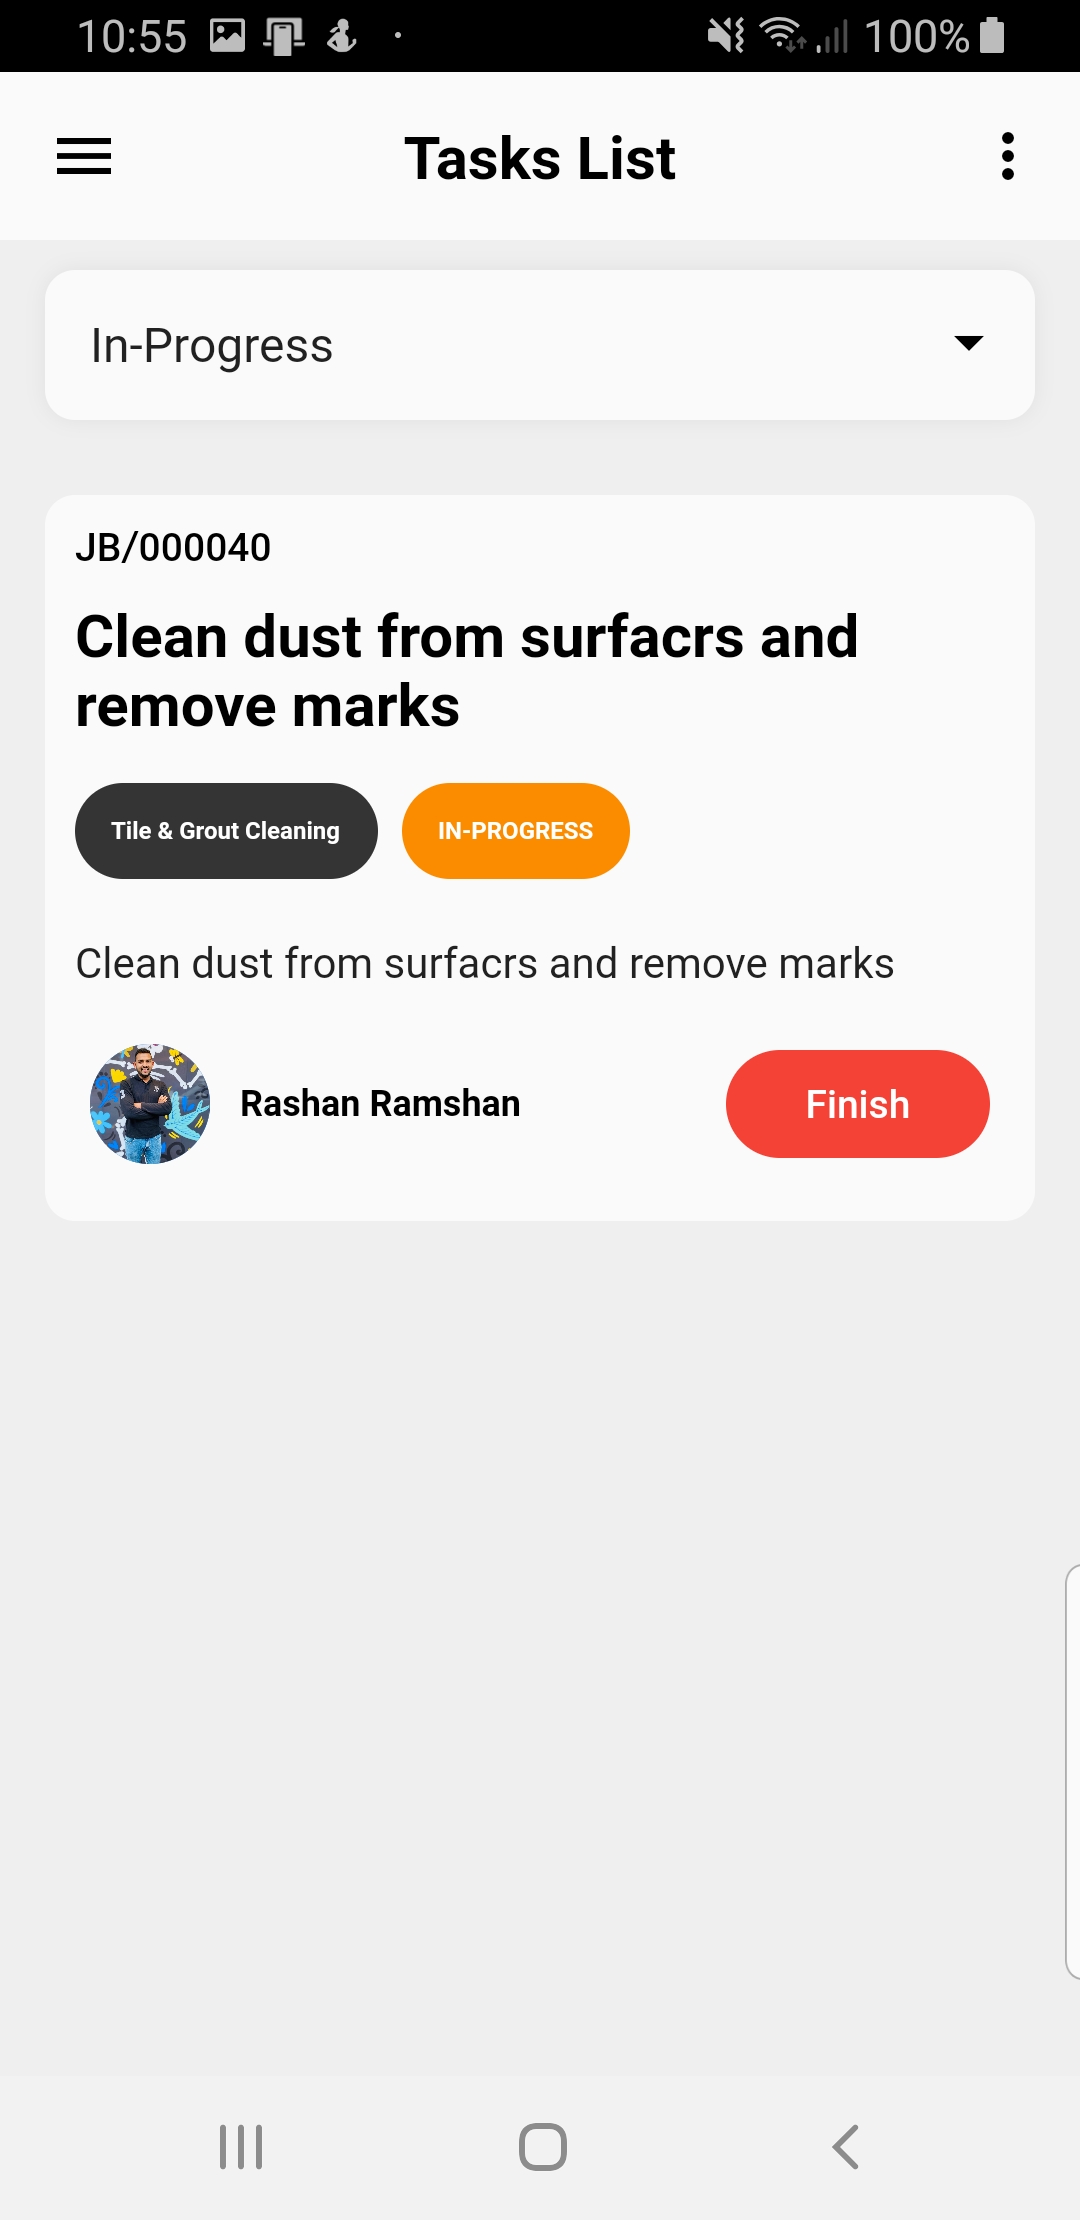
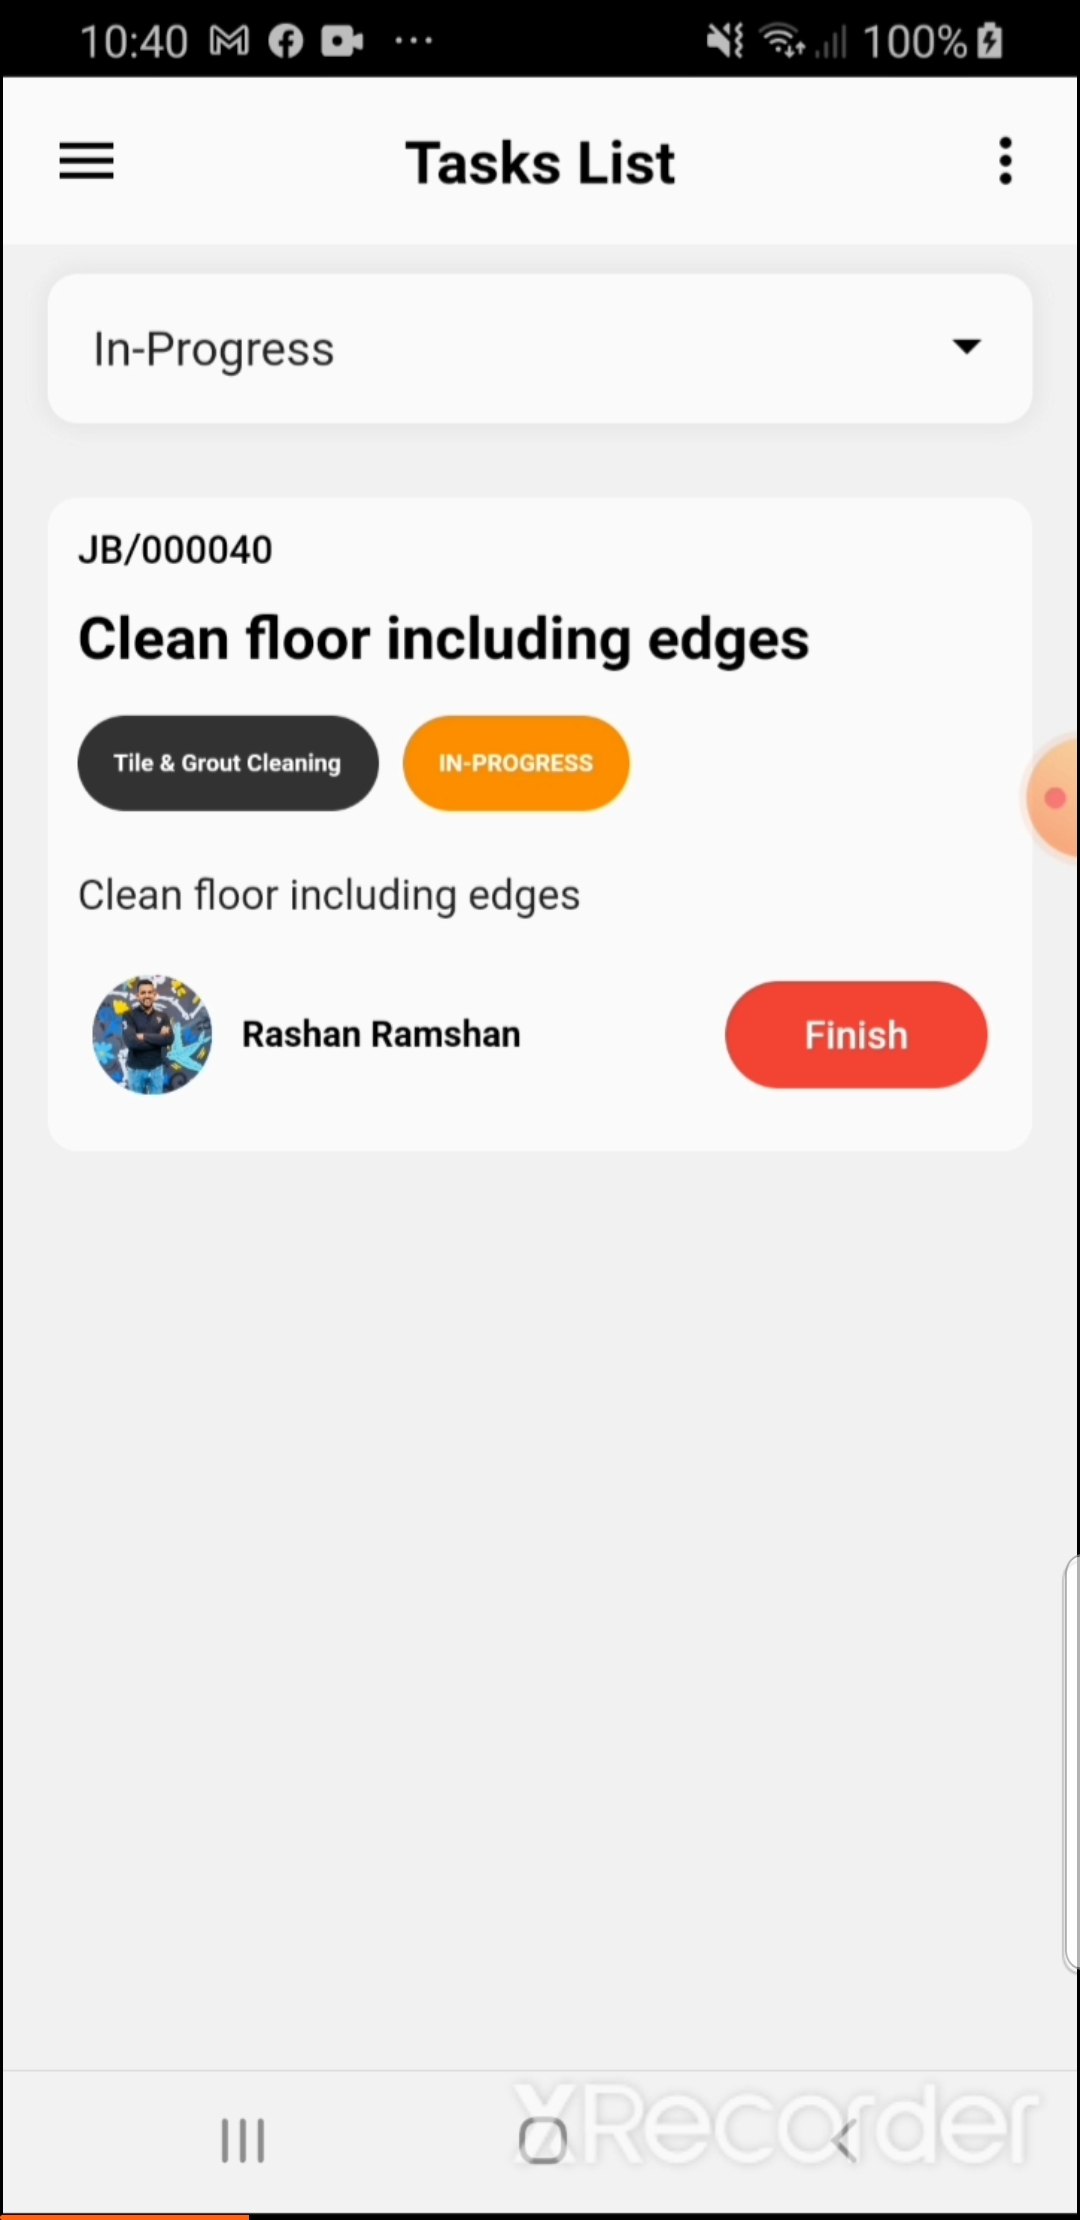
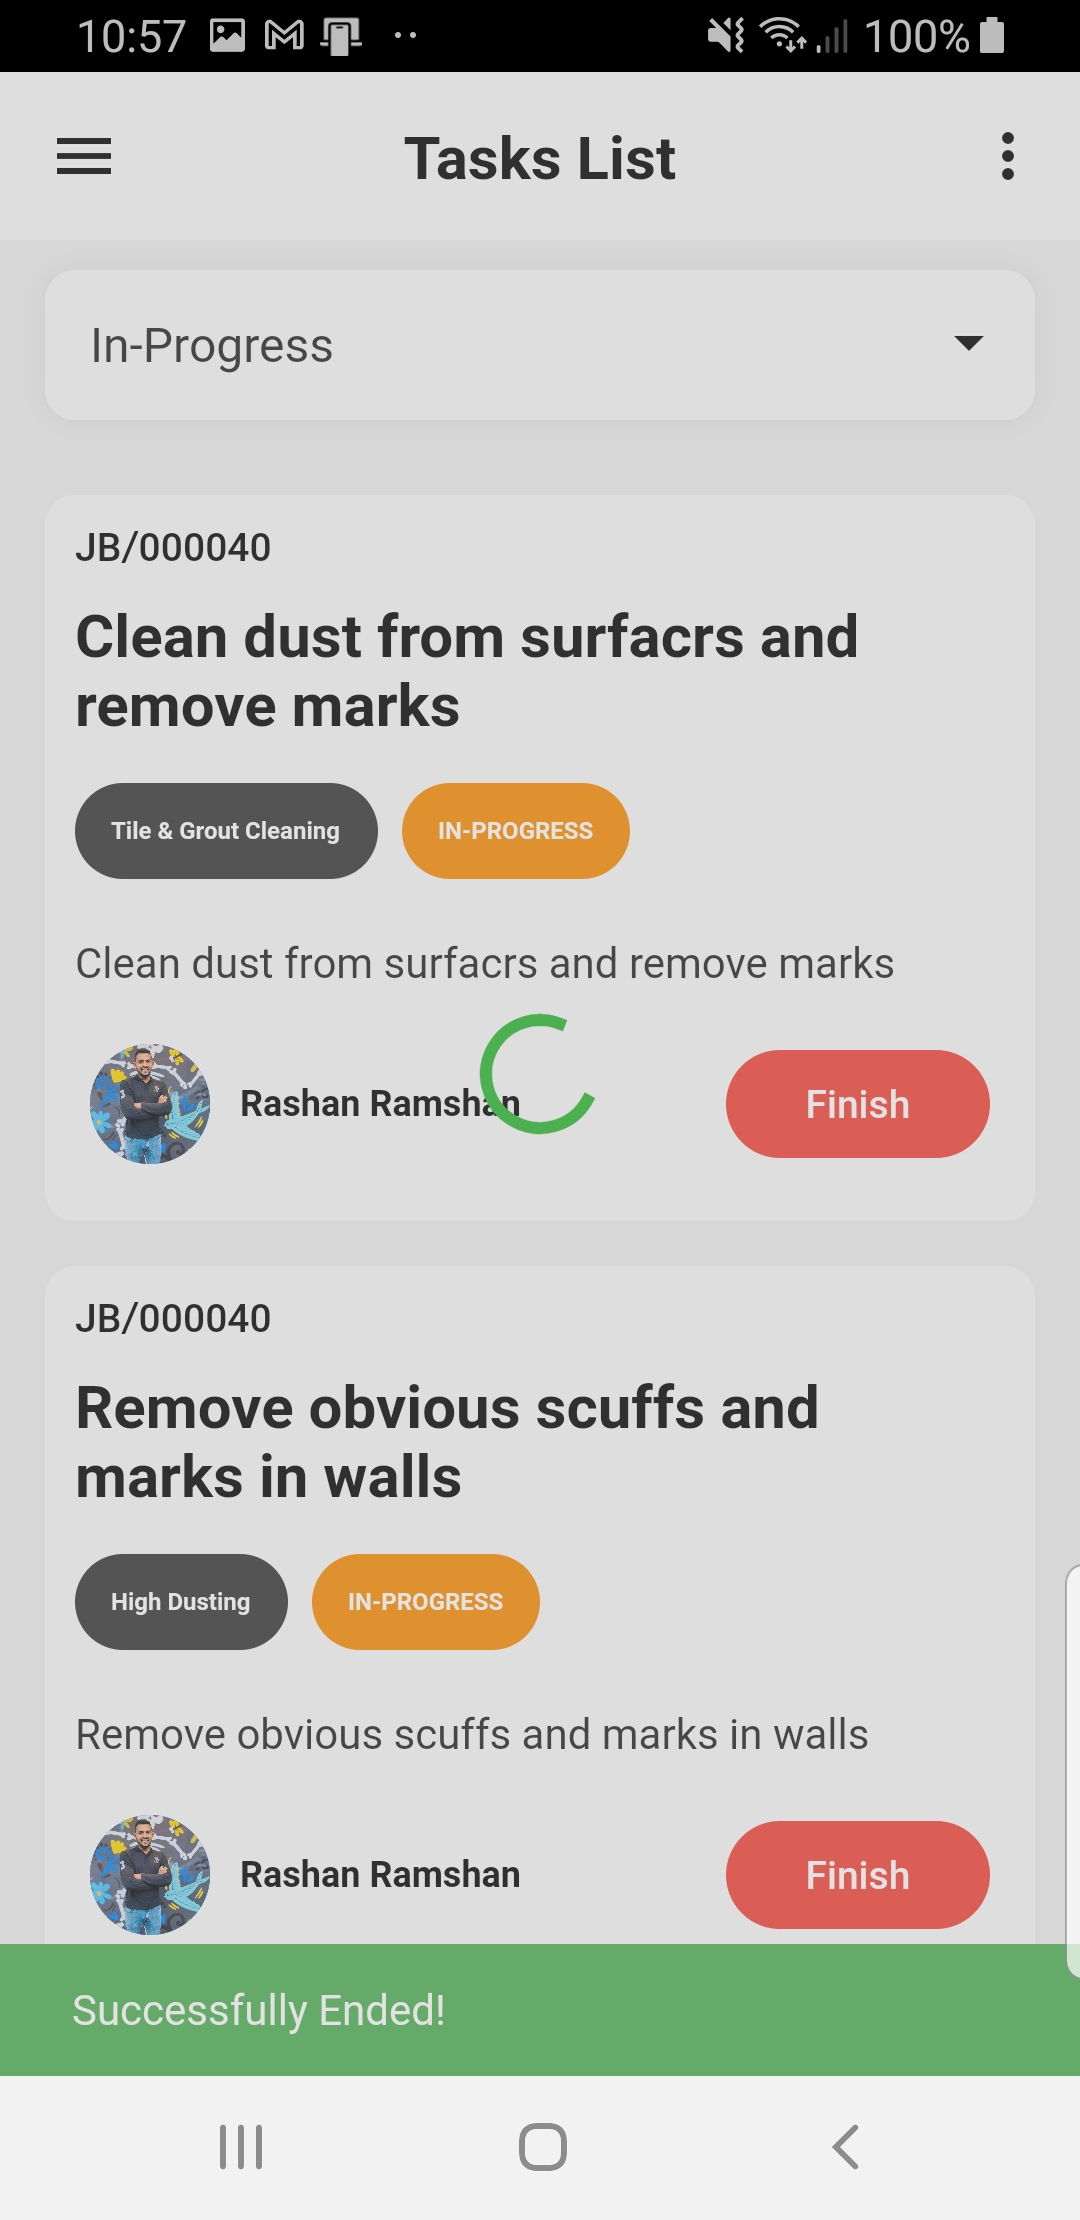
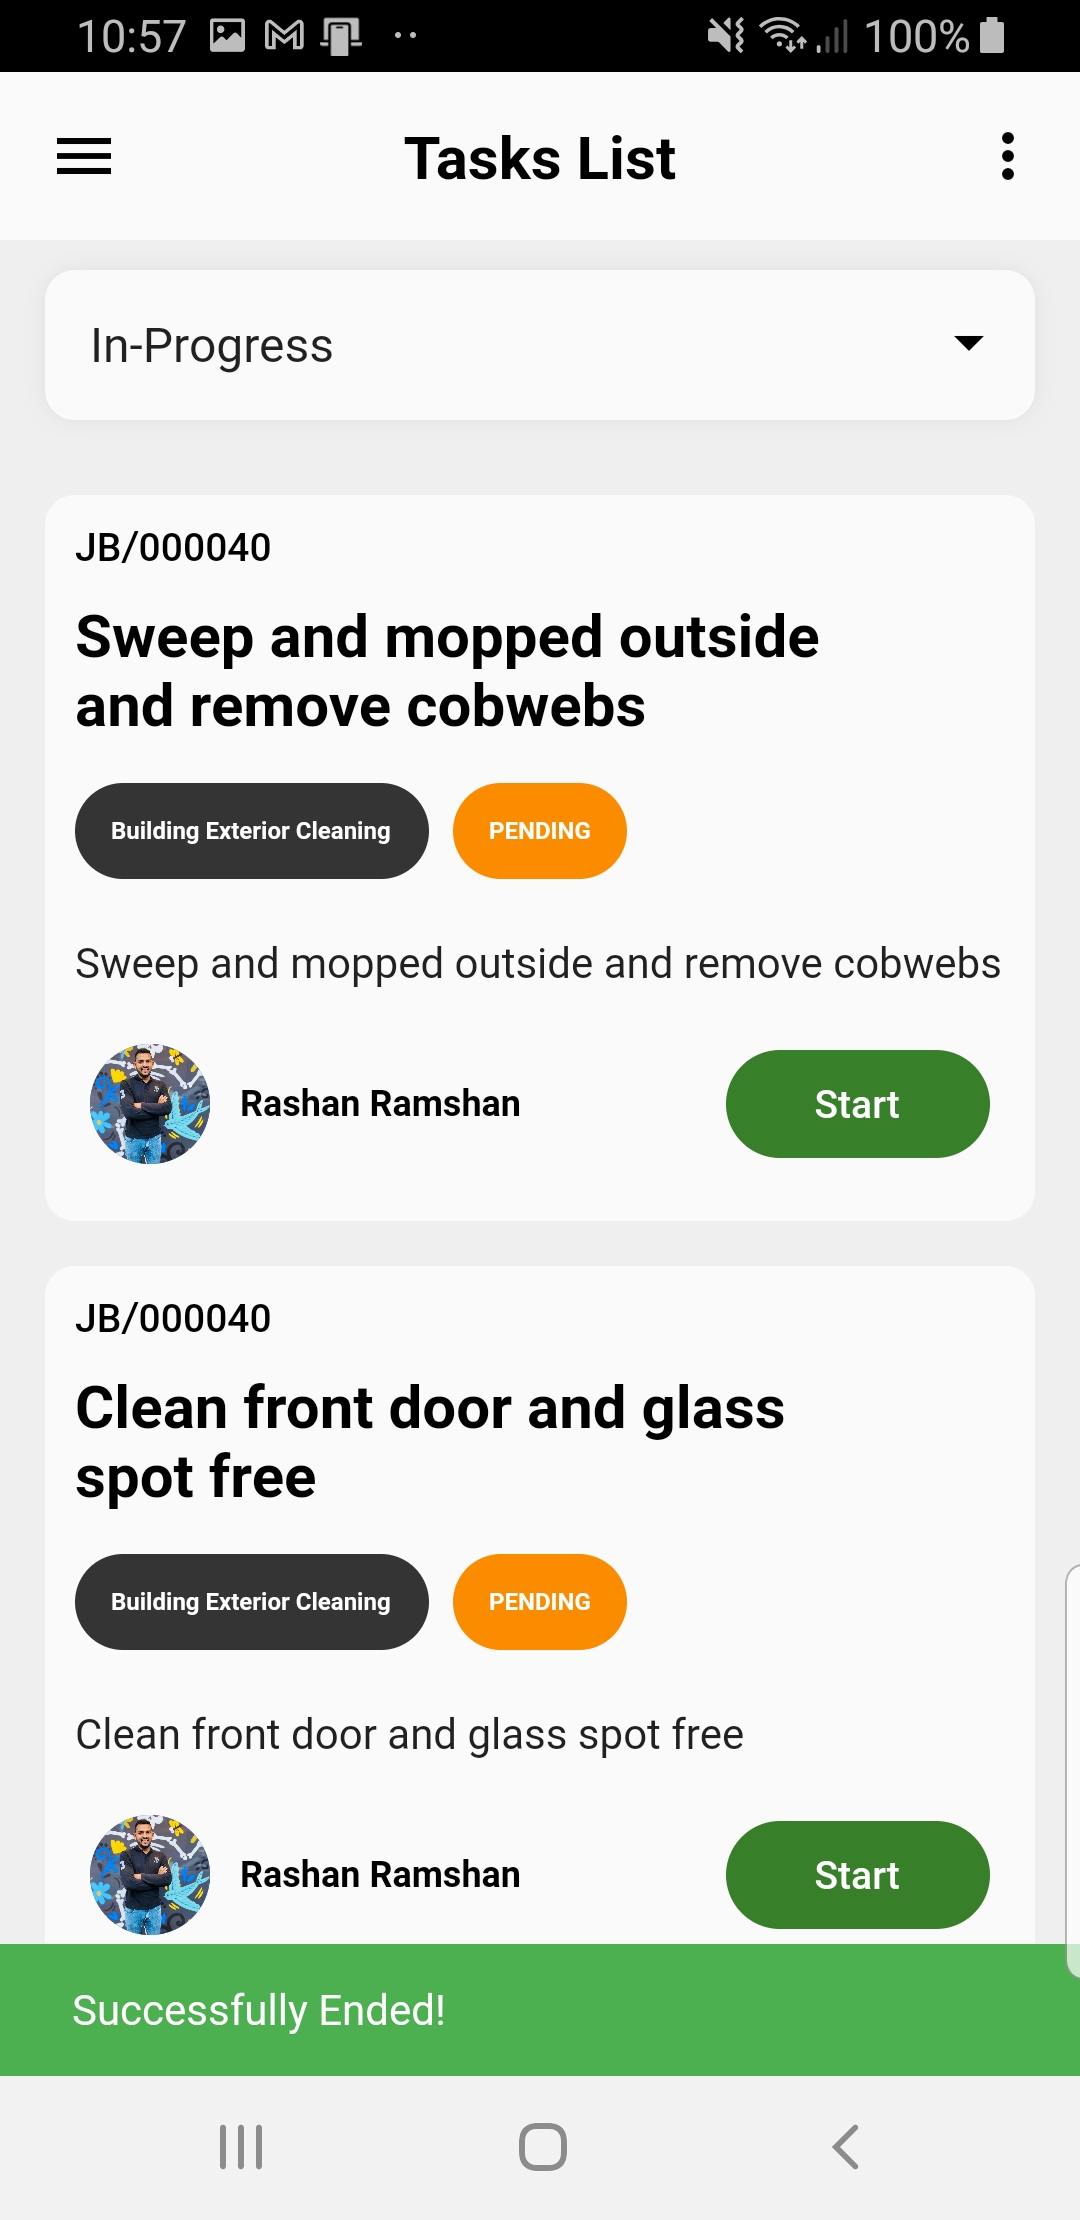
End one time job task
1. Log in to the mobile app if not logged already
2. Open side menu
3. Select Task List
(App will redirect to Task List view)
4. Select In-Progress Option in filter
(Only In-Progress task will filter to the list)
5. Click Finish button to end task
6. Click ok to confirm action
Step 1

Step 2
Step 3

Step 4
Step 5
View assigned inspection list
1. Log in to the mobile app if not logged already
2. Open side menu
3. Select Inspection List
(App will redirect to Inspection List view)
Step 1
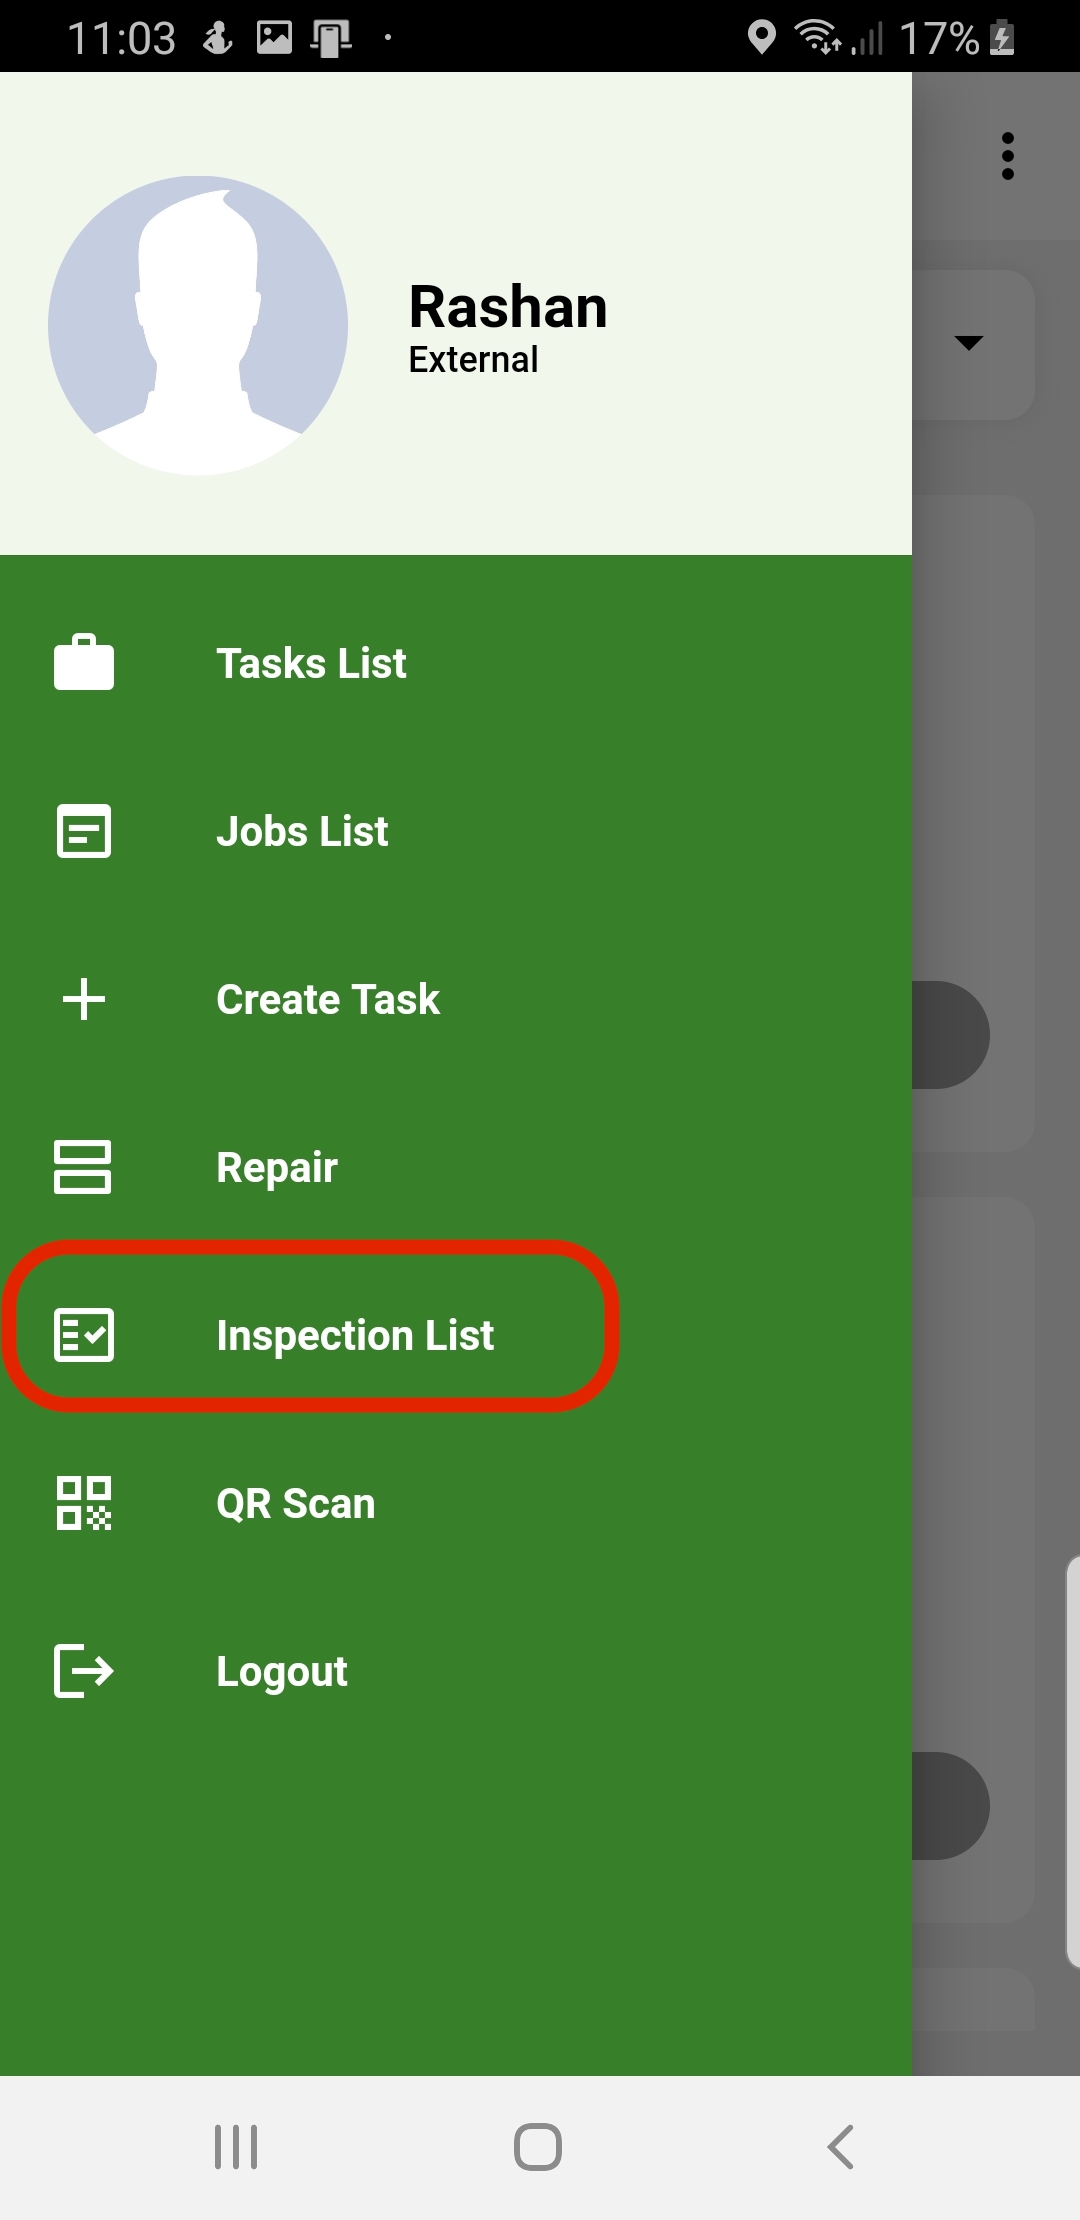
Step 2
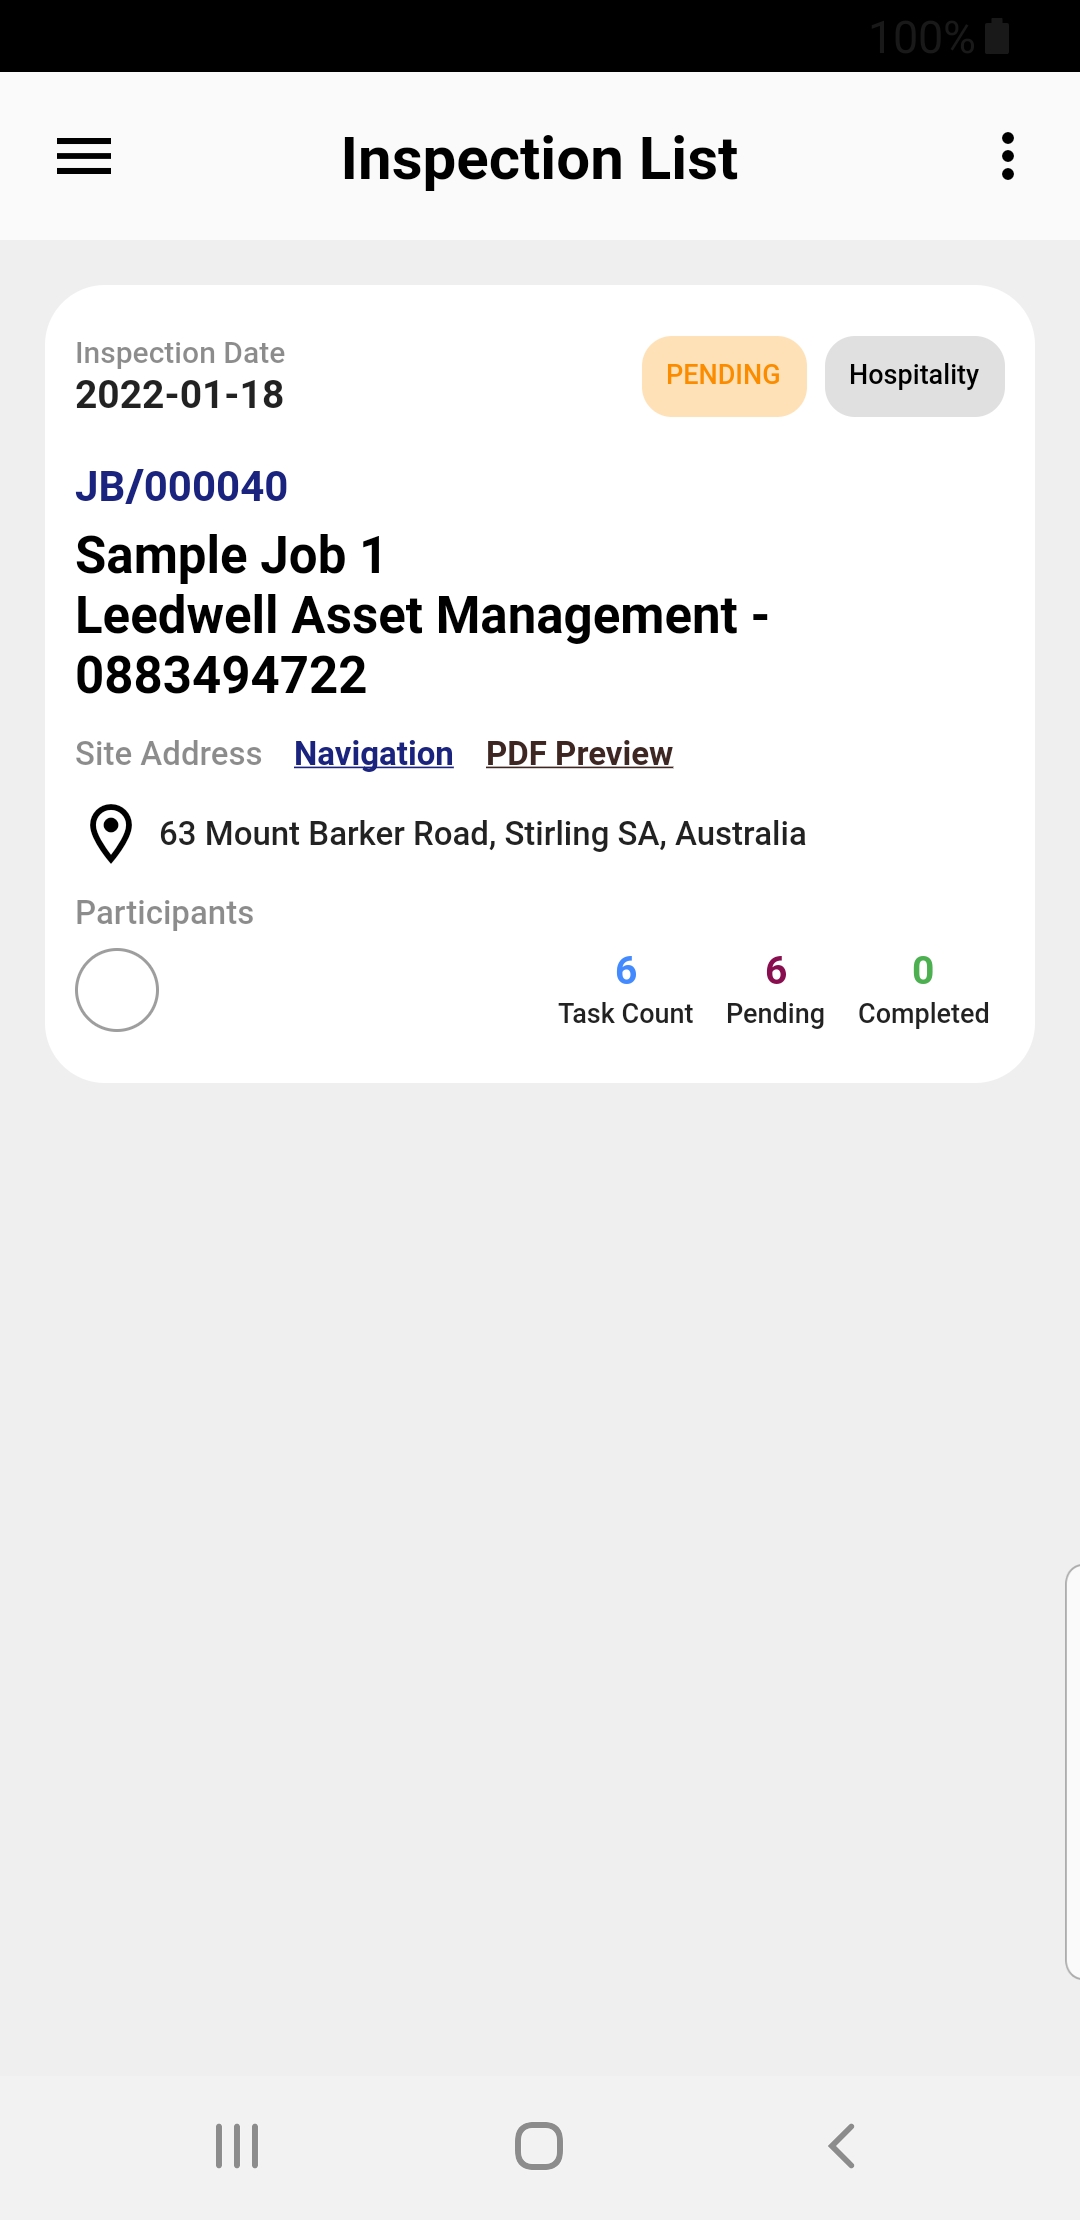
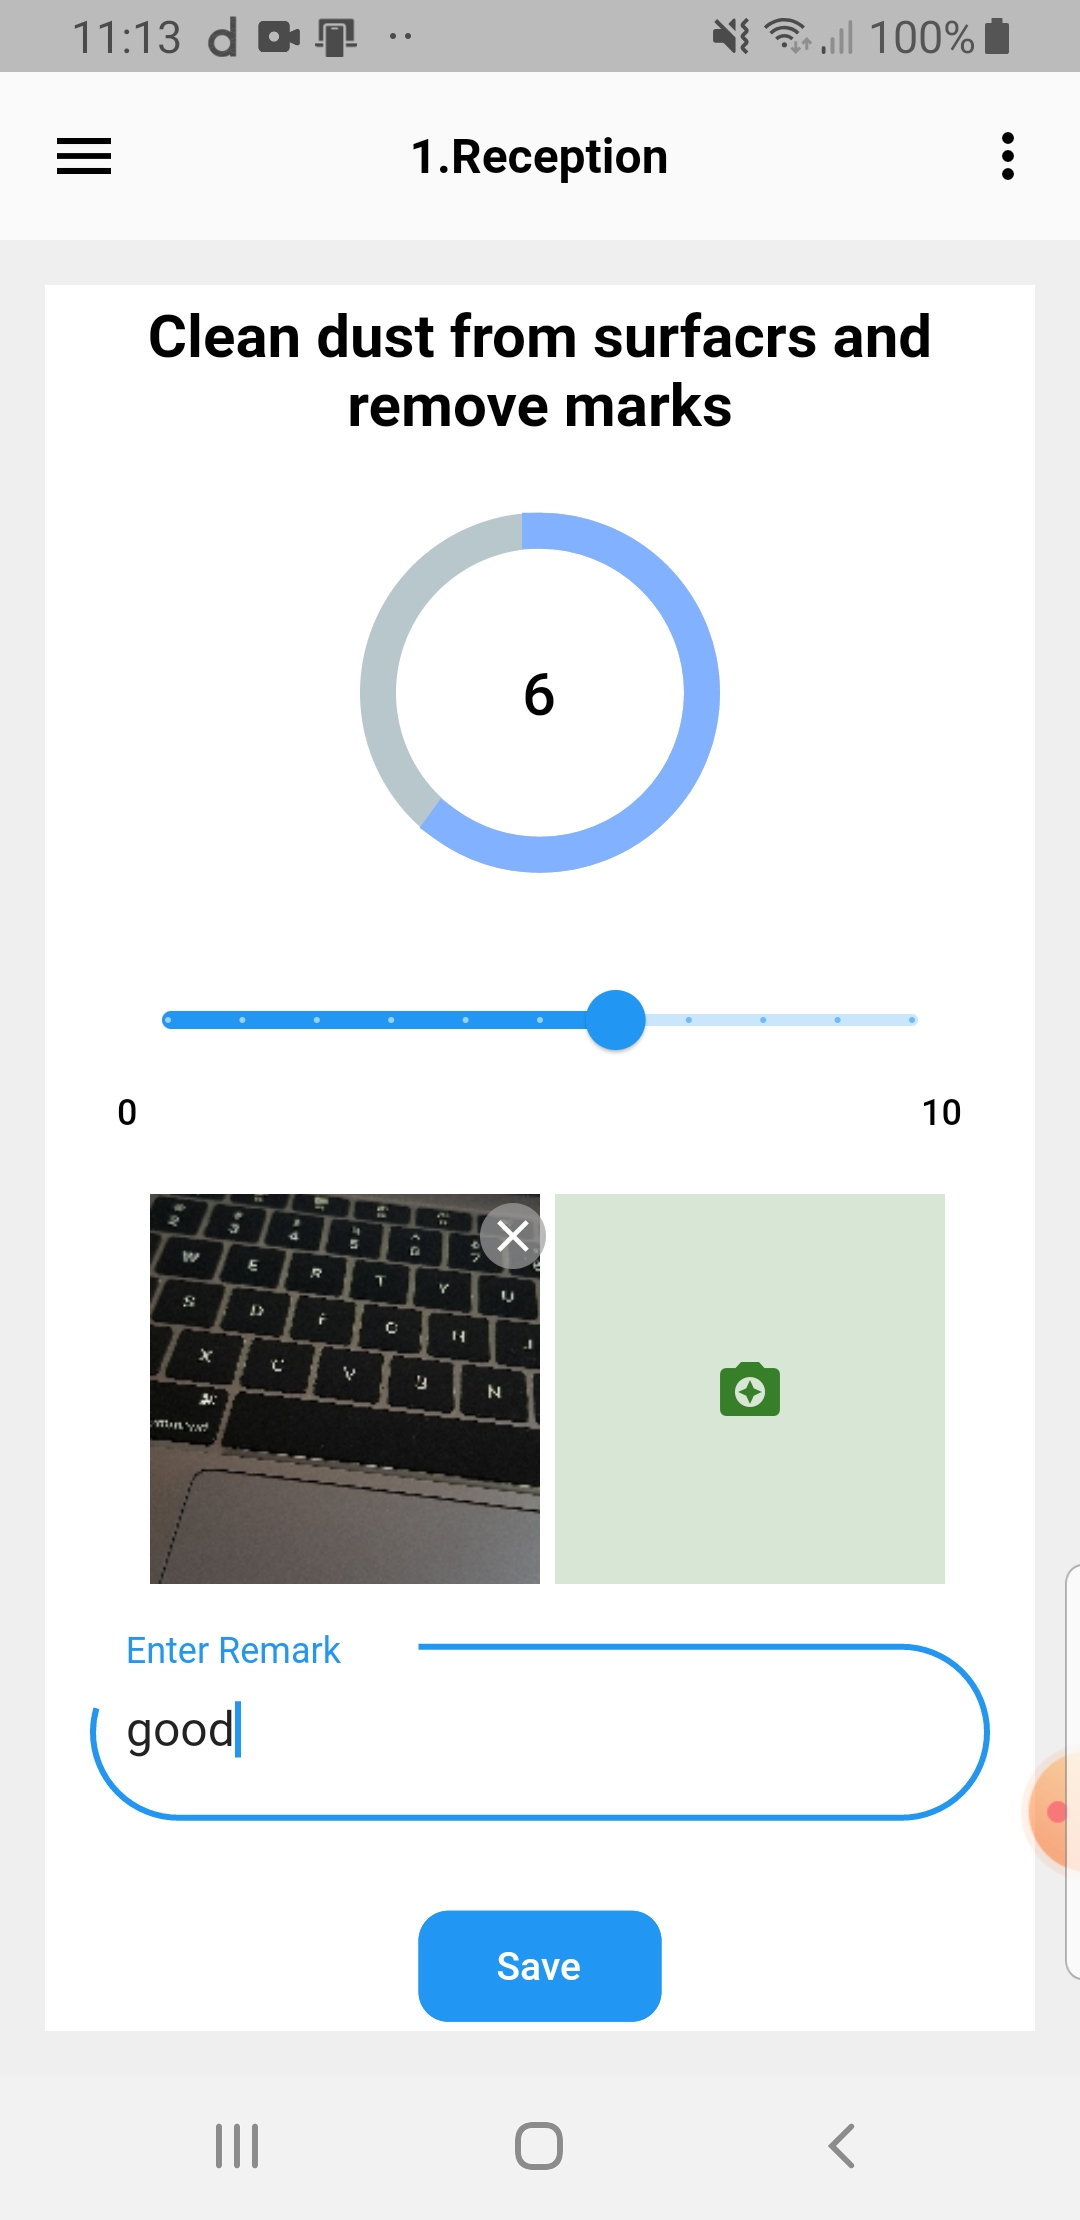
Rate inspection task
1. Log in to the mobile app if not logged already
2. Open side menu
3. Select Task List
(App will redirect to Task List view)
4. Select Inspection from list
(This will redirect to Section List)
5. Select Section from list
(This will redirect to Task List)
7. Select task from list
(This will redirect to Rate View)
8. Select Rate value from moving progress bar
9. Capture image of inspection area
10. Enter note for task
11. Click on save button
Step 1

Step 2
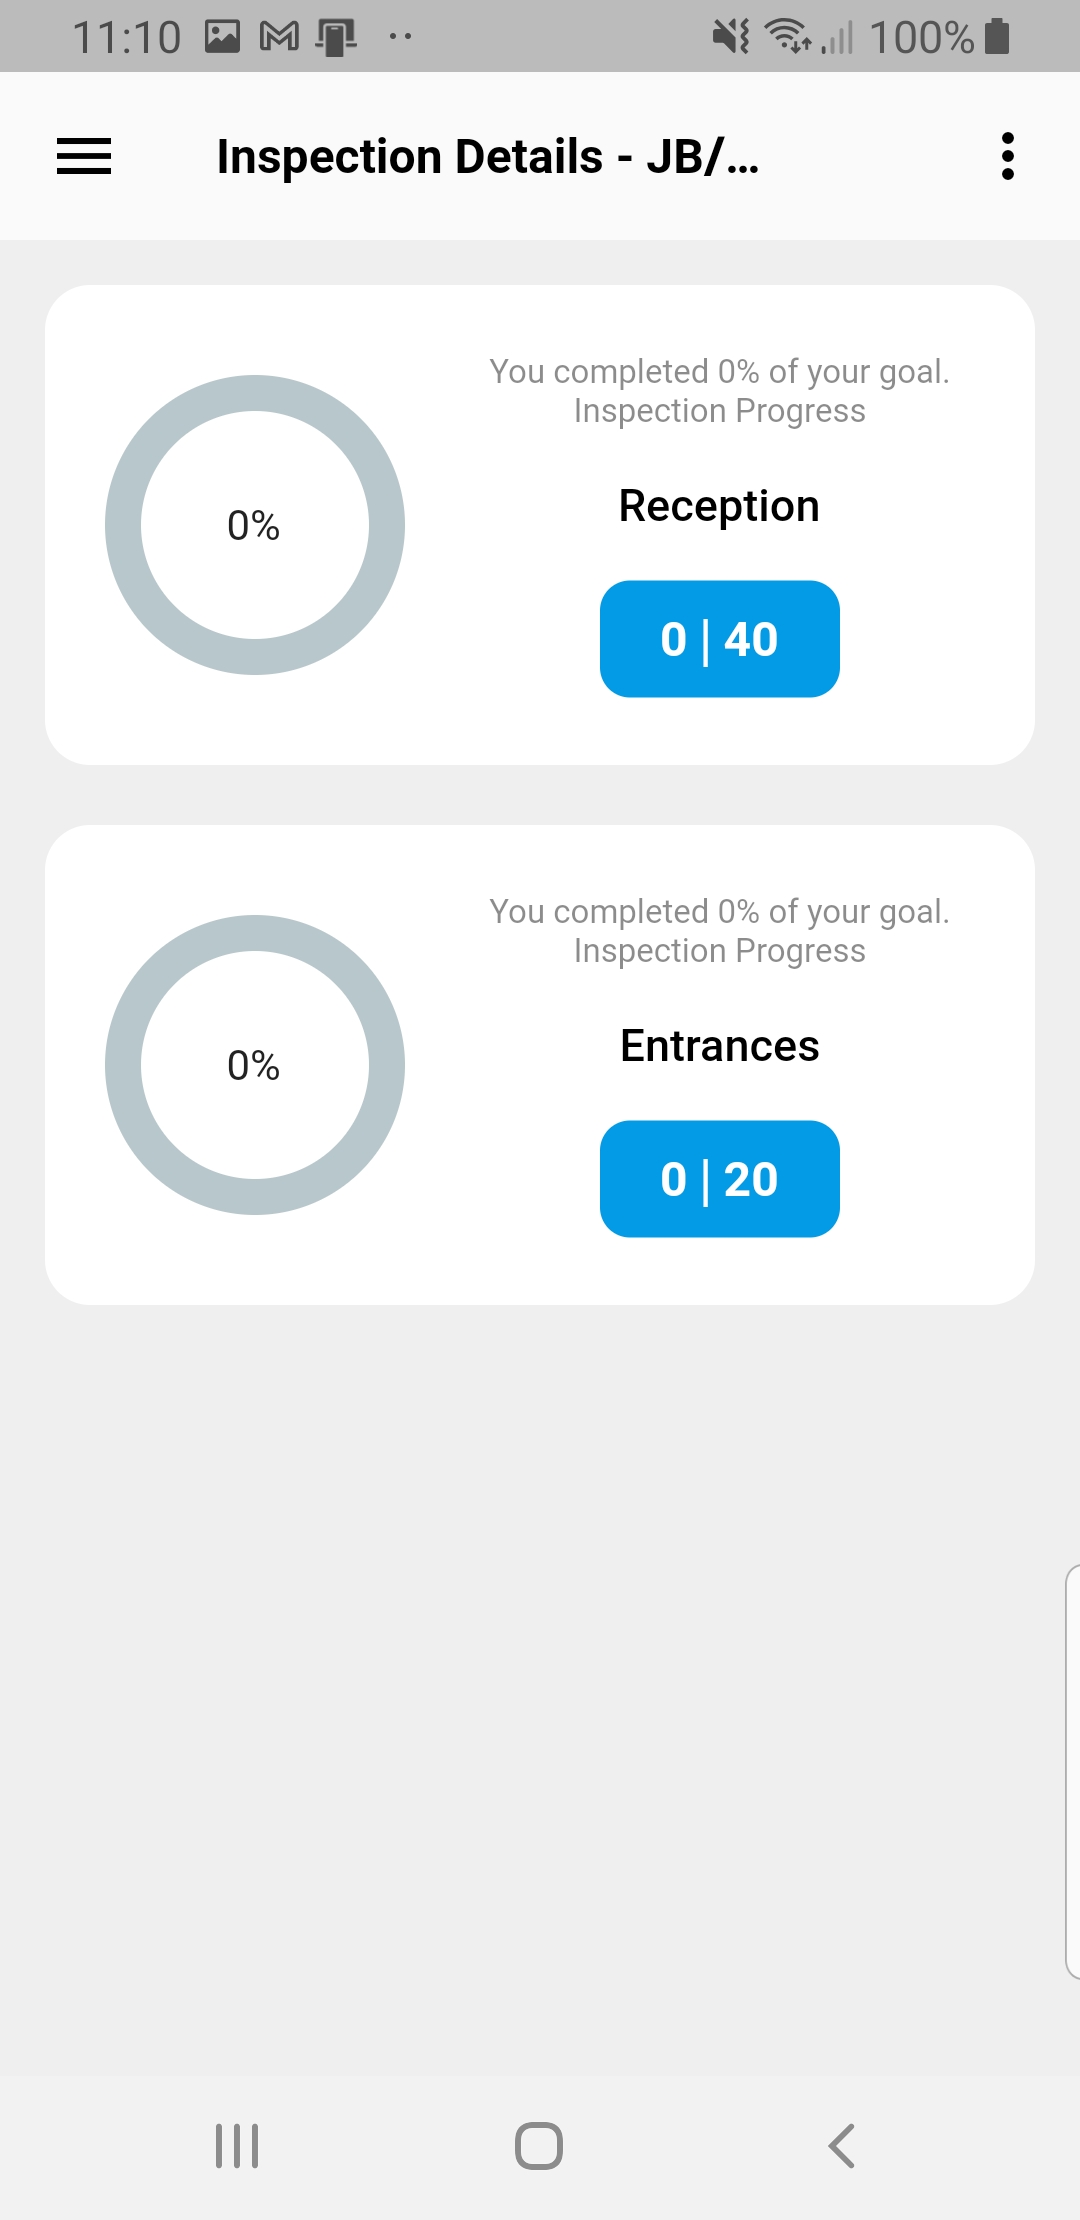
Step 3
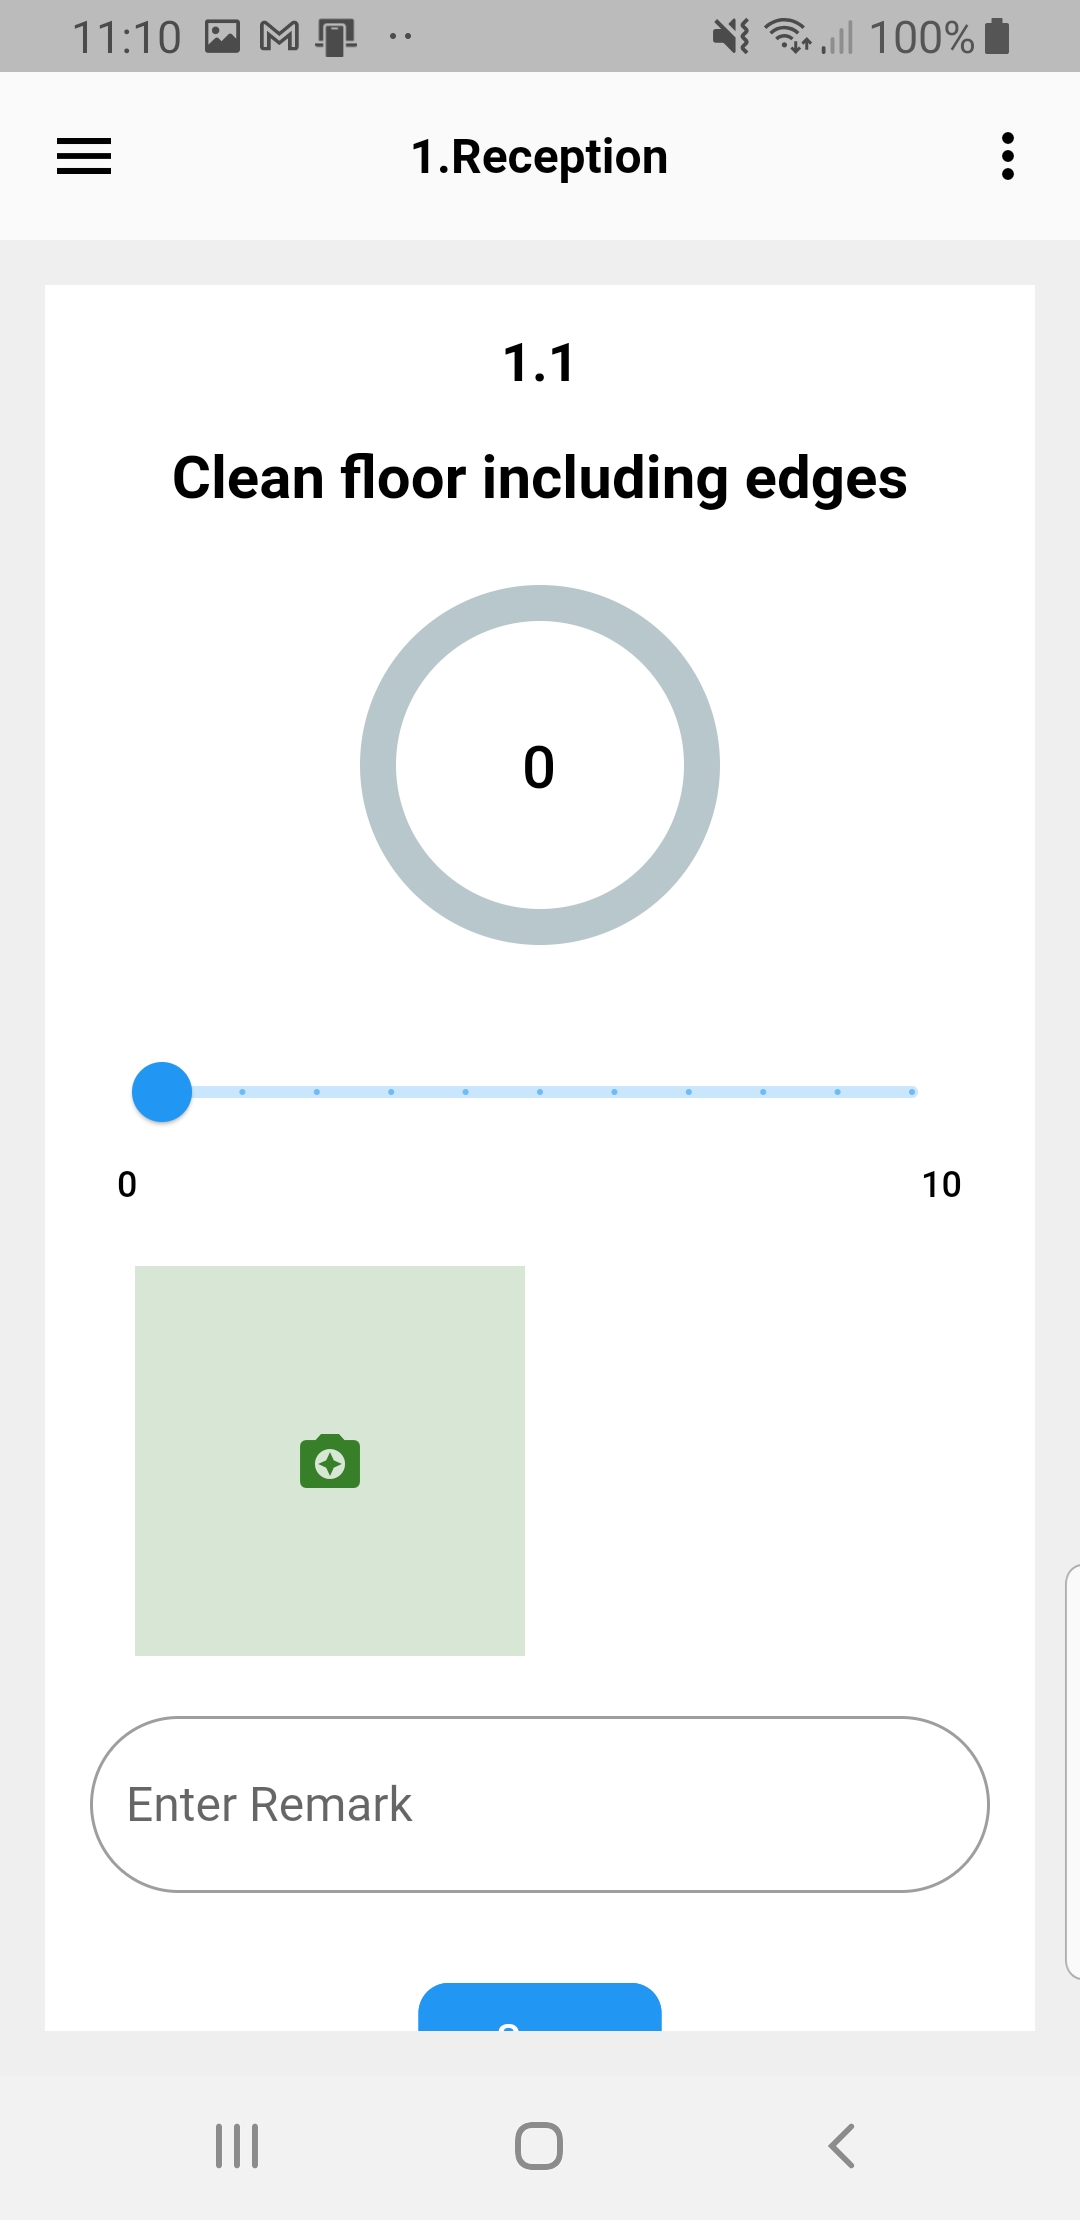
Step 4
Step 5

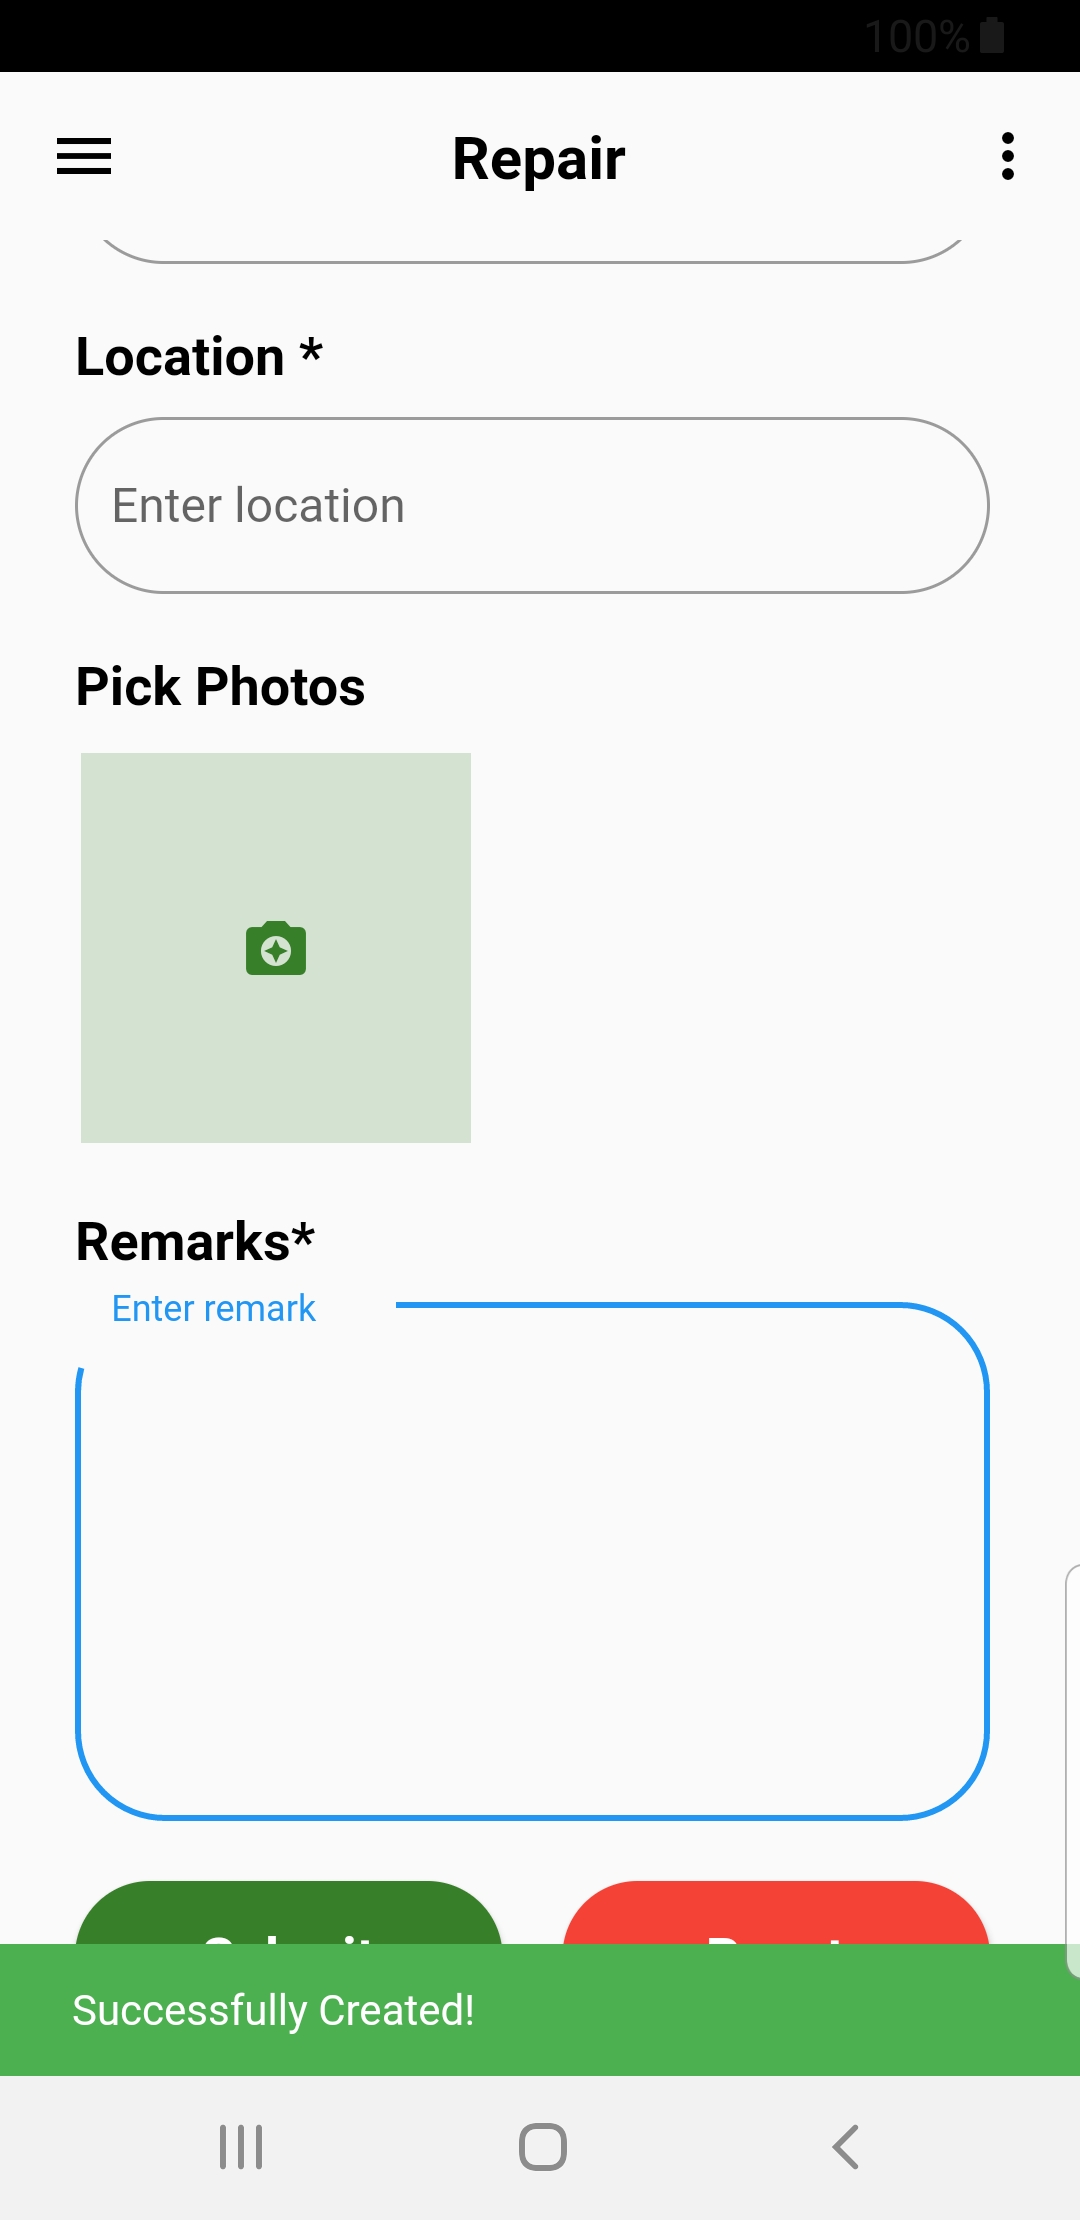
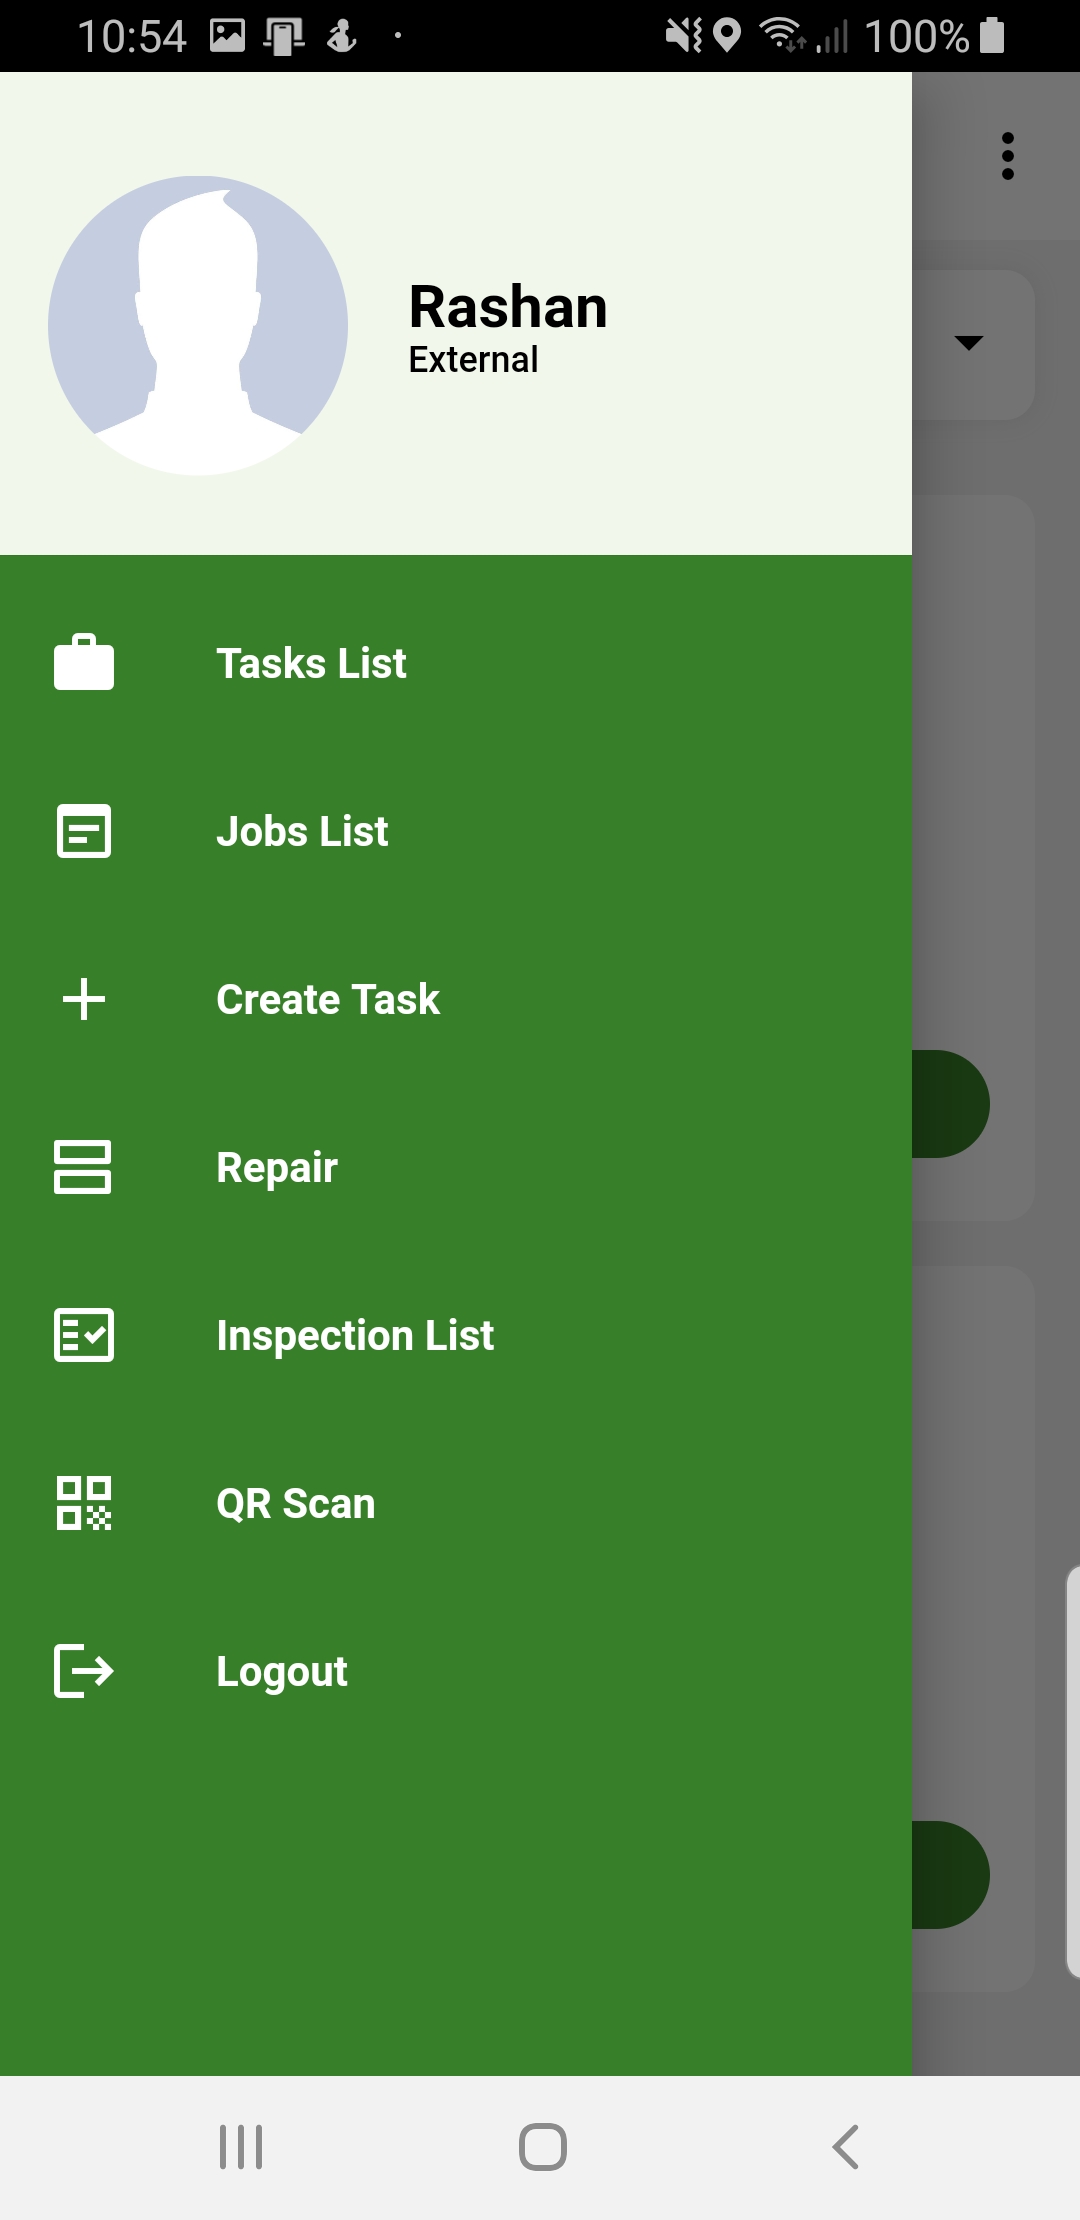
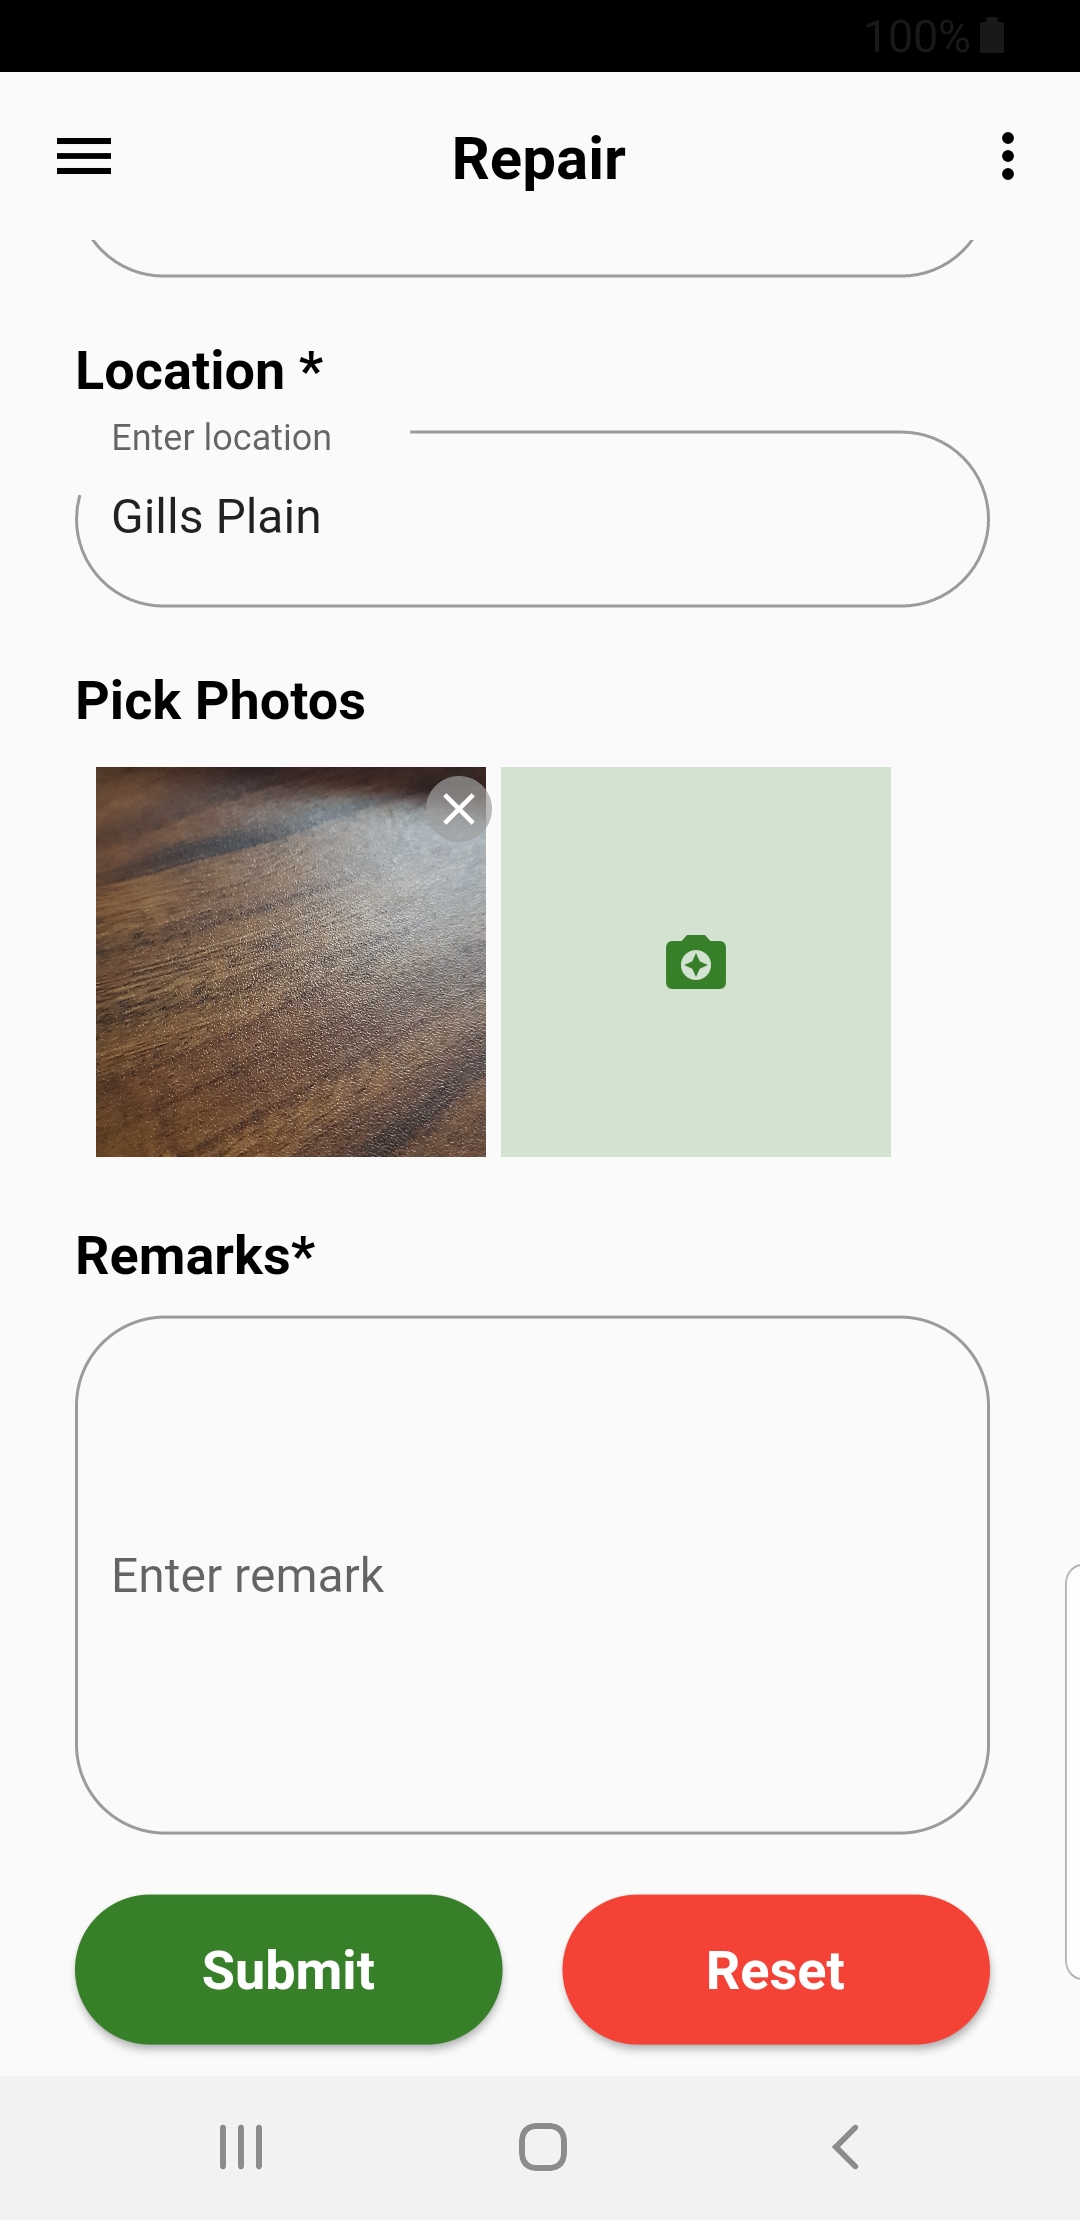
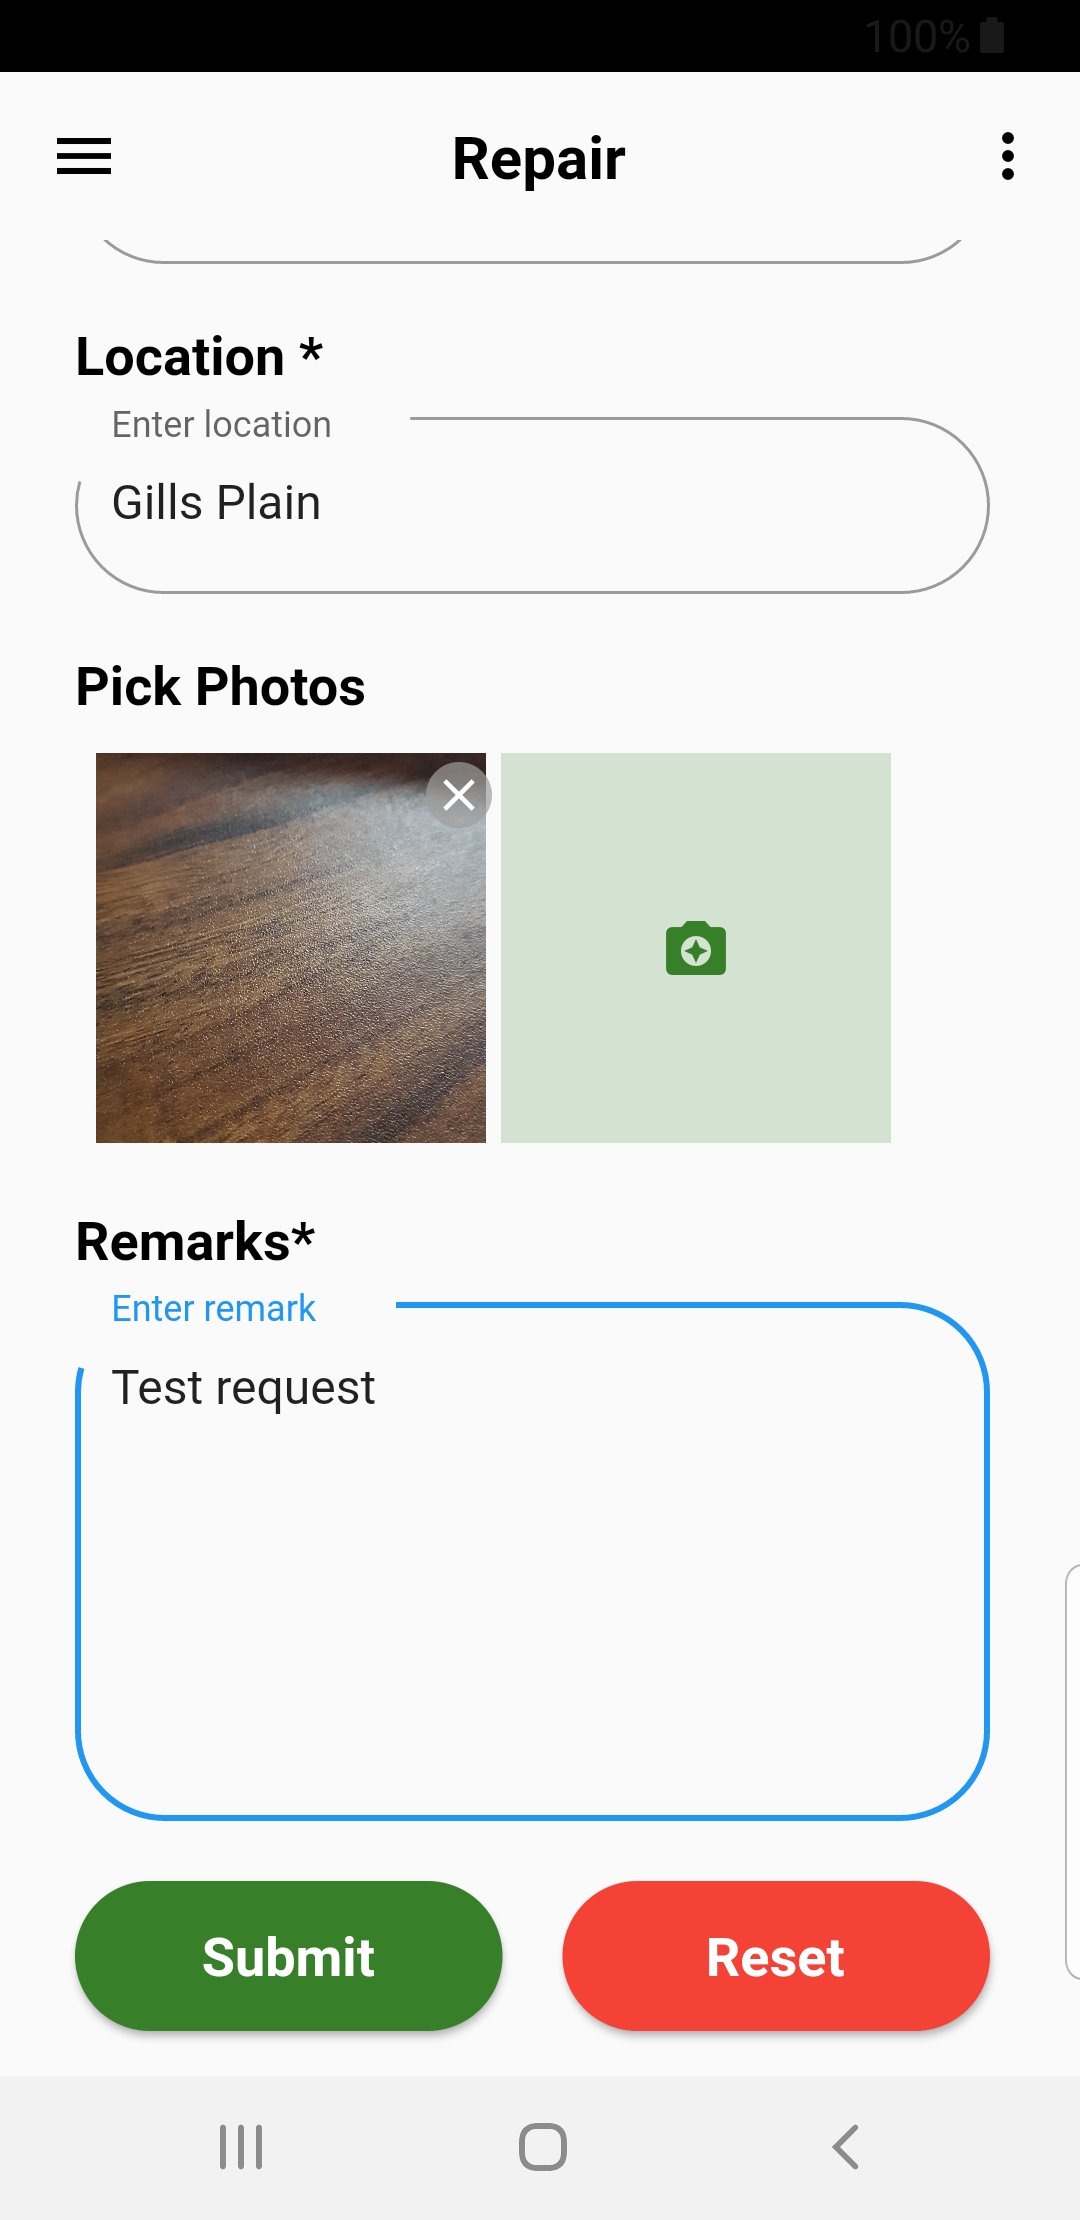
How to create maintainance request
1. Log in to the mobile app if not logged already
2. Open side menu
3. Select Repair
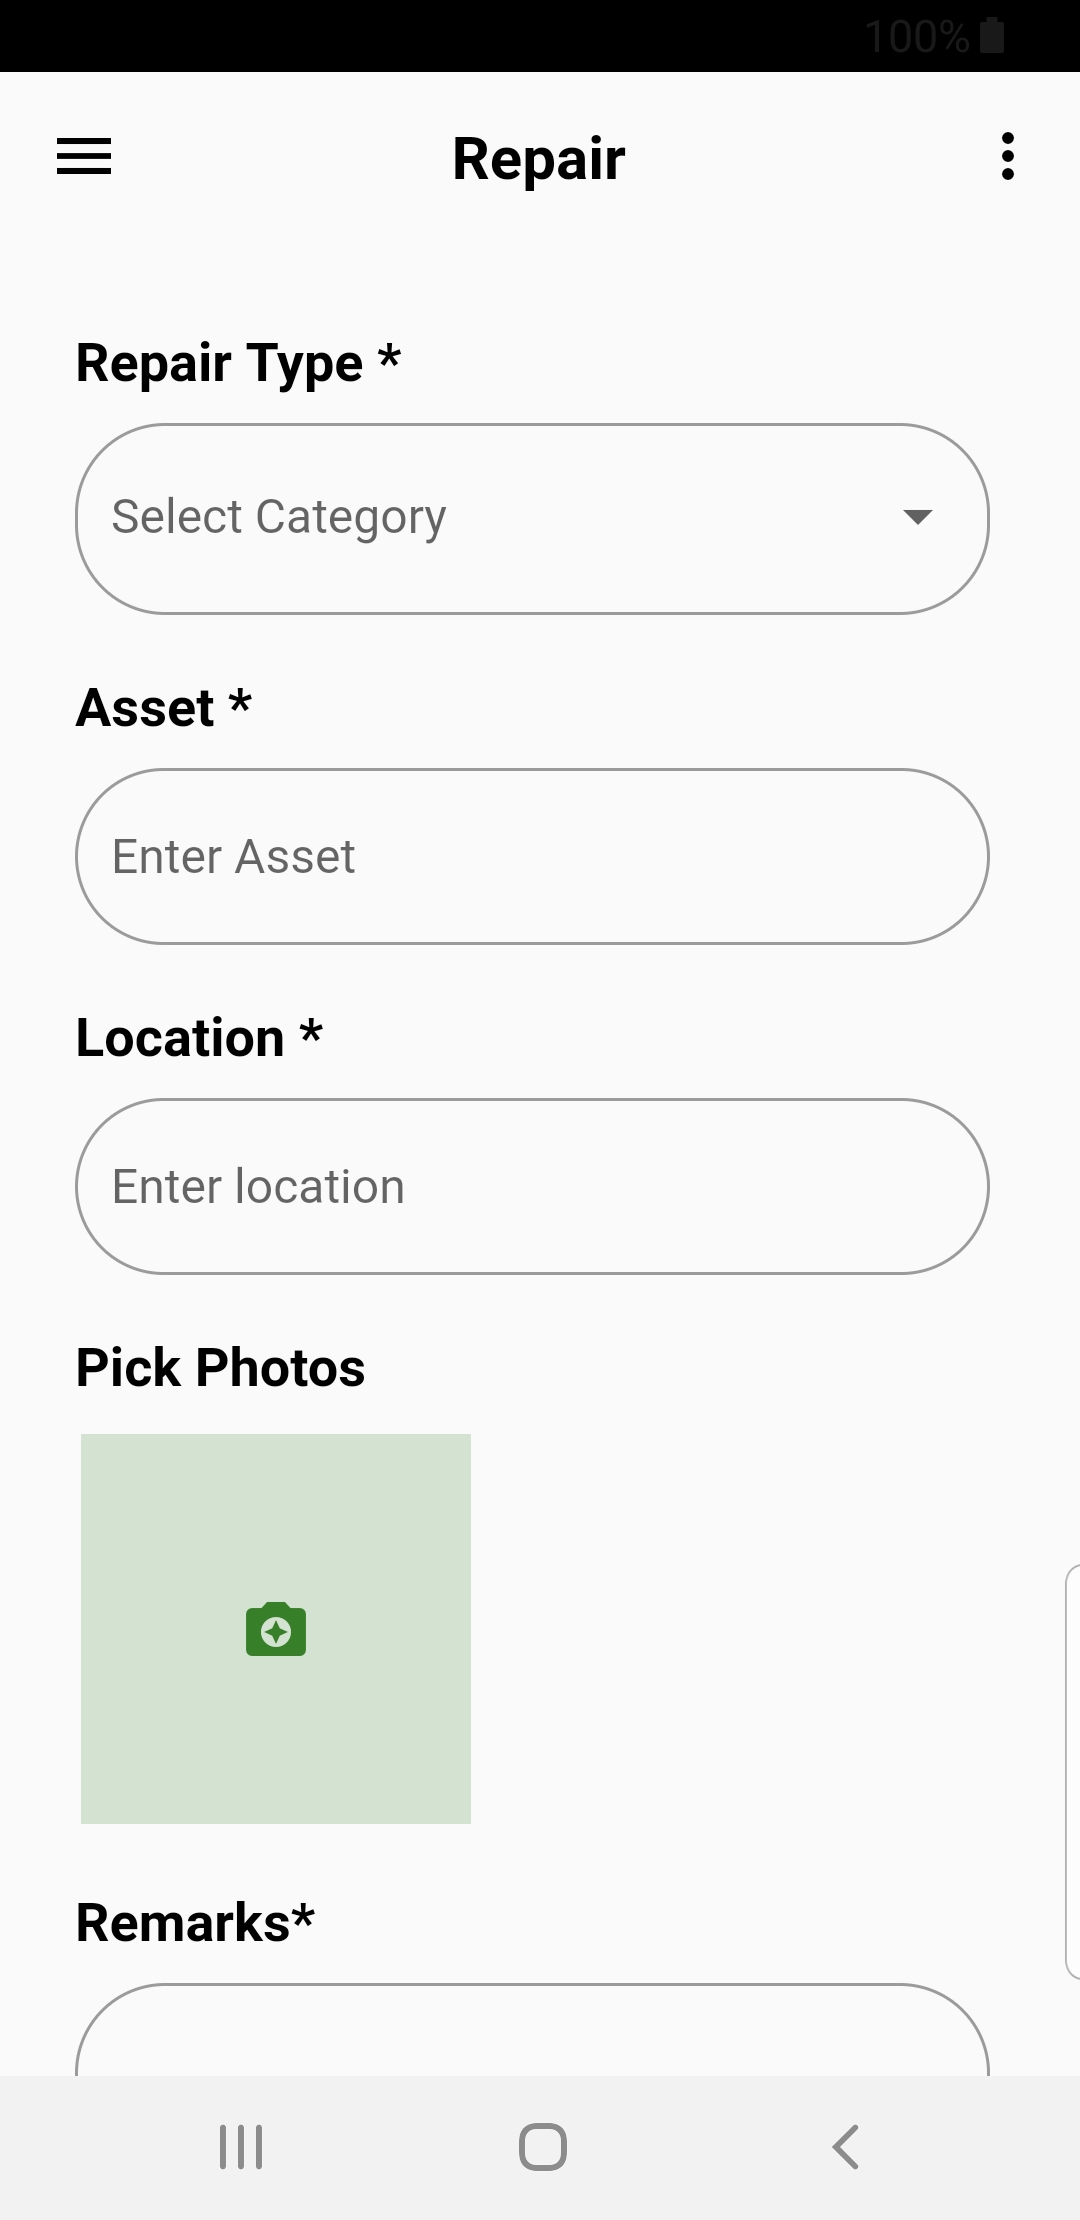
(App will redirect to create maintainance view)
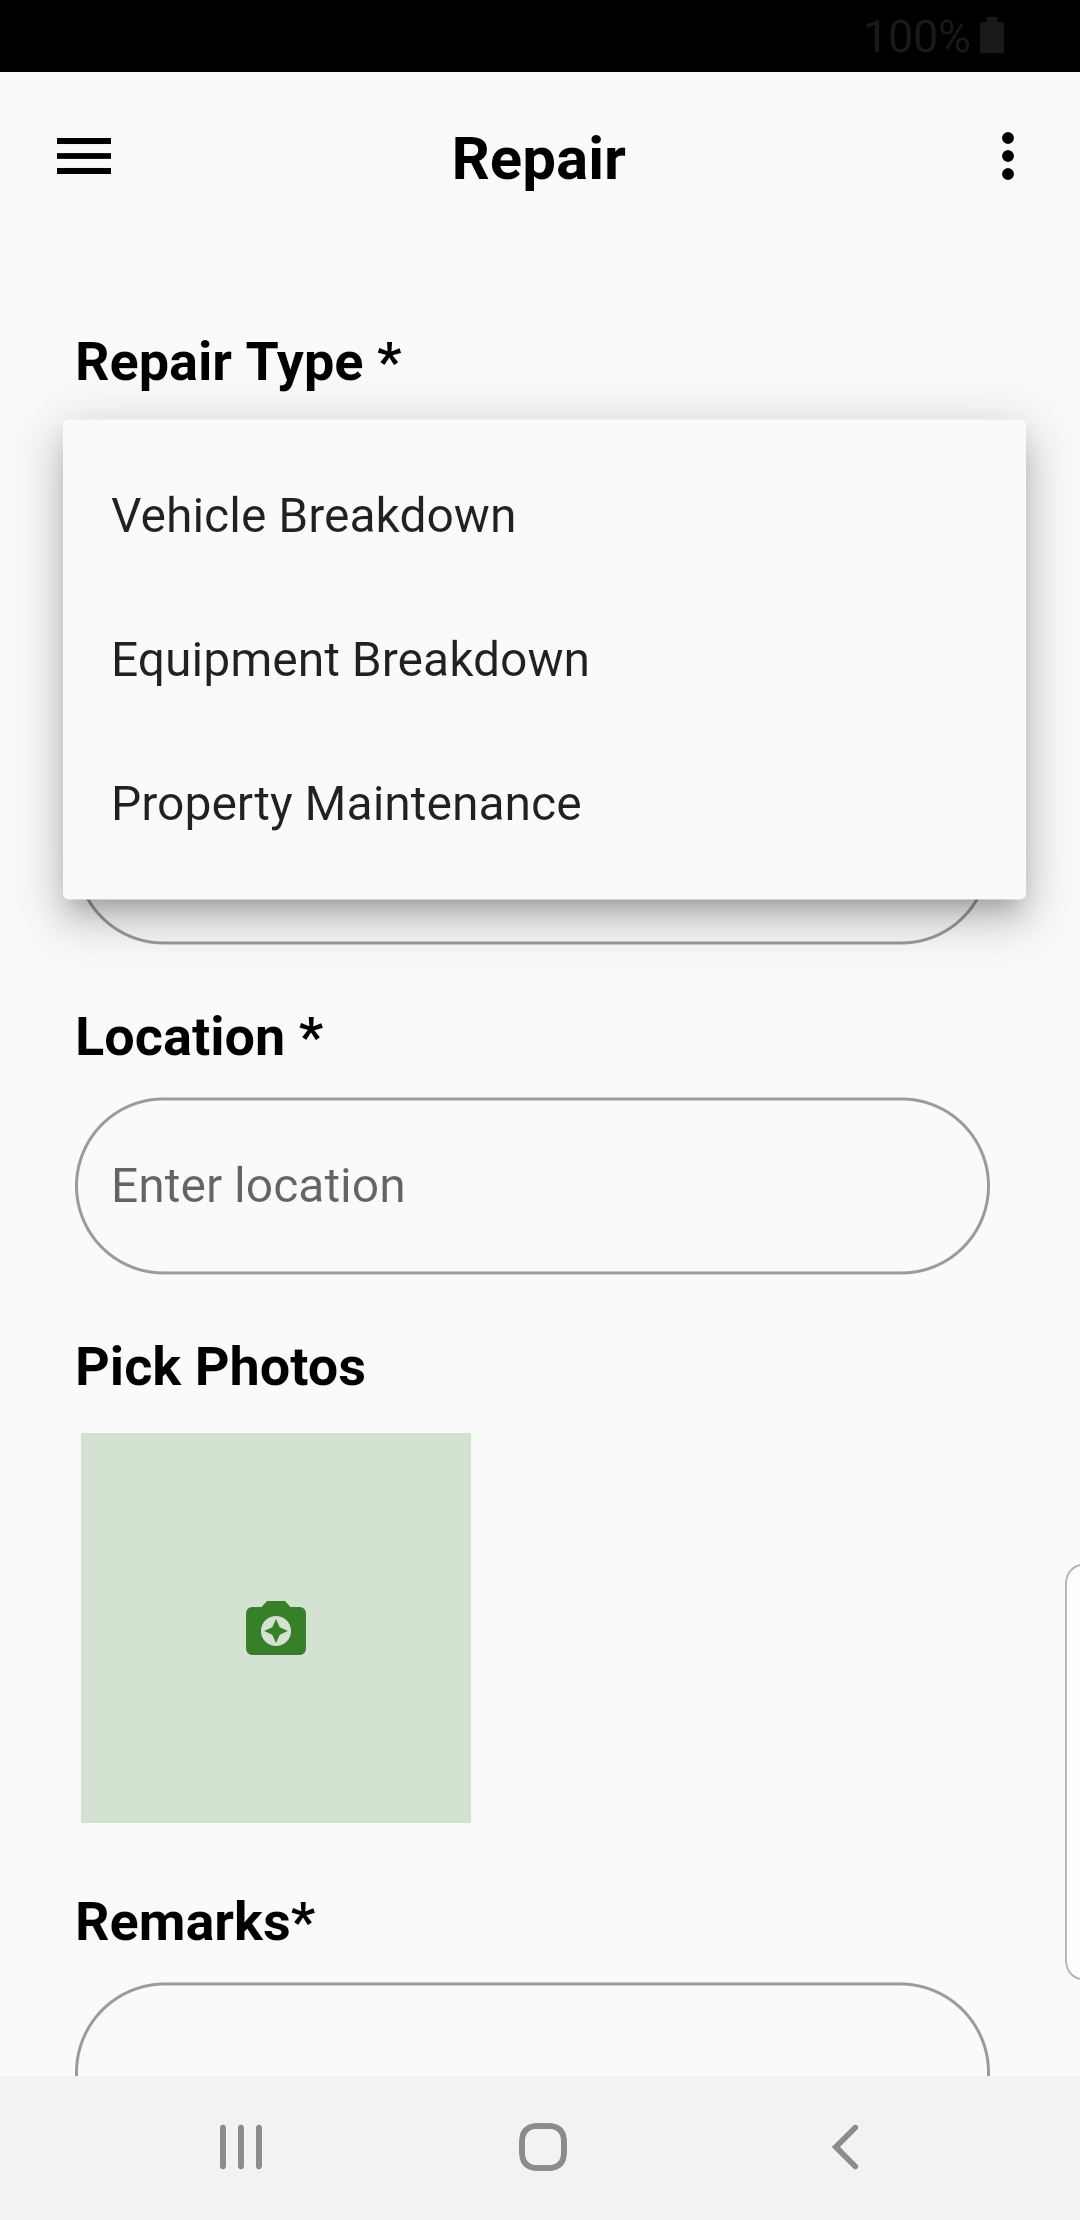
4. Select request type
5. Enter asset detail
6. Enter incident location
7. Capture image
8. Enter note
9. Click on submit button
Step 1
Step 2
Step 3
Step 4
Step 5
Step 6